
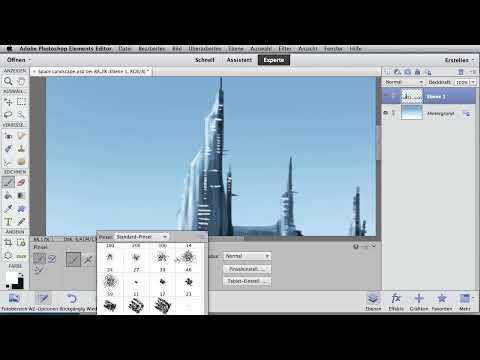
A silhouette only looks convincing when it has more to offer than a closed shape. This is exactly where the fine-tuning begins: buildings get contours, antennas and landing platforms give them character, and a few targeted shadings create depth. In this tutorial, you will see how to refine the existing silhouette of a space landscape motif step by step. You will work with the eraser, chalk brush, fine brushes, smudge finger, and eyedropper, quickly adding structures, windows, and textures along the way.
The video is only loaded from YouTube when you play it – data (including your IP address) is then transmitted to YouTube/Google. More in the privacy policy
The guide follows the flow of the video. You will find the tools in the same order in which they are used in the image, and you can follow the steps directly on your own motif.
Key Takeaways
- Shaping comes before details: first set the contours of the buildings cleanly with the eraser and chalk brush, then add the finer points.
- Switching between brush, eraser, and smudge finger keeps the work lively and avoids rigid surfaces.
- With a small brush size, reduced opacity, and the Shift key, you get precise lines and subtle contrasts.
- The smudge finger blends new shadows harmoniously with the existing color area.
- Windows are created from many small dots, occasionally complemented by a continuous stroke.
- The eyedropper helps you pick up colors directly from the motif and thus paint coherent structures.
Step-by-Step Guide
Step 1: Zoom in on the building and check the shapes
Begin by looking closely at the first building with the magnifier. Zoom in close enough that you can clearly see the edges and transitions. Only then do you select the eraser. Make sure you don't start with details right away, but first check the basic shape. Weak spots in the contour are noticed much more quickly when zoomed in, and that is exactly where you will start later.

Step 2: Refine the shaping with chalk brush and eraser
Now combine the eraser with the chalk brush. With the eraser, you remove excess areas; with the chalk brush, you set new edges. This way, you can align the shape of the buildings piece by piece. You don't have to work perfectly, because you can switch between the tools at any time. Scroll down a bit regularly to check the left side of a building or the tower. If the tower should look a bit more pointed, reduce the area with the eraser until the silhouette has the desired effect.

Step 3: Add antennas and landing platforms
Now the typical features of futuristic architecture come into play. With the brush and dark, short strokes, place antennas on the roofs and add small landing platforms. These elements act like distinguishing marks and draw the eye to the buildings. Keep the brush stroke deliberately short and dark so that the additions stand out from the surface without overloading the silhouette. Repeat the process with the other buildings, constantly switching between brush and eraser so that the shapes fit together.

Step 4: Draw straight lines with the Shift key
When you need clean, straight lines, for example for rows of windows or building edges, hold down the Shift key while painting. This way, the program draws an exact line between the start and end point. Use this technique to set fine contrasts between individual windows. This creates a clear structure that gives the motif order and differs nicely from the organic shading of the mountains.
Step 5: Apply darker shadows and blend them in with the smudge finger
Now choose a color tone that is slightly darker than the current area. Zoom in closer and roughly apply some darker shadows. The brushwork can be generous here. Then take the smudge finger and pull the edges of the shadows into the surrounding color. This way, the shadows lose their hard edge and look embedded. This step is especially important so that the buildings do not look like pasted-on surfaces.

Step 6: Add dark lines on the right side of the building
On the right side of the building halves, a few dark lines can create additional depth and structure. Work here with varying brush sizes. With a larger brush, you set the base lines; with a smaller brush, you add finer details. This keeps the work varied, and you maintain an overview of the individual areas.

Step 7: Shading the Mountains
The mountains on the right side need their own shading. First, roughly apply a darker area that follows the shape of the mountain range. Then switch to the smudge finger and blend the colors together. Pay attention to the direction of your strokes: if you guide the smudge finger along the mountain ridge, the surface looks more natural and three-dimensional.
Step 8: Placing Windows with Fine Brushes
For the windows, choose a very small brush and also increase the opacity so that the dots remain clearly visible. Place the windows as small dots, occasionally supplemented by a continuous line. Zoom in on the first building and work your way forward row by row. The variation of dots and lines brings the facade to life and prevents a rigid grid.

Step 9: Undoing Mistakes and Varying Window Structures
Not every stroke lands right away. If you've made a mistake, use the "Undo" option in the "Edit" menu to take back the last step. Also note that the chosen brush strongly influences the window structure. Different brush shapes leave different patterns, and you can use exactly this deliberately to create varied facades.
Step 10: Picking Colors from the Artwork with the Eyedropper
With the eyedropper, you pick up colors directly from the artwork. This way, new structures stay consistent, and you don't have to constantly open the color menu. Select the color from an existing window or a shadow area and use it to paint additional structures. This approach noticeably speeds up the work and ensures that all elements of the scene match each other.

Step 11: Reworking Glowing Windows and the Third Building
With each additional window, more small glowing accents are added, giving the scene a lively atmosphere. Then move on to the third building. Here too, you correct the outline with the eraser and add fine details with a small brush size. Feel free to work in small steps and check after each area whether the effect is right.

Step 12: Checking Antennas, Mini Buildings, and the Overall Impression
Now add small antennas and mini buildings, which you integrate into the overall structure. Then use the smudge finger to blend the transitions. In between, it's worth taking a look at the entire artwork. Zoom out and assess whether the buildings, the mountains, and the windows harmonize. This overview shows you where contrast is still missing or where an area has become too busy.
Step 13: Making the Mountains More Contrasty and Finishing the Detail Work
For the mountains, use the chalk brush to apply rough shading to create more contrast. Then blend the colors with the smudge finger. Finally, pick up the eraser to optimize the shaping in individual places. Repeat this check until all elements of the silhouette look coherent. Then your artwork is ready for the final evaluation.

Summary – Digital Painting: Refining a Space Silhouette with Details and Textures
You have seen how a simple silhouette transforms into a richly detailed space scene. You start with shaping, add antennas and landing platforms, and create clear contrasts with the Shift key and dark lines. With the smudge finger and eyedropper, you connect new structures with the existing color area, and windows are created from small dots and lines. If you approach the work in small steps and keep regaining an overview, a coherent result emerges that gains a lot of depth with little effort.
FAQ
Which tool is suitable for correcting building outlines?The eraser is best for removing excess areas. Afterwards, you can set new edges with the chalk brush.
How do you create straight lines when painting?Hold down the Shift key while painting. The program then draws an exact line between the start and end points.
Why should you use the smudge finger?The smudge finger blends shadows and color areas softly together so that no hard edges appear.
How do you achieve particularly fine windows?Choose a very small brush, slightly increase the opacity, and place the windows as small dots, supplemented by occasional lines.
What do you do if a stroke has failed?Use the "Undo" option in the "Edit" menu to take back the last step.
What is the eyedropper used for?With the eyedropper, you pick up colors directly from the artwork. This way, new structures stay consistent, and you don't have to constantly open the color menu.


