
You are editing a portrait, and the light gray background of the workspace keeps drawing your eyes away from the person. Many beginners know this problem. The good news: you can change the color of the workspace in Photoshop Elements with just a few clicks, without altering your image. In this tutorial, I'll show you how to make the background darker, define your own colors, and even pick a color directly from your photo.
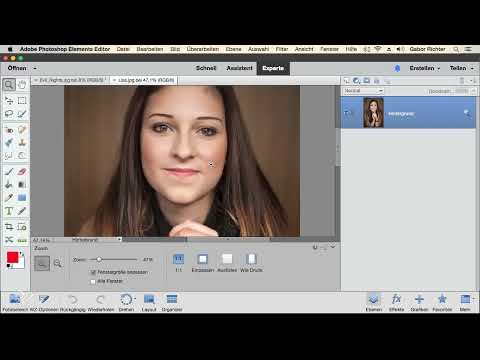
The video is only loaded from YouTube when you play it – data (including your IP address) is then transmitted to YouTube/Google. More in the privacy policy
Key Takeaways
You change the background color via the context menu of the workspace, that is, the gray area around your image.
A darker background is less distracting, because our eyes like to move from dark to light.
With "Select Custom Color" you can set any color you like.
You can pick a color directly from the image so that the background and subject harmonize.
The background color applies to all open images, and under "Custom" you will find your most recently chosen custom color again.
Step 1: Open the context menu of the workspace
Right-click on the gray area around your image. A menu with the available color options will then open. Make sure you really click on the workspace and not on the image itself, otherwise this menu will not be displayed.

Step 2: Choose medium gray or dark gray
In the menu you will find several shades. The default gray is quite light, and that is exactly what is disruptive with a dark subject. Medium gray is a first compromise that already softens the contrast a bit. Dark gray goes one step further: the background recedes, and your gaze stays on the portrait. Especially when editing faces, you quickly notice how much easier it is to concentrate on the details.

Step 3: Use black as the background
If you want maximum calm, choose black. Then nothing distracts from the subject anymore, and the person is clearly the center of attention. Many photographers work with a dark surrounding for exactly this reason. Try out the variants and decide for yourself which effect you prefer.

Step 4: Select a custom color
None of the presets fit perfectly? Then use the "Select Custom Color" option at the very bottom of the menu. This opens the color picker. There you can freely decide on a tone. In the example of this tutorial, a warm orange-brown is chosen. By clicking "OK" you confirm your selection, and the background adjusts immediately.


Step 5: Pick a color from the image
A freely chosen color does not necessarily match the photo. Better is a tone that already appears in the image. To do this, open the color picker again and click with the eyedropper on a suitable spot in the photo, such as a brown tone from the clothing or the background. The color is picked up, and the overall image looks much more harmonious.

Step 6: Understanding multiple images and the "Custom" option
When you open another image, for example via the view of multiple documents, Photoshop Elements automatically adopts the selected background color. So you have the same color everywhere. Therefore, don't be surprised if another image suddenly no longer appears gray. This is not an error, but the setting you chose last.

If you want to use your own color again, you'll find it under "Custom." The last color value you set under "Choose your own color" is always saved there. That way, you don't have to search for the shade again.
Summary – Customizing the color of the canvas in Photoshop Elements
The background color of the canvas is a simple setting with a big impact. A dark shade such as dark gray or black distracts less from the subject, while a custom color that you pick up from the image creates harmony. Change the color via the canvas context menu, and try out different variations. The chosen color is retained for all open images, and under "Custom" you can find your personal favorite color again at any time.
FAQ
Do I have to change the image to change the color?No, the background color of the canvas has no effect on your image and is not saved when you save.
Can I go back to the original gray color?Yes, simply select the default gray option again in the context menu.
Why does the color also change for other open images?Photoshop Elements uses the same background color for all documents so that your working environment remains consistent.
Where can I find my most recently chosen custom color?It is located under the "Custom" option in the canvas context menu.


