
Imagine the eyes of your subject glowing razor-sharp, while the coat and scarf gently recede into the background. You can achieve exactly this look in Photoshop Elements with two tools that seem similar at first glance but have different purposes. This guide shows you how to use both tools with pinpoint precision and how to make your corrections on a separate layer so that you can adjust them at any time.
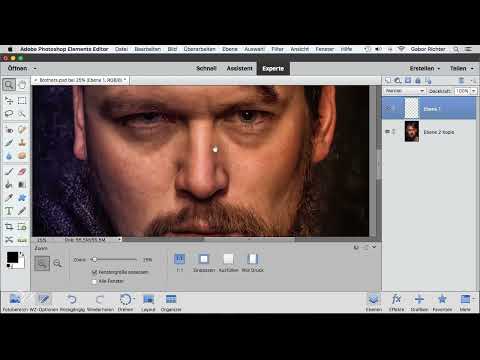
The video is only loaded from YouTube when you play it – data (including your IP address) is then transmitted to YouTube/Google. More in the privacy policy
Key Takeaways
- The Sharpen tool and the Blur tool only affect the pixels you drag the mouse over. This lets you edit individual areas selectively.
- Work with low strengths of about 10 to 20 percent and rather go over an area several times instead of working at 100 percent right away. Otherwise, ugly artifacts will appear.
- The "Sample All Layers" option must be enabled when you work on an empty layer. Without it, nothing happens, because an empty layer contains no pixels.
- On an empty layer, you can adjust, disable, or delete corrections at any time. This is non-destructive working in its simplest form.
Step-by-Step Guide
Step 1: Duplicate the Layer
Before you start working on your portrait, you should back up the original layer. Duplicate the layer so that you can later compare the effect directly with the original image. This is especially helpful if you want to make before-and-after comparisons.

Step 2: Find and Select the Sharpen Tool
The Sharpen tool is located in the toolbar on the left. Right next to it is the Blur tool. First select the Sharpen tool, because we will start editing the facial areas with it.

Step 3: Set Brush Size and Strength
In the options bar at the top, you set the size of the brush. For a portrait like this one, a size of about 100 pixels is enough to cleanly capture the beard, upper lip, and eyes. You can initially leave the strength at 20 percent. The right brush size always depends on the resolution and the subject. So feel free to try out what works best for your image.
Step 4: Subtly Sharpen the Details
Now go over the beard with the brush. At 20 percent, only a subtle sharpening occurs, which gives the image structure without looking intrusive. If you raise the effect to 100 percent as a test, you will see the difference immediately: grain and edges appear that nobody wants in the image. Feel free to do this test once to get a feel for the limits of the tool, and then undo it with Command + Z (Mac) or Ctrl + Z (Windows).
Step 5: Go Over Repeatedly Instead of Overdoing It
The best method is to work with a strength of 10 to 20 percent and go over the area several times if needed. Each pass strengthens the effect a little, and you stay in control of when it is enough. This approach usually delivers more natural results than a single hard brushstroke.

Step 6: Sharpen Lips, Eyes, and Eyebrows
Now you turn to the areas that should guide the viewer's gaze. Sharpen the lips slightly, go over the eyes once, and then over the eyebrows. Be careful not to do too much. In this example, it quickly becomes apparent that the sharpness is already getting quite strong. Make a note for later that you can tone the eyes back down a bit if necessary.

Step 7: Compare Before and After
Use the duplicated layer to double-check your changes. Turn the visibility of the individual layers on and off so that you can see how the image has changed. Often you will notice that a correction turned out too strong. In this case, you can undo it via the history or adjust it later on a separate layer.
Step 8: Select the Blur Tool for the Softness
The background and the coat should become softer so that the eyes, the lips, and the mouth get the attention. To do this, you switch to the Blur tool. It is located in the same spot as the Sharpen tool in the toolbar. You set the size of the brush entirely as needed, because you will switch between different sizes again and again while editing.

Step 9: Remove details with the Blur tool
First set the strength of the Blur tool to 100 percent to understand its effect. With this setting, details in the suit and coat almost completely disappear. That is the advantage of this tool: in a short time you can calm distracting textures that make the subject look busy. With a click on Undo, you can see how strong an effect you really need.
Step 10: Build up the effect gradually
To build up the blur evenly, you go over the desired areas several times with a lower strength. Each pass makes the region a little softer. You can repeat this step as often as needed until the background has the desired look. Afterwards, compare the result again with your original layer.

Step 11: Create an empty layer for non-destructive work
So far you have worked directly on the pixels of the image. Once you have saved a correction, it is difficult to remove again. Therefore, create a new empty layer. On this layer you work with the Blur tool or the Sharpen tool without changing the original image. An empty layer can later be deleted, adjusted, or hidden.

Step 12: Enable the "Sample All Layers" option
For your tools to have any effect on an empty layer, you must enable the "Sample All Layers" function in the tool options. Without this setting, the tool only accesses the current, empty layer, and nothing happens. Many users make this mistake, so you should pay close attention to it on your first attempt.

Step 13: Sharpen on the empty layer
With the option enabled, you now go over the desired areas again, such as the eyes. The sharpness now visibly affects the underlying image. Since everything happens on its own layer, the original photo remains untouched. So you can go back at any time if you no longer like the result.

Step 14: Correct oversharpening with the Eraser
If you have sharpened the eyes too much, you don't have to start over. Select the Eraser and set the opacity to about 20 percent. Enlarge the eraser tip and carefully erase the spots on the sharpening layer where it is too much. This creates a harmonious result that looks natural to the eye.

Step 15: Increase softness on the empty layer
On the same empty layer, you can additionally work with the Blur tool if you want more blur in the background. Here too: it is better to go over it gently several times than to strike too hard once. In the end, you have a file in which sharpness and softness are on separate layers and can be adjusted individually at any time.

Summary ??? Targeted sharpening and blurring in Photoshop Elements
With the Sharpen and Blur tools, you control sharpness and blur precisely where they should take effect. Work with low strengths, repeat the passes, and place your corrections on an empty layer. With the "Sample All Layers" option and an Eraser with reduced opacity, you keep full control and can undo changes at any time.
FAQ
How strong should I set the Sharpen tool?A strength of 10 to 20 percent is a good starting point for most subjects. It is better to go over the area several times than to work at 100 percent, as otherwise artifacts will occur.
Why does nothing happen when I sharpen on an empty layer?An empty layer contains no pixels on which the tool can act. Enable the "Sample All Layers" function in the tool options, and the tool will then access the underlying image.
Can I correct the effect on an empty layer afterwards?Yes, that is one of the biggest advantages. You can adjust the layer, change its opacity, hide it, or delete it completely. With an Eraser with reduced opacity, areas that are too strong can be selectively weakened.


