
You don't need an expensive cinema camera to shoot decent videos. The smartphone in your pocket is already enough for many projects, because modern devices record in 4K without any problem. Whether for social media, a vlog or a tutorial: with the right approach, you can get significantly more out of your phone than you might think.
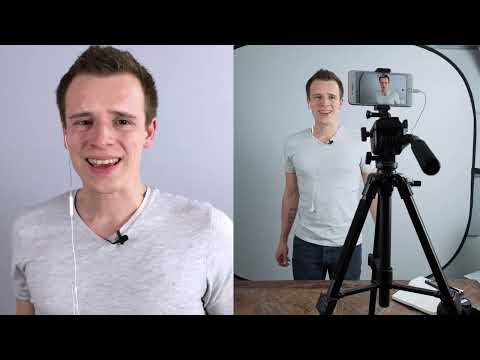
The video is only loaded from YouTube when you play it – data (including your IP address) is then transmitted to YouTube/Google. More in the privacy policy
A good video doesn't happen all by itself, though. If you simply pick up your smartphone and point it, you often end up with blurry, shaky or dark footage. The following steps show you what matters and how to achieve noticeably better results with little effort.
Key Takeaways
A clean lens, activated airplane mode, a stable stand and sufficient light form the foundation for every good smartphone video. For sound, additional accessories are worthwhile, and when it comes to zoom, the rule is: better to walk closer with your feet than to zoom in digitally. Finally, editing directly on your smartphone helps you finish your footage quickly.
Step-by-Step Guide
Step 1: Keep the Lens Clean
Before you even press the record button, take a look at the camera lens. Lint, dust and fingerprints collect in your pocket, and that is exactly what is often visible in the video later. Even if you don't notice it right away, a smudged lens makes images look blurry and strange overall. Therefore, wipe the lens with a soft, clean cloth before every recording.

Step 2: Activate Airplane Mode
A call, a text message or a notification can disturb or even interrupt the recording in progress. Especially when you're in the flow of speaking, this is particularly annoying. Therefore, turn on airplane mode before shooting. Then you stay undisturbed, and your recording will be significantly less prone to interruptions.

Step 3: Film Steadily with a Tripod or Holder
If you film handheld in selfie mode, the result quickly looks amateurish. A tripod or a phone holder provides a remedy here. Such holders cost just a few euros, and you simply clamp your smartphone in. This way you can easily film yourself too, without the image shaking. Make sure to attach the device firmly and securely so that it doesn't slip away during recording.

Step 4: Ensure Sufficient Light
The smartphone reacts more sensitively to poor lighting conditions than a large camera. The less light there is, the grainier and blurrier the image becomes. The easiest thing is to sit or stand facing a window. Daylight is often the best light source you can get for free.
If that's not enough, you can get a video light. A single light source is usually enough. Be sure to avoid the ceiling light, because light from above quickly makes faces look terrible. Also make sure you don't film with your back to the light source and that the light doesn't come from behind.

Step 5: Improve the Sound
Sound often determines the quality of a video more than you think. In a quiet environment, the smartphone's built-in microphone works quite well. As soon as it gets louder or background noises occur, you should upgrade. A lavalier microphone that you connect to the smartphone via a headphone jack, in some cases even without an adapter, delivers a very good result here.
If you don't want to get an additional microphone, simply use your smartphone's headset. Although this sometimes looks a bit unusual, the sound comes across much clearer as a result, even in louder environments. Also, don't speak directly into the device, but keep a reasonable distance.

Step 6: Choose the Right Format
Before you get started, decide which platform you're filming for. If the video is intended for smartphone screens, such as Instagram Stories, you film in portrait format. If the video is to be played on a TV or desktop, you choose landscape format. Don't rotate afterwards; set the format before recording.
Also, use the rear camera whenever possible. The front camera usually has noticeable wide-angle distortion and doesn't offer the quality of the rear camera. So if you have the choice, use the camera on the back.

Step 7: Using the Zoom Correctly
If your smartphone has multiple lenses, you can take advantage of that. With the zoom button or the lens switch, for example labeled 2x or 3x, you get a suitable framing without losing quality.
You should stay away from the digital zoom, however. It basically just crops the image, and the further you zoom in, the more the video loses quality and starts to become noisy. In addition, every small hand movement becomes visible at strong zoom. Even stabilizers can hardly compensate for this.

Step 8: It's Better to Move Closer
Instead of working with the zoom, it's best to simply walk a few steps toward your subject. Just two steps forward improve the image significantly more than constantly zooming in and out. Your subject stays sharp, and the video looks calmer and more professional.

Step 9: Controlling the Exposure
The smartphone sets the exposure automatically, which isn't always optimal. To address this, tap on the face on the screen and hold your finger down for a few seconds. As soon as the AE Lock indicator appears, the exposure is locked. Brightness and focus then remain constant, no matter what you do in that moment. This gives you a fixed situation in which you can film or take photos.
If you want to adjust the exposure specifically, a small sun appears next to the selection frame. If you drag it up, the image becomes brighter; if you drag it down, it becomes darker. This makes it relatively easy to compensate for difficult situations such as backlighting.

Step 10: Editing Directly on the Smartphone
Your smartphone is a small computer and is therefore also suitable for editing. For quick projects on the go, this is a practical solution. With iMovie, which is preinstalled on Apple devices, you can combine and edit your clips. Android users will find a good alternative in Premiere Clip, which is available on both systems.
Once you have finished the video, you export it and upload it directly to Instagram, Facebook, or the platform of your choice. For more extensive projects, however, a desktop computer is often more comfortable, since operation and overview are usually better there.

Step 11: Keep an Eye on the Case and Microphone
One detail is often overlooked: some phone cases create noises through friction against the housing, which show up as hissing or scratching in the audio recording. Therefore, make sure your case doesn't cause any disruptive noises. Also keep the actual microphone uncovered so that you don't accidentally cover it with your fingers. A tripod helps here too, since you then don't have to constantly hold the device in your hand.

Summary ??? Filming with the Smartphone: Tips for Better Videos
With a smartphone, you can shoot high-quality videos if you observe the most important basics. Keep the lens clean, activate airplane mode, and ensure a stable tripod or mount. Use sufficient light, ideally daylight or a video light, and avoid ceiling lighting. Improve the sound with a lavalier microphone or the headset and choose the appropriate format. Avoid the digital zoom, move closer to your subject instead, and control the exposure using AE Lock and the sun. Finally, you can edit directly on the smartphone and share your video.
FAQ
Do I absolutely need expensive camera equipment to shoot good videos?No, for many projects a modern smartphone is completely sufficient, since it can already film in 4K.
Why should I activate airplane mode?So that calls, messages, and notifications don't interrupt or disturb your recording.
Which light source is best suited?Daylight through a window is ideal. Alternatively, a single video light works well, while you're better off avoiding the ceiling light.
What does a lavalier microphone do?It significantly improves sound quality, especially in louder environments or with background noise.
Should I use the digital zoom?No, the digital zoom greatly reduces image quality. Instead, walk a few steps toward your subject.
How can I adjust the exposure manually?Long-press on the face in the image until AE Lock appears, and then drag the sun up or down.
Which software can I use to edit directly on the smartphone?On Apple devices, iMovie is suitable; on Android and iPhone, Premiere Clip works.


