
Often it's not the most expensive camera that determines the quality of a video, but the light that falls on your face. That's exactly what this lesson is about. You'll learn how to tell good light from bad light, which light sources are suitable, and which mistakes you should avoid from the start. You don't need a studio for this. Often a window, an inexpensive video light, and a feel for the right position are enough.
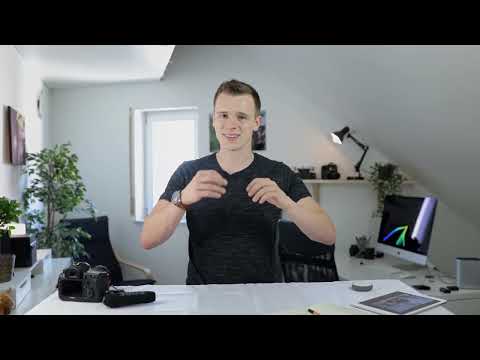
The video is only loaded from YouTube when you play it – data (including your IP address) is then transmitted to YouTube/Google. More in the privacy policy
Key Takeaways
- Light is the foundation of every shot and is often more important than the camera itself.
- A light source should never come directly from above, but should be positioned to the side in front of the face.
- The light color should be neutral. Ceiling lamps and ordinary light bulbs usually look too yellow or too cold.
- A single main light source is completely sufficient to get started.
- A window is an excellent natural light source if you get close enough to it.
- Background and accent lighting create depth, but don't have to match perfectly in color.
Step-by-Step Guide
Step 1: Consciously Notice the Existing Light Sources
Before you start setting up, get an overview of all the lights in your room. In the example video, there are five light sources in total: a key light from the side, a large main light from the front, an accent light in the background, another lamp, and a window with daylight. It's best to draw a small sketch of your room and mark where each source is located. This way you can quickly see which lights you can use deliberately.

Step 2: Recognize the Ceiling Light as a Negative Example
A typical beginner mistake is filming with only the ceiling light. In the video, all light sources are switched off so that only the ceiling light remains. The result looks gray and unflattering. The light is yellowish or very cold, and it falls directly from above, so shadows form under the eyes and on the nose. If your face looks like this on the screen, it's not the camera's fault, but the light's.

Step 3: Position the Light to the Side and Slightly Elevated
A light source should always come from the side, neither from above nor directly from the front toward the camera. In the example, the main light shines from the left from a relatively high position, while the light from the right sits a bit lower. This combination looks natural. Try out different angles until your face gets contours and the shadows fall softly. However, don't place the light too high, because otherwise unflattering shadows will appear again.

Step 4: Pay Attention to a Neutral Light Color
The color temperature determines whether your face looks natural or distorted. A light that is too reddish or greenish doesn't suit a portrait. Ceiling lamps aren't made for this, and fine-tuning via Kelvin values is hardly possible with them. You need a light source that is color-neutral, meaning a light developed specifically for video. Such lamps emit a neutral, daylight-like light, similar to flash units.

Step 5: Choose an Inexpensive Video Light
To get started, you don't need to plan for a big budget. The speaker in the video has been using a very inexpensive video light with a softbox for years, which he bought for about 20 euros. It is certainly not the most professional option and occasionally shows slight color shifts, but for your first videos it is completely sufficient. If you want to invest more later, look for continuously adjustable brightness. More expensive models can additionally be adjusted in color temperature. A ring light with a dimmer is a practical helper because you can flexibly adjust intensity and direction.

Step 6: Start with a Single Main Light Source
Many beginners place a lamp on each side of the camera, to the right and left. That quickly looks odd and unnatural. To begin with, one light source is entirely sufficient. Position it to the side in front of the face and, if needed, add a weaker second source or a simple reflector for fill light. This way you keep an overview and avoid unsightly multiple shadows.

Step 7: Use Background and Effect Lighting Purposefully
The background shouldn't disappear completely into darkness. White walls aren't strictly necessary for this; open rooms with some atmosphere are often the better choice. An additional effect light, such as a simple room lamp in the background, adds depth to the image. The color hardly matters here. All that matters is that the light is switched on and that the overall picture looks harmonious. These lamps therefore don't have to be neutral; they can even be used deliberately.

Step 8: Use the Window as a Natural Light Source
If you don't have any additional light, a window is an excellent alternative. Move close to the window so that as much light as possible falls on your face. The light then comes directionally from the front, without light coming in from the sides, and works similarly to a softbox. Make sure the sun isn't shining in directly, because harsh sunbeams create strong contrasts. Indirect daylight, for example on a cloudy day, is ideal.

Step 9: Soften the Window Light with a Curtain
If the daylight seems too harsh, you can draw a curtain in front of it. This makes the light more even and softer. That way you avoid harsh shadows under the eyes or on the nose, which in most cases look unflattering. The instructor explains the difference between hard and soft light in more detail in a later lesson. For now, the rule of thumb is enough: the softer the light, the more flattering the face looks.

Step 10: Avoid Flickering Light Sources and Fluorescent Tubes
Finally, an important note: fluorescent tubes and some modern light sources can flicker at the wrong frame rate, which becomes visible in the video as a distracting pattern. They also often look too cold. Your eye usually doesn't perceive this as clearly as the camera does. Therefore, before every recording, check on the screen whether the face is evenly lit and no flickering occurs.

Summary – Lighting for Video: Step by Step to Perfect Illumination
Good lighting is the foundation of every appealing video. You begin with an overview of your light sources and avoid using the ceiling light as your sole illumination. Position the main light to the side and slightly elevated, pay attention to neutral colors, and rely on a single, well-placed light source. A window combined with a curtain also provides soft, natural light. Effect lighting in the background creates depth, and you should avoid fluorescent tubes. With these basics, you can get started without spending much money. The next step continues with video editing.
FAQ
Question: Do I absolutely need an expensive video light?Answer: No, to get started, an inexpensive video light or a window with indirect daylight is perfectly sufficient.
Question: Why does the light from the ceiling look so unflattering?Answer: It usually falls from above, is often yellowish or too cold, and creates unattractive shadows on the face.
Question: Which light source should I use first?Answer: Ideally a main light source to the side in front of the face, alternatively a window that you move close to.
Question: Does the light in the background have to be perfect in color?Answer: No, an effect light may vary in color; it mainly serves to give the image depth and atmosphere.
Question: Why should I avoid fluorescent tubes?Answer: They can flicker at the wrong frame rate and often look too cold.
Question: How do I prevent harsh shadows in daylight?Answer: Draw a curtain in front of the window or film in indirect daylight, such as on a cloudy day.


