
You have probably already started the grading task yourself and asked yourself when a look is finished and which steps make sense in which order. That is exactly what this guide is for. It shows you a practical workflow in DaVinci Resolve that lets you match the colors of several shots, stabilize shaky footage, and build your own look. What matters: this approach is only one possible way. If you have already solved the task, it is best to compare your results with this workflow and look for differences.
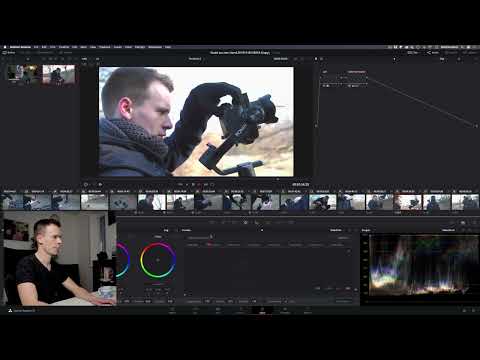
The video is only loaded from YouTube when you play it – data (including your IP address) is then transmitted to YouTube/Google. More in the privacy policy
Key Takeaways
- A grade begins with a neutral base correction. Only after that do you build the creative look.
- Every major action belongs in its own node. This way you can later modify or delete individual steps in a targeted way.
- With stills and adjustment clips, you efficiently transfer a look to all clips.
- You should perform stabilization as early as possible and in its own node, because too many color changes can amplify the jitter in the image.
- A good result in a reasonable amount of time is often more important than a perfect result that never gets finished.
Step-by-Step Guide
Step 1: Choose the reference shot
Before you make any color adjustments at all, you look at the footage. Choose a shot that shows a lot of the environment. It serves as your orientation for all other clips. Make sure your look also works for the other shots, because a look that only looks good on a single shot won't help you with the series.

Step 2: Pre-correct log footage with a LUT
In the Color page, you first add a base correction. In the example, a Canon Log to Rec.709 LUT is used, which is included in DaVinci Resolve by default. It makes the image somewhat higher in contrast and brighter. A slightly overexposed background is not yet a problem at this stage. Then give the node a name, for example "Note Label" or "Base Correction". This keeps things organized as the node tree grows.

Step 3: Increase saturation in the second node
With Alt + S you add a second node. Here you adjust the saturation so that the image doesn't look washed out. In the example, the value ends up at 60. The value is subjective, so you should always judge it in the context of the other clips. Don't overdo it, otherwise the footage quickly looks artificial.


Step 4: Lift the shadows and tone down the highlights
Now you work on the tonal values. Lift the shadows slightly so that more detail becomes visible and the image gains dynamics. At the same time, you pull the highlights back only minimally so that bright areas such as the sky don't blow out. If you intervene too strongly here, the image quickly looks unnatural.

Step 5: Fine-tune contrast, black levels, and darks
In the next step, you apply a bit more contrast and clip the black levels very slightly. You may also lift the darks a little, but without raising the overall brightness too much. Afterwards, name the node clearly, for example "Color Correction", so that you know later what it does.


Step 6: Save a still and apply it to all clips
Once the base correction is in place, it's worth switching to the Gallery. There you create a still by right-clicking the clip and choosing "Grab Still". Beforehand, you should remove old stills so that no confusion arises. Then you select all clips, open the context menu, and choose "Apply Grade". Now you can see whether the clips match in color or whether there are strong deviations, such as a transition from green to yellow.


Step 7: Fine-tuning the color balance with Offset
If individual clips still look too green or too magenta, you correct the color balance using the Offset controls. Proceed in small steps and compare regularly with the reference shot. It doesn't have to look perfect at this point. What matters is that the shots match each other overall.

Step 8: Stabilization as a separate step
Before you make further creative decisions, check which clips need to be stabilized. To do this, create a separate node with a clear name, such as "Stabilization". Then open the stabilization panel. In the example, you first use a Cropping Ratio of 0.7, which means heavy cropping. For a gentler variant, reduce the Smooth value to 0.5 and the Cropping Ratio to 0.25. Click "Stabilize" to start the calculation. The first playback may stutter a little, which is normal, since the analysis often still needs to be refined after it is applied.


You shouldn't put every clip into the same node. A separate node is worthwhile for every major action, because you can then delete or adjust the stabilizer individually later. Skipping this will come back to bite you at the latest when a single clip needs to be reworked.

For clips with a strong handheld camera look, you can additionally use Camera Lock. Try the default settings and then check whether the result looks steady without the image becoming unnaturally distorted.

Step 9: Reducing the audio track and creating an Adjustment Clip
Before you make global changes, you adjust the audio. In the example, the audio track is turned down slightly so that it doesn't drown out the video.

Then you create an adjustment layer, i.e. an Adjustment Clip, and place it over all the clips in the timeline. An effect that sits in the Adjustment Clip affects all the shots underneath it at the same time. This is particularly useful for white balance, brightness, and the final look.


Step 10: Adding sharpness and vignette as finishers
In the finisher, you apply Radius and Scaling for sharpness, but only subtly. With Alt + S, you create another node for the vignette. To do this, draw a circle that slightly darkens the edges of the image. You invert the mask so that only the edges are affected. Since this effect sits on the Adjustment Clip, it applies to all clips.


Step 11: Creating a color effect for the B-roll sequence
For interludes or B-roll, you can get more creative, because there are no talking-head situations to get in the way here. First increase the contrast, to 1.2 in the example, and add a Color Boost of about 10. Then work with color: blue in the dark areas creates a cool effect, while yellow in the brighter areas provides sunlight. With Command + D, you can activate the before-and-after comparison to check that the effect doesn't look exaggerated.


Step 12: Adjust the aspect ratio with cropping
If a distracting detail such as a leg appears in the frame, a different format can sometimes help. In the Inspector, you can cut off a bit at the top and bottom using the cropping values, for example to simulate the 21:9 format. In the example, the values for Crop Top and Crop Bottom are increased step by step until the distracting area is no longer noticeable. Don't forget to save the project afterwards.

Step 13: Check the result and fine-tune
Play the video through completely and stop immediately at every irregularity. If you collect all the problems until the end, too many changes quickly pile up. In the example, it is noticeable that the blue area is too weak. By adjusting the gradation curve, especially in the shadows, and slightly reducing the highlights, the image becomes more harmonious. A misaligned stabilization clip also has to be analyzed again, since otherwise the stabilization was calculated on the wrong basis.


Summary ??? DaVinci Resolve Color Grading: Step-by-Step Guide to Cohesive Looks
Good grading in DaVinci Resolve comes from a clear workflow. You begin with a reference shot and a neutral base correction, work your way toward your look via saturation, tonal values, and contrast, and stabilize the footage in its own node. Using stills and adjustment clips, you transfer the settings to the entire timeline. Finally, you add finishers, color effects, and aspect ratio, and check everything in the overall context. Remember: a convincing result in a reasonable amount of time is usually more important than perfection that never ends.
FAQ
Do I absolutely have to work with log footage?No, the guide also works with other footage. However, a base correction with a LUT is a good starting point if you have flat log footage.
Why should I create a separate node for each action?Individual nodes can be enabled, changed, or deleted separately. This way you keep an overview and can fix errors in a targeted way without rebuilding the entire look.
How many stabilization nodes should I use?Create a separate node for each clip that needs its own stabilization. For larger actions this is especially useful, because you can then adjust them individually later.
What exactly does an adjustment clip do?An adjustment clip acts like a layer above all the clips beneath it. Changes made in it apply to all shots at the same time, which is why it is suitable for white balance, vignette, or the final look.
How can I tell if my grading is too strong?Regularly compare your result with the reference shot and use the before-and-after comparison. If skin tones look unnatural or details in the highlights are lost, you have gone too far.


