
Movements in a video can be used in DaVinci Resolve in two ways: You can track them so that masks, effects or titles follow a subject, or you can stabilize shaky footage. The tracker in the Color page handles both, with the stabilizer being a separate function within the same tool. This tutorial guides you through both areas, from automatically tracking a mask to smoothing out shaky handheld footage. I will also show you where the limits are and why some shots do not turn out perfect despite good settings.
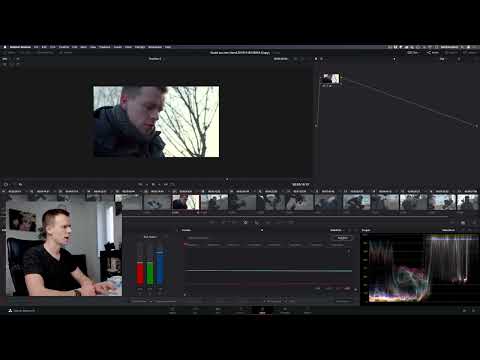
The video is only loaded from YouTube when you play it – data (including your IP address) is then transmitted to YouTube/Google. More in the privacy policy
Key Takeaways
- With the tracker, you can automatically align masks to a subject. To do this, activate the Interactive Mode, and DaVinci Resolve sets the tracking points on its own.
- You can run the tracking forward or backward through the timeline. Unwanted tracking points, for example in the background, can be removed selectively.
- In addition to shifts, the tracker can also capture pan, tilt, zoom, rotation and perspective movements. Select only the types of movement that your subject actually performs.
- The stabilizer smooths out camera shake. The settings Cropping Ratio, Smooth and Strength control how much the image is cropped and smoothed.
- Camera Lock stabilizes to the maximum by essentially putting the camera on a tripod. This crops the image more heavily.
- The analysis methods Perspective, Similarity and Translation deliver different results. Test them one after another until you find the best result.
- Stabilizing only works well if the footage itself is usable. If the foreground moves differently from the background, even a powerful tool reaches its limits.
Step 1: Automatically tracking a mask
Before you even start tracking, you need a mask that should follow the subject. Create it in the masks area and then open the tracker. There you will find the checkbox "Interactive Mode". Tick the box so that DaVinci Resolve recognizes the mask and automatically sets tracking points based on this mask. As a rule, you do not need to prepare anything else. You can also set manual points additionally, but with simple subjects you usually do not need them.

Then you start the tracking via the play button in the tracker. By default, the analysis runs from left to right through the timeline. If you want to track backward, for example when the subject is easier to recognize at the end of the scene, the direction can also be switched. The mask then aligns itself frame by frame with the face or another subject. The result is not always perfect, because the tracker can be thrown off by a bright background or a similar structure. In the normal case, however, it is enough for a good start.

Step 2: Checking and cleaning up tracking points
Once the tracking is complete, you will see the automatically set points as small white markers in the image. Look at which points lie on the subject and which do not belong. In the example shown, some points lay on a plant in the background, even though only the face and hair were supposed to be tracked. You remove such points by marking them with a selection and then deleting them with the Delete key. You can also move the points or add new points if an area offers too little hold.
Make sure to keep only the points that really lie on the subject. A point in the background can make the mask jitter as soon as that area changes. After you have cleaned up the points, you start the tracking again. The results usually become visibly more precise as a result, even if they are not one hundred percent.


Step 3: Defining movement types for the tracker
The tracker can do more than just follow positions. In the settings, you define which movements should be captured. The Pan describes a camera movement from right to left or from top to bottom. The Tilt, on the other hand, means the movement on the camera axis to the right or left. With Zoom you capture approach or distance, Rotate takes into account rotations of the camera or subject. Finally, the perspective 3D option covers more complex movements.
If possible, select only the types of movement that actually occur. If your subject only moves sideways, the shift is usually enough. Extensive settings can unnecessarily complicate the result. You will need the same logic later when stabilizing as well, because there you draw on the same movement data.

Step 4: Open the Stabilizer and set the basic settings
For stabilization, switch to the Color page and look for a clip that is actually shaky. Not every shot needs correction, because a deliberately moving camera would look unnatural after smoothing. In the Window settings area, don't open the Window panel, but the Stabilizer. It then analyzes the entire clip, not just a section.
The Stabilizer offers several sliders that you should understand in a particular order. The Cropping Ratio determines how much the image may be cropped. Because the camera movement has to be compensated, a crop at the edge inevitably results. A value of 0.25 crops little, but also limits the strength of the stabilization. At 1, the program may zoom in heavily, which strengthens the effect but noticeably changes the image. The default value of 0.5 is a good starting point.


The Smooth slider determines how strongly the video is smoothed. Low values let the camera sway along slightly, while higher values rather simulate a gimbal or a completely steady camera. Strength, on the other hand, controls the overall intensity of the correction. Imagine you are holding a camera and have to decide how much movement you allow. Smooth describes how steady the camera should appear, Strength how strongly you fight against the shake. The difference is hard to grasp at first, so it is worth changing the values one after another and observing the effect directly.
Step 5: Use Camera Lock for maximum stability
With Camera Lock you achieve the strongest stabilization. The option ensures that the image is treated as if the camera were mounted on a tripod. As soon as you tick the checkbox, the other values disappear because DaVinci Resolve then takes over the maximum smoothing itself. The result is particularly suitable for shots with little movement. With stronger pans or camera moves, however, the image quickly looks artificial, and a clear wobble effect appears.
After clicking Stabilize, the clip is analyzed and processed. You can recognize the result by the fact that the subject hardly moves in the frame anymore. At the same time, the image is cropped significantly more. Pay attention to whether the framing remains acceptable, and deactivate Camera Lock again if the camera movement is supposed to look natural.

Step 6: Compare the analysis methods
The Stabilizer offers the methods Perspective, Similarity and Translation. Each of them calculates the movement differently, and which works best depends on the footage. An instructor would advise you here not to theorize for long, but simply to try it out. If Perspective does not deliver good results, choose Similarity and click Stabilize again. If that doesn't work either, try Translation. The clip is completely re-analyzed each time, so you can compare the results directly.
In the example shown, Similarity delivered the best result. This does not have to be the case with your footage, so you should briefly check all three variants.

Step 7: Avoid black borders with Zoom
Stabilizing usually means that the image is cropped. If the crop is too large, black areas can appear at the edge. The Zoom slider gives DaVinci Resolve permission to zoom in a bit closer to the image and cover these borders. If you activate Zoom, the black borders usually disappear because the program adjusts the framing accordingly. However, you can also control the function yourself by setting the framing manually.
With the Bypass switch you can compare the original with the stabilized clip at any time. This way you can see immediately whether the correction has the desired effect.


Step 8: Compare and evaluate the result
Once you have adjusted the settings, a direct comparison is worthwhile. Switch back and forth between the original and the stabilized clip to judge the improvement. In the example, the previously shaky clip was significantly steadier after stabilization, even if it was not completely perfect. A video tripod or a slider would of course have delivered better results. Nevertheless, the software solution is sufficient for many projects, especially with short clips.

Step 9: Removing Stubborn Jitters and Recognizing Limits
Some jitters remain visible after the first pass. In this case, you stabilize the clip again until the flaw disappears. Keep in mind: each additional pass crops the image a little more. For clips with strong bumps, such as when the camera was knocked against something, a second pass is often enough to eliminate the jitter almost completely.
The limits show up especially when the foreground and background move differently. If a person walks through the frame while the background shifts due to camera shake, the Stabilizer cannot correct these two movements separately. The tool stabilizes the entire image uniformly. That is why, when filming, you should make sure to hold as steady as possible and not combine a moving subject with camera shake. Stabilizing is not a cure-all, but a tool that works best with cleanly shot footage.


Summary ??? Tracking and Stabilization in DaVinci Resolve: Step-by-Step Guide
You have seen how to automatically track a mask with the Interactive Mode, clean up tracking points, and select the appropriate motion types. In the second part, you got to know the Stabilizer, adjusted its Cropping Ratio, Smooth, and Strength controls, and tested Camera Lock as well as the analysis methods. You also know how to use Zoom to avoid black borders, and why foreground and background movements make stabilization more difficult. Try out the functions on your own footage, because only by comparing the settings will you develop a feeling for which values suit which shot.
FAQ
Question: Can I also track a mask backwards?Answer: Yes, you can run the tracking through the timeline in both directions, depending on where the subject is easier to recognize.
Question: Why is my image heavily cropped when stabilizing?Answer: Stabilization compensates for camera movement, which creates areas at the edges that have to be cropped. A lower Cropping Ratio value limits the crop, but also reduces the effect.
Question: When should I use Camera Lock?Answer: Camera Lock is suitable for shots with little camera movement where you want to achieve as rigid an effect as possible. With stronger movements, an unnatural wobble effect quickly arises.
Question: Which analysis method is the best?Answer: There is no universally best method. Perspective, Similarity, and Translation deliver different results depending on the footage, so you should test all three one after another.
Question: Can I use the Stabilizer to correct movements of a subject and the background at the same time?Answer: No, the Stabilizer treats the entire image uniformly. If the subject and background move differently, the tool cannot separate them cleanly.
Question: How do I remove incorrectly placed tracking points?Answer: Mark the unwanted points with a selection and delete them with the Delete key. Then restart the tracking so that the result is updated.


