

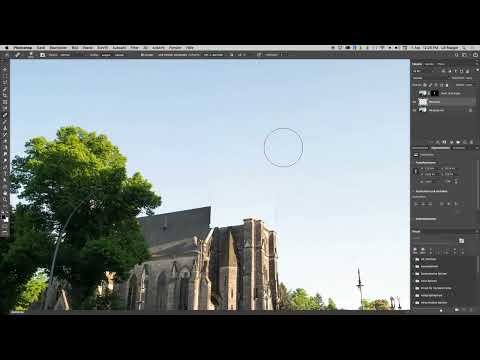
You moved a church tower, and suddenly an unsightly spot gapes in the sky at its old position. This is exactly the problem we solve in this tutorial. The tower now sits on its own layer, but the background shot underneath still shows its original position. When you move the tower upward, this trace shimmers through visibly. It gets tricky mainly because the sky here has a gradient that you have to continue seamlessly after retouching. With a combination of the classic Clone Stamp and the smarter Healing Brush, though, you will get the hole under control quickly.
The video is only loaded from YouTube when you play it – data (including your IP address) is then transmitted to YouTube/Google. More in the privacy policy
Key Takeaways
Key Takeaways
- With Ctrl-click or Cmd-click on the layer mask, you load a precise selection that limits your retouching.
- Retouching belongs on a separate layer so that you can rework it at any time.
- The Clone Stamp transfers pixels without tonal adjustment and is suitable for the rough preliminary work.
- The Healing Brush adapts brightness, color, and texture to the surroundings and is ideal for fine work.
- Small brush tips prevent new patterns or edges from appearing.
- Not every perspective has to be physically perfect. If the image looks coherent, the goal has been achieved.
Step-by-Step Guide
Step 1: Identify the problem on the background layer
The tower is on its own layer, but the original shot underneath still contains it. If you move the tower upward, the old position remains visible below. So you have to retouch exactly this area out of the background shot. That sounds simple but is tricky, because the gradient in the sky has to continue without a visible edge after the correction.

Step 2: Load the selection from the layer mask
As a foundation, you need a clean line at the lower edge of the tower. Hold down the Ctrl key (the Cmd key on macOS) and click directly on the thumbnail of the layer mask. Photoshop then loads the selection of the tower. This limits your work exactly to the area where the line runs, and you can work precisely.

Step 3: Create a separate retouching layer
Create a new layer above the background and give it a clear name, for example "Retouch". This seems trivial, but it saves you a lot of trouble later. All corrections stay separate from the original, and you can hide, change, or delete them at any time. Then select the Clone Stamp tool in the toolbox.
Step 4: Do the rough preliminary work with the Clone Stamp
The Clone Stamp copies pixels from one source to another spot without adjusting tonal values. Therefore, you should choose a source that is very similar to the target area, that is, sky next to sky. Set the source by holding down the Alt key (Option on macOS) and clicking. Set the brush size to about 700 pixels and then simply paint over the problem area. With well-chosen sources, this works surprisingly well.
Step 5: Check the result and deselect
Work the line all the way to the top and then deselect with Ctrl+D or Cmd+D. Only now does it become apparent where the Clone Stamp reaches its limits. Light and dark areas differ slightly from each other, and transitions are visible. However, the problem can now be tackled much more precisely than before.
Step 6: Use the Healing Brush for fine work
For the fine work, you switch to the Healing Brush. This tool thinks along with you, because it adapts the tonal values, brightness, and texture of the source to the surroundings. Set a source again with Alt or Option-click nearby and then go over the problem areas several times. You don't have to be accurate to the millimeter; the brush smooths out the transitions automatically.

Step 7: Remove the last traces with a small tool
Reduce the brush tip size before you tackle the remaining lines. A brush that is too large can create new structures or unnatural patterns, and that is exactly what you want to avoid. Work your way forward bit by bit until the tower can no longer be made out. In between, show and hide the retouching layer to critically check the result again and again.

Step 8: Matching Color and Atmosphere
If the retouched area looks a bit paler or less saturated than its surroundings, you don't need to worry. Small color differences can be fixed with a soft brush and a matching color, or with saturation. Smoke, steam, or clouds can also help reliably hide any remaining traces. In this example, however, the retouching so far is already sufficient, so the little problem is hardly noticeable in the finished image.

Step 9: Bringing the Tower Back and Positioning It
Make the tower layer visible again and remove the "Copy" suffix from the layer name. Select the Move tool (V) and use the arrow keys to move the tower upward in small steps. Note that the movement often continues a little after you release the key. Leave the tower enough space so that the engines will have room later as well.

Step 10: Consciously Accepting the Perspective
Strictly speaking, you would have to isolate the side of the tower and transform it downward so that the vanishing lines run toward the horizon again. With this motif, however, the effort would be enormous, and the result would look patched together. Therefore, in this case we deliberately forgo it. The lines are not entirely correct, but the overall impression is convincing. Especially with creative composites, gut feeling often counts for more than any rule.

Summary – Retouching the Sky in Photoshop: Quickly Repairing a Hole in the Sky
You have learned how to remove the traces in the background after moving an object. With a selection from the layer mask and a separate retouching layer, you stay in control. The Clone Stamp takes care of the rough work, the Healing Brush the fine work. With small tools, color adjustments, and an eye for the overall effect, the hole in the sky becomes an inconspicuous spot, and the tower can launch completely.
FAQ
Why should the retouching be on a separate layer?On its own layer, your corrections remain flexible; you can hide, modify, or delete them at any time without damaging the original image.
How do I load the tower's selection?Hold down the Ctrl key or Cmd key and click directly on the layer mask, and the selection will be loaded.
When do I use the Clone Stamp and when the Healing Brush?The Clone Stamp is suitable for rough preliminary work, since it transfers pixels without tonal adjustment, while the Healing Brush is intended for fine work and automatically blends transitions.
Why should I work with a small brush?Large brushes can create new visible patterns; with small brushes you can remove the last lines in a controlled way.
What should I do if the retouched area looks too pale?Small color deviations can be compensated for with saturation, a matching brush, or additional clouds and smoke.
Does the perspective always have to be corrected perfectly?No, if the effort is disproportionately high and the overall image looks coherent, the not entirely correct perspective may remain.

