

Imagine you add a new row to your spreadsheet, and shortly afterwards your mailbox automatically sends an email. That's exactly what you'll build in this tutorial. Google Sheets serves as the trigger, Gmail as the action, and Zapier handles the connection between them. You don't need any programming skills for this, and the setup takes only a few minutes. You'll learn two approaches: the manual step-by-step setup and the route using Zapier's AI feature.
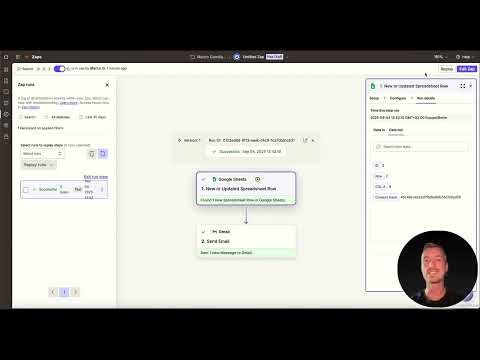
The video is only loaded from YouTube when you play it – data (including your IP address) is then transmitted to YouTube/Google. More in the privacy policy
Key Takeaways
- A workflow in Zapier, referred to below as a Zap, consists of a trigger and at least one action.
- Google Sheets is suitable as a trigger whenever a new entry in a spreadsheet should be detected.
- Gmail sends the email, and you determine the sender, subject and content yourself.
- Test every step before you publish the Zap.
- With the Copilot, you build the same workflow via text input, but you still have to configure the individual steps yourself.
Step-by-Step Guide
Step 1: Log in to Zapier
Open Zapier and log in with your account. Without logging in, you can write a workflow into the input field, but the login is mandatory for saving and starting it. So take care of this step right at the beginning.

After logging in, you land on the dashboard. Here you manage all your Zaps, and this is also where you start new workflows. If you already know Zapier, the basic elements are probably familiar to you.

Step 2: Create a new Zap
Now create a new Zap. It's best to give it a meaningful name right away, such as "Connect Google Sheets with Gmail". That way you can quickly find the workflow later if you run several automations. With the "Create Zap" button, you start with an empty workflow that you build from scratch.
Step 3: Select Google Sheets as the trigger
The first building block is the trigger, i.e. the event that starts the workflow. Enter "Sheets" in the search field and select Google Sheets. The search is indispensable in Zapier, because over 7000 apps are available. Then you define the event: the Zap should run when a new entry is added to a spreadsheet.

Step 4: Set Gmail as the action
The second building block is the action, i.e. what should happen after the trigger. Here an email is to be sent. Search for "Mail" and it's best to choose Gmail right away, as the selection is then clearer. This means your workflow consists of two steps, and the basic structure is in place.

Step 5: Connect Google Sheets and create a spreadsheet
Now Zapier needs to be allowed to access your spreadsheet. Click "Connect" and log in to your Google account. For the test, it's best to create a new spreadsheet, for example named "Zapier Test Mail". Leave it empty for now. Google saves changes automatically, so you don't need to save anything separately.

Step 6: Select the account and spreadsheet in the Zap
Return to Zapier and, if necessary, refresh the view so that the new spreadsheet appears. Then select your Google account and confirm with "Continue". Next, look for the spreadsheet you just created. The worksheet is usually the first sheet, since only this one exists in a new spreadsheet. The field for the column is optional and can stay empty for now.

Step 7: Test the trigger
Before you continue, check whether the trigger works. Zapier reads the spreadsheet and shows you whether a connection exists. If the test is successful, a confirmation appears. This check saves you a lot of troubleshooting later, because you immediately see whether Zapier detects the data at all.

Step 8: Configure the Gmail action
Now you design the email. First select the Gmail account and set the action "Send Email". In the "To" field, enter the recipient address. For the test, use your own address here so that you don't send anything to uninvolved people. In the "From Name" field, enter a sender name, for example "Zapier Test", so that you can later recognize where the email came from. In "Subject", write the subject line, such as "New entry". You type the actual text in the "Body" field. It's best to choose the "Plain" format there and write a simple sentence like "Hello, there is a new entry."

You can leave the fields "Send message to Google Groups", "CC" and "BCC" empty for this workflow.
When testing, make sure not to send an unnecessarily large number of emails. Too many automatic emails can cause Google to temporarily block your account or the messages to end up in spam.
Step 9: Send a test email
Now start a test run of the Gmail action. Zapier will then send an email to the saved address. In the results area, you can see whether the sending was successful. Then check your inbox. If the email arrives with the correct sender, subject and text, the connection to Gmail is working flawlessly.
Step 10: Test with a new spreadsheet entry and publish
Now comes the actual practical test. Enter a new record in your Google spreadsheet and run the trigger again. Zapier recognizes the entry and triggers the workflow. Once everything works, you publish the Zap using the "Publish" button. Only then is the process permanently active and reacts to new entries without you having to trigger anything.


Step 11: Include entry data in the email
Right now, the email contains only a fixed text. However, it is often useful to send the contents of the new entry along directly. For this, Zapier offers data fields from the spreadsheet that you can insert into the email text with a click. That way, the recipient learns not only that an entry exists, but also what it is about. To do this, open the Gmail action again and add the desired fields to the text.

Step 12: Create the same process with the Copilot
The second way goes through the AI function. To do this, go back to the home page and describe in the input field what should happen, for example: "When a new entry appears in Google Sheets, send an email via Gmail." Zapier analyzes your description and automatically suggests the appropriate steps. The result essentially corresponds to the manual setup, but the account, spreadsheet and email must then be configured again.

Step 13: Reconfigure the suggested steps
Even with the AI route, you're not completely done once the Copilot has created the Zap. You have to confirm the connections, select the correct worksheet and fill in the fields of the email. Proceed exactly as in the manual method. The Copilot mainly saves you the search for the individual apps and the basic structure of the workflow.


Step 14: Extend the workflow
Your simple workflow can be extended at any time. You can add further actions, build in conditions or create branches. Zapier also offers AI functions that you can integrate directly into the process, for example to formulate texts automatically. With over 7000 apps, many variants open up, so that you can adapt the Zap to your needs.

Summary ??? Automatically connecting Google Sheets and Gmail with Zapier
In this guide, you built a workflow that connects Google Sheets with Gmail. A new entry in your spreadsheet serves as the trigger, and as the action, Gmail sends an email. You can build the Zap manually step by step or use the Copilot and then check the settings. Test each step before you publish, and be sure to send test emails sparingly.
FAQ
Do I need programming skills to create a Zap?No, Zapier works with a graphical interface in which you select apps and fill in fields.
Do I have to create a Zapier account?Yes, you need to sign in to save and publish a Zap.
Why should I test the trigger and the action individually?This way you spot errors early, and troubleshooting after publishing is largely unnecessary.
How many test emails can I send?Send only a few test emails, as too many automated messages can lead to an account suspension or spam flags.
Can I include content from the spreadsheet in the email?Yes, you can insert data fields from the new entry into the subject and body with a click.
What does Zapier's AI feature offer?The Copilot automatically creates the basic structure of the workflow from a text description, which you then only need to adjust.

