

How many clicks do you repeat every week without thinking about it? Copying data between spreadsheets, forwarding emails, or manually publishing posts costs time that you could use more productively. Make.com is an automation platform that takes over exactly these processes. Unlike simple automations, Make also lets you build branched, conditional, and AI-powered workflows.
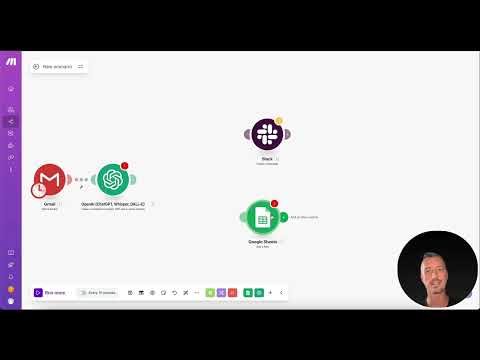
The video is only loaded from YouTube when you play it – data (including your IP address) is then transmitted to YouTube/Google. More in the privacy policy
In this guide, you will learn the basics: the pricing models, signing up, the interface, and building your own scenario. I will also show you when Make is the right choice and when other tools are a better fit.
Key Takeaways
- Make.com is a visual automation platform in which you connect modules into scenarios via drag-and-drop.
- The free version includes 1,000 operations per month, but has a minimum interval of 15 minutes between runs.
- With routers, filters, and conditions, you can also implement complex branching.
- An AI assistant can create a basic scenario framework from a text description, which you should review afterwards.
- Pre-built templates help you get started and show typical workflows.
- Build workflows step by step and test each module individually before adding further steps.
Step-by-Step Guide
Step 1: Understanding the Pricing Models
Before you get started, you should know what the plans cost and what they offer. The Free version is free of charge and offers 1,000 operations per month. It includes the visual workflow builder, around 2,000 apps, as well as routers and filters. The limitation concerns execution frequency: a scenario runs at most every 15 minutes. For checks like "Check every few seconds whether a new email has arrived," that is not enough.
The Core plan costs around 9 US dollars per month and includes 10,000 credits. It is suitable for freelancers and solo self-employed people with simple automations. It includes unlimited active scenarios, scheduling down to the minute, and access to the API. The Pro plan at 16 US dollars per month also offers 10,000 credits, plus prioritized execution, custom variables across multiple workflows, and full-text search in the logs. The Teams plan for about 29 US dollars per month adds team roles and is intended primarily for companies.

Step 2: Creating a Free Account
Registration is quick. Click "Get started free" and sign in with your Google account or with an email address and password. You will then land directly in the Make backend.

Step 3: Getting to Know the Dashboard and Navigation
The dashboard shows you at a glance how many operations have already been executed and which scenarios are active. In the menu, you will find, among other things, "Scenarios" for your workflows, "Templates" for pre-built templates, "Connections" for your linked accounts, and "Webhooks" as well as "Data Stores" for advanced applications. The "Variables" category is also located here. To begin with, scenarios, templates, and connections are completely sufficient.

Step 4: Defining the Trigger of a Scenario
Every scenario begins with a trigger that starts the process. A typical example is "Watch New Rows" in Google Sheets: Make regularly checks whether a new row appears in a spreadsheet. To connect to Google, you create a connection and grant the necessary access permissions. Make sure to grant only the permissions you actually need. If the file selection dialog does not display any files, this is often due to missing shares in Google Drive. In this case, it helps to check the sharing settings of the file and connect again.

Step 5: Adding More Modules
After the trigger, you add further modules by clicking the plus icon. In the example, a summary is created with OpenAI and the result is then written back into a spreadsheet using the "Add a Row" module. The appropriate connection must be set up for each module. You can transfer the values from previous modules into the fields with a click, so that each step accesses the results of the previous one.

Step 6: Test and activate the scenario
With "Run once" you start the scenario manually. Make shows you the input and output data for each module. Check that the results are correct before you turn the scenario on. Only then do you set the interval, for example every 15 minutes in the free plan, and activate the workflow.

Step 7: Use the AI assistant
Make offers an AI assistant that creates a draft from a text description. You write, for example: "When a new file lands in Google Drive, summarize the text with OpenAI and publish it on LinkedIn." The assistant then generates a template with modules. You should still check it carefully, since connections, prompts, and mappings often need to be adjusted.
Step 8: Build branches with the router
If a piece of information needs to go to several destinations, you use a router. In the example, a summary lands in Slack and in a Google Sheet at the same time. The router can be extended as much as you like without fundamentally rebuilding the workflow. With filters and conditions, you additionally define which branches are executed under which conditions.

Step 9: Use templates as a starting point
The template library contains thousands of prebuilt workflows. You can filter by apps, for example by Gmail. Each template includes instructions and shows the individual steps. One example is a workflow that summarizes a website and creates social media posts for LinkedIn and Facebook from it. You adopt the template and adapt the prompts to your target audience.

Step 10: Your own social media workflow
A practical project shows how the parts work together. The trigger is a new file in a Google Drive folder. The second step is a Chat GPT module that summarizes the text. The third step publishes the post on LinkedIn. Optionally, you send a status email to yourself at the end. This workflow can be built in a few minutes.

Step 11: Improve existing workflows in a targeted way
A good scenario is rarely created on the first attempt. Start with a few steps, test each of them individually, and only then expand the workflow. Especially with multiple branches, the following applies: the more confusing the scenario becomes, the more important clean documentation of the steps is. If you use an AI, collect all requirements beforehand so that the assistant can understand the goal.

Summary – Getting started with Make.com: Create workflows with drag-and-drop
Make.com combines a visual interface with powerful functions. You choose a trigger, add modules via drag-and-drop, branch with the router, and test the workflow before you activate it. The free version is suitable for trying things out, while the paid plans offer more operations and faster intervals. With templates and the AI assistant, you reach your goal faster. For complex workflows, Make is a good mix of user-friendliness and range of features.
FAQ
Can Make.com be used for free?Yes, the free version offers 1,000 operations per month and the full visual workflow builder. However, execution is limited to intervals of at least 15 minutes.
Which plan is suitable for beginners?The free version is enough to get started. If you need more operations, the Core plan with 10,000 credits is an affordable option for simple automations.
Can Make.com also automate AI workflows?Yes, you can integrate modules such as OpenAI or other language models via interfaces. The AI assistant also helps with creating scenarios.
Do I need programming skills?No, the interface is built visually. For very specific requirements, however, knowledge of APIs or data structures can be helpful.
When is it worth switching to an Enterprise plan?If you need to involve several team members, need team roles, or process very large amounts of data, the Teams plan or a custom solution via sales is worthwhile.
How does Make.com differ from n8n?n8n is open source and can be run on your own servers. However, it is technically more demanding. Make, on the other hand, offers simpler operation without your own infrastructure.

