

How many hours do you spend each week copying data by hand between Gmail, Slack, and Google Docs? This is exactly where Zapier comes in. The automation platform connects your applications with each other and integrates AI directly into the process. In this guide, you will learn about the plans, find your way around the interface, and finally build your own workflow that automatically summarizes incoming emails.
The video is only loaded from YouTube when you play it – data (including your IP address) is then transmitted to YouTube/Google. More in the privacy policy
Key Takeaways
- Zapier connects thousands of applications and automates recurring tasks without programming knowledge.
- A Zap consists of a trigger, meaning an event that starts it, and at least one action.
- The free plan with 100 tasks per month is enough for initial experiments.
- AI can be built in as an intermediate step, or you can even have a complete workflow generated via prompt.
- Test every step before you activate the workflow. Only then will it run reliably in the background.
- You should not pass sensitive data on to AI services without checking, as this data is often processed on servers outside of Europe.
Step-by-Step Guide
Step 1: Create an account and log in
Open the Zapier website. If you don't have an account yet, click on "Sign up". If you already have access, choose "Login". After logging in, you land in the backend, which you will get to know in more detail shortly.

Step 2: Understand the plans and choose the right one
Zapier offers the Free, Pro, Team, and Enterprise plans. The Free plan costs nothing and includes unlimited Zaps, two-step Zaps, Power-Ups, and 100 tasks per month. The Pro plan is aimed at individuals and gives you unlimited premium apps, webhooks, email and live support. Team and Enterprise are intended for larger groups with approvals and SSO.
When choosing, pay attention to two points: annual billing is noticeably cheaper than monthly billing, and costs rise with the number of tasks you need. Don't blindly rely on the prices in the video, because plans are adjusted regularly. Check the current terms directly on the pricing page.

Step 3: Get to know the interface
In the left menu you will find the "Create" section. Here you can create a Zap, a table, an interface, a chatbot, or a canvas. Below that are "Home" and "Discover", as well as the overview of your Zaps, the app connections, and the Zap History with deleted or older automations. On the start page there is the field "What would you like to automate?". There you describe in one sentence what should be automated, and Zapier suggests suitable workflows.

Step 4: Use ready-made templates from the Discover section
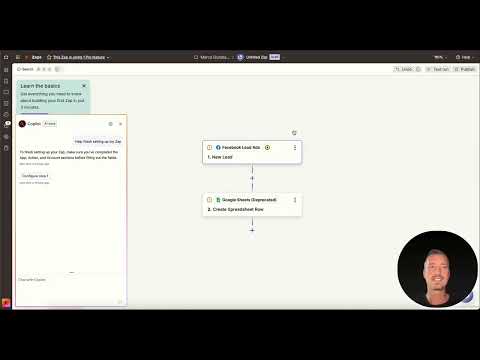
Before you build something yourself, it's worth taking a look at "Discover". There you will find templates by categories such as lead management, sales pipeline, customer support, or project management. A good example is the template in which new Facebook leads automatically end up in Google Sheets. Via "Watch Video" you can see an explanation, and with "Try it" you load the template into your account. Pay attention to notes about premium apps, as these can only be used in the paid plan. If the connection to Google Sheets shows the status "Update required", simply reconnect the account.

Step 5: Create your own Zap with a Gmail trigger
Now it gets practical. Click on "Create" and select the Zap. As the trigger, choose Gmail and then the event "New Mail". If your Gmail account is not yet connected, sign in via "Sign in" and allow access. In the free plan, Zapier checks every 15 minutes whether a new email has arrived. This interval cannot be changed in the Free plan.

Step 6: Build in the AI as an intermediate step with ChatGPT
After the trigger comes the action. Search for "OpenAI" or "ChatGPT" and connect your account. As the event, choose "Create analyze text", since this function analyzes and summarizes the text. In the text field, you take the content of the new email from the trigger. With "Continue" you confirm the step. Note that using the OpenAI interface requires a credit balance, which you must top up in advance.

Step 7: Send the summary to Slack
The final building block is the output. Add another action and select Slack. As the event, choose "Send Direct Message". Then select the desired username. In the message field, insert the variable "Summary Text" from the AI step so that exactly the summary is sent to Slack. If you want to expand the workflow, you can add further steps at any time, for example having a task created from the text.

Step 8: Have the workflow generated via an AI prompt
If you want to get to the goal faster, use the built-in Copilot. Describe the desired workflow in a prompt, for example: "Create a zap: start with the trigger new mail in Gmail. The next step is to summarize the text from the mail and send it to Slack." The Copilot analyzes your request and creates the corresponding workflow. The result is usually identical to the manually built workflow, just in a fraction of the time. Experience shows that precise descriptions deliver the best results. English prompts often work most reliably, but German is also worth a try.

Step 9: Test each step individually and the entire workflow
First test each step on its own. With the ChatGPT action, for example, an error such as "OpenAI API error" can occur if no credit has been deposited. In this case, you top up the account or switch to the appropriate billing option and test the step again. Once all connections are error-free, you start the complete process with "Test Run". Only when all steps are marked green is the workflow ready.

Step 10: Publish the workflow
The final click decides on continuous operation. With "Publish" you activate the Zap, and from that moment on it runs automatically in the background. As long as you don't publish, the workflow remains inactive. Therefore, make it a habit to test changes first and then release them.
Summary – Zapier Tutorial: Automating Workflows with AI Support
Zapier connects your applications and relieves you of monotonous routines. You have seen how to classify the plans, navigate the interface, and get started quickly with templates. In addition, you have built your own workflow that summarizes emails with the help of AI and sends them to Slack. With this foundation, you can extend the automation step by step to other processes, such as reports, social media posts, or sorting emails.
FAQ
Do I need programming skills to work with Zapier?No, the platform is designed for beginners without programming skills. More complex workflows can additionally be extended with code, but this is optional.
How many tasks do I get on the free plan?On the Free plan, you have 100 tasks per month available. This amount is sufficient for initial experiments and small automations.
How often does Zapier check for new emails on the free plan?On the Free plan, it checks every 15 minutes. This interval cannot be shortened on this plan.
Why does the AI step fail with an API error?Often there is no credit deposited with the AI provider. Check your payment method and then test the step again.
What data should I not send to the AI?Confidential or personal information does not belong in automated AI steps without review. The data is often forwarded to servers outside the EU, so you should check data protection carefully.

