

Imagine you describe a task in a few sentences, and an AI tool turns it into a finished workflow that researches information, writes texts and even generates images. That is exactly what Google Opal makes possible. The application is still in beta, but you don't need any programming knowledge to get started right away. In this guide, I walk you through the interface, show you how a simple prompt becomes a working app, and explain where you still run into limits today.
The video is only loaded from YouTube when you play it – data (including your IP address) is then transmitted to YouTube/Google. More in the privacy policy
Key Takeaways
- Google Opal creates workflows from natural-language descriptions, entirely without code.
- Behind the scenes, Gemini rewrites your input into a clean prompt and sets up the individual processing steps.
- You can copy templates from the gallery via Remix and then customize them freely, while the original remains unchanged.
- With the Preview you test each run, and the Console logs every single processing step.
- Results can be output in the app view, as a web page, or in Google Docs, Slides and Sheets.
- Many external applications such as Gmail are not yet connected, and not all AI models are enabled.
Step-by-Step Guide
Step 1: Get access and open Opal
To get started, you need a Google account. At the time of the video, Opal can only be used in the USA. Anyone who wants to access it from Germany uses a VPN client in the video that routes the connection through the United States. Check whether the terms of use of Google and your VPN provider allow this. On the start page, you then select "Sign in" or "Try Opal" and log in with your Google account. After a short wait, the dashboard opens.

Step 2: Understand the dashboard and gallery
The dashboard is clearly structured. At the top you'll find the search for templates as well as the areas "Build", "Edit" and "Share". Below that is the list of your own Opal apps, and at the very bottom is the gallery with ready-made templates. Keep in mind that not every template works right away, because some building blocks are not yet implemented or enabled. Clicking on a template already shows you the individual steps it goes through, without you having to change anything.

Step 3: Copy a template via Remix
If you like a template, you click on "Remix". Opal then creates a copy that you can do whatever you want with. The template in the gallery remains untouched. This function is particularly well suited for learning, because you can take apart the structure of someone else's workflow directly and adapt it to your needs.

Step 4: Create your own app from scratch
If you want to start from zero, you choose "Create new". The interface then shows you buttons at the top for "Share", the status, the settings, as well as "Preview" and "Console". You should change the default name right away, for example to "Test-App", so you can quickly find the app again later. New apps are initially in the "Draft" status. There you can keep working in peace before you test anything.

Step 5: Describe the workflow via prompt
In the input field with the prompt "Add a step to get started", you describe what your app should do. One example would be a workflow that automatically creates a blog post based on a topic. You don't have to phrase your description in technical terms. The AI Gemini translates your input into a sensible prompt and builds the required steps from it. The language doesn't matter here, since German input is processed as well.
Step 6: Understand the generated building blocks
As soon as Opal has created the workflow, you see the individual building blocks. In the blog example, there is an input block for the topic ("Blog topic"), a research block that searches for an optimal title, as well as blocks for the report and the instructions. The instructions define step by step how the report should be evaluated. If you understand what each block does, you can later intervene in a targeted way when a result doesn't fit.

Step 7: Extend the Workflow with Meta Information
The existing workflow can be extended at any time without having to start over. If you enter another command, such as "Create meta title and meta description," Opal adds an additional block to the process. If you want to optimize the post for search engines, you can add an SEO component directly this way. The principle is always the same: You briefly state what is missing, and the extension is built in automatically.
Step 8: Start a Test Run in the Preview
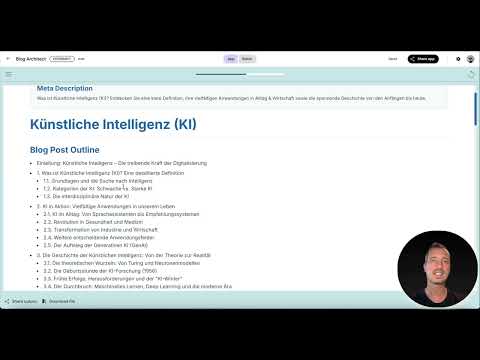
You start a test run via "Preview". For example, you enter the keyword "artificial intelligence" and watch as the workflow is processed step by step. The current step is displayed as it runs. At the end, you receive a complete blog post that can be opened in the Preview or in the app view. With the download button, you save the result locally on your computer.

Step 9: Define Inputs, Models, and Outputs
Using input fields, you determine what information a user of your app should provide. Possible inputs include text, uploaded files such as Excel spreadsheets or PDFs, as well as sources from Upload, MyDrive, or YouTube. In the Generate block, you select the AI model. Currently, Gemini 2.5 Flash works reliably, while other models such as Gemini Pro are in some cases not yet released. In the Output area, you specify where the result goes, such as to the app view, a web page, Google Docs, Google Slides, or Google Sheets.

Step 10: Use the Console and Find Errors
The console is your most important tool when something doesn't run as expected. It logs every process with timestamps and displays messages such as "calling Gemini Flash". This way you can tell which step is stuck or is producing a faulty result. Especially with longer workflows, this overview saves you a lot of time because you can make targeted improvements instead of restarting everything.

Step 11: Incorporate Assets, Drawings, and Custom Adjustments
In addition to text and files, you can add assets and define further outputs. With the "Drawing" block, you draw a rough sketch from which Opal is then supposed to create a graphic. Image generation also already works, so a blog post can directly receive a suitable cover image. All blocks can be edited manually, renamed, or rebuilt, so you can design the workflow entirely according to your own ideas.

Step 12: Keep Costs, Limitations, and Outlook in Mind
During the beta, the Workflow Creator is free to use. However, Google apparently plans paid access, for example for Gemini Pro. Also note the current limitations: Gmail and many other interfaces are still missing, and Opal can so far write to Google Sheets and Google Docs, but not yet read from them. Triggers are planned for the future, such as scheduled execution or being triggered by a new row in a spreadsheet. In the video, a blog post was created in around two and a half minutes. Anyone who regularly needs content can thus generate large quantities with manageable effort.

Summary – Google Opal: No-Code Automation with AI Explained Simply
Google Opal makes automation accessible to beginners because you describe workflows in plain language instead of programming them. You start with a template, adapt it via Remix, or build your own app, test it in the Preview, and monitor the processes in the console. The results can be output in various formats. The tool is still in the beta stage, and some integrations are missing, but the basic idea already works very well and is worth a first try.
FAQ
How much does Google Opal cost?During the beta, the Workflow Creator is free according to the video; costs may arise later for models such as Gemini Pro.
Do I need programming skills?No, you describe your task in plain language, and Opal creates the workflow automatically.
Is Google Opal available in Germany?At the time of the video, Opal was only usable in the USA, which is why a VPN was used in the video.
Can I use ready-made templates?Yes, via "Remix" you create a copy of the template, which you can then freely customize.
Can Opal already automate Gmail tasks?No, many external applications such as Gmail are not yet implemented, but are supposed to follow.
How long does it take to create a blog post?In the video, the complete workflow took about two and a half minutes.

