
When you open Google Opal for the first time, you see numerous buttons, menu items, and areas whose purpose isn't immediately clear. This is exactly where this guide comes in. You'll learn where the most important functions are located, how to create a new Opal, and what tasks the individual areas in the editor take on.
The video is only loaded from YouTube when you play it – data (including your IP address) is then transmitted to YouTube/Google. More in the privacy policy
Opal is an experimental tool from Google Labs. There, you can create your own applications, so-called Opals, or use, customize, and extend existing templates. To help you find your way around this environment, we'll go through the interface step by step: from the top menu via the start page to the actual editor.
One preliminary note: the topic of Nodes is only touched on briefly in this overview. The detailed Node functions will be covered in a follow-up video. Here, you first get the foundation on which you can build later.
Key Takeaways
Key Takeaways
- The top menu offers search, settings, feedback, status updates, the Discord server, and a demo video.
- On the start page, you create a new Opal with "Create new" or open a template from the Galleries.
- In the editor, you'll find the name, the App/Editor toggle, Save, and Share in the header.
- The areas User Inputs, Generate Output, and Add Assets determine what your Opal accepts, processes, and outputs.
- On the right side, you display the areas Preview, Console, Steps, and Sims.
Step 1: The Top Menu and Search
Start at the top edge of the start page. There you'll find the search function, which you can use to search for Opals that have already been created, both your own and examples. This saves you a lot of time when you want to find a particular application again.
To the right of it are the settings. In addition, several links are available there: Feedback, status updates, the Google Labs Discord server, and a demo video. The demo video gives you a good idea of what Opal can do overall before you try something yourself.

Step 2: Using Your User Area and the Galleries
In the area for your user, you can create new Opals. If you click on your user area, you get to an overview where you can create a new Opal directly with the "Create new" button. So the process is self-explanatory; you just have to click this button.
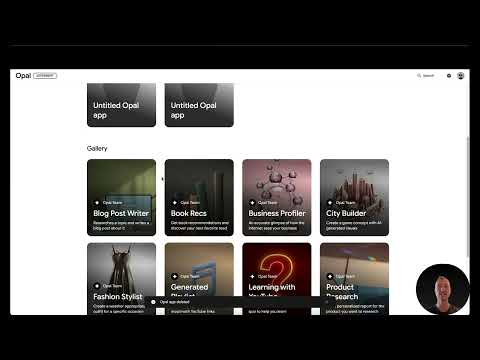
It's also worth taking a look further down. There you'll find the Galleries with examples. These are ready-made Opals that you can run directly. You can also use them as a starting point to change, improve, or extend them. Especially at the beginning, the Galleries are a good way to understand the logic behind an Opal.
Step 3: Creating a New Opal
To create your first own Opal, click "Create new" again. The interface of the workflow creator then opens. At first glance, it may seem a bit cluttered, but the individual elements can be easily divided into groups. We'll take a closer look at this in the next steps.
Step 4: The Header of the Editor
At the top of the editor, you'll first find the name of your Opal. Right next to it, it shows that Opal is an experimental tool from Google. There is also a toggle between App and Editor. Exactly how these two views work together will be explained in more detail in the follow-up video.
On the right in the header is the "Save" button. It shows you that the current state of your Opal has been saved. Keep an eye on this indicator, especially when you're making longer changes.
With the "Share" function, you can share your created application with other people. This is handy if you want to make a workflow available to a colleague or friend.

Step 5: Understanding Inputs, Outputs, and Assets
Directly below the header, you encounter three central building blocks: User Inputs, Generate Output, and Add Assets. They form the basic framework of every Opal.
With User Inputs, you specify which inputs your Opal expects from the user. With Generate Output, you define which result should ultimately be generated and displayed. With Add Assets, you add additional files or resources that your Opal needs for its work.
If you internalize these three terms, building your own workflows becomes much easier. You will then think first about the input, then about the processing, and finally about the output.
Step 6: Using Full Screen, Zoom, and the Prompt
In the editor, you can switch the view to full-screen mode. This is helpful if you want to keep as much of an overview as possible with more complex workflows. There are also buttons for zooming in and out. With them, you adjust the display of your workspace without changing the content.
In addition, you will find a prompt in the editor. It forms the basis for the description with which you tell your Opal what it should do. The prompt is explained in more detail in the next video.
Step 7: The Right Side with Preview, Console, Steps, and Sims
On the right side of the editor, there are four tabs: Preview, Console, Steps, and Sims. Preview shows you a preview of your Opal, with which you can check the result directly. The Console is an area for outputs and messages. Under Steps, you see the individual steps of your workflow. The Sims tab is only mentioned briefly in the video, so you should explore it yourself when trying things out on your own.
Don't worry if these areas seem unclear to you at first. Their meaning will become clear on its own once you have built your first workflow.

Step 8: Privacy and More Opal Apps
At the bottom of the interface, you will find links to "Privacy and Terms" as well as to "View more Opal Apps". If you have data protection questions, it is worth taking a look at the privacy notices. There you can find out which information is processed and which terms apply.
Via the link to more Opal apps, you get an overview of additional applications that you can use as inspiration for your own projects.
Summary – Understanding the Google Opal User Interface
You now know the most important areas of Google Opal. In the top menu, you will find search, settings, and help resources. On the start page, you create new Opals with "Create new" and access ready-made examples via the Galleries. In the editor, Name, Save, and Share control your work, while User Inputs, Generate Output, and Add Assets determine the structure of your workflow. Preview, Console, and Steps on the right side help you with testing and understanding. With this overview, you are well prepared to create your first own workflow in the next step.

