
You built an agent in Agent Builder and wonder how it ends up on your own website? That is exactly what I will show you in this tutorial. The path leads through publishing the workflow, retrieving the API key and workflow ID, and working with a starter app in a coding interface. This tutorial is aimed at beginners who have already created a workflow but have no experience with repositories and Python yet.
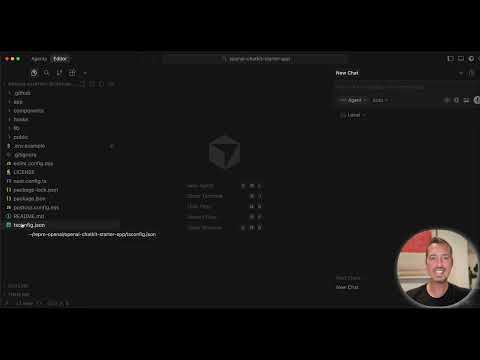
The video is only loaded from YouTube when you play it – data (including your IP address) is then transmitted to YouTube/Google. More in the privacy policy
Key Takeaways
A workflow must be published before it can be accessed from the outside. To integrate it with ChatKit, you need two pieces of information: an API key and the workflow ID. You enter both in a local environment file. The route via the starter app requires basic knowledge of Git, Python, and a code editor. With Cursor, you can have an AI help you adapt the code.
Step 1: Publish the Workflow
The first step is publishing. Without publishing, your workflow will not work, even if you have access to ChatKit. Open Agent Builder, select the workflow you want to integrate, and click Publish at the top. After that, the workflow is deployed and can be accessed. From this moment on, the code section of the workflow contains the information you will need later.

In the code section of the published workflow, you see two options: ChatKit and the Agent SDK. Both get you to the goal, but they differ in effort. ChatKit is the simpler variant because you get by with little programming. With the Agent SDK, you have to integrate your agent into your own code yourself. For this tutorial, you stick with ChatKit.

Step 2: Read the ChatKit Documentation and the Quickstart
Before you get started, open the quickstart that OpenAI provides for ChatKit. Read it through carefully. A common misunderstanding is that clicking Publish immediately makes the application available on your website. That is not the case. You need a frontend, a small server, and some configuration. The documentation explains the individual building blocks step by step, even if it seems complicated at first.

Step 3: Get the Starter App from GitHub
The starter app is available as a repository on GitHub. You can download it, retrieve it via a URL, or clone it directly. To get started, the HTTPS address is enough; SSH is not necessary. Copy the address from the code section of the starter app.
If you are not yet familiar with Git, learn about repositories, commits, and cloning beforehand. GitHub is basically easy to use, but it requires a bit of familiarization.

A convenient option is Cursor's agent, which clones the repository for you. Enter the GitHub link in the agent and have the copy created. After that, you have the project in your own account and can continue working with it.

Step 4: Open the Project in Cursor
Cursor is a coding interface that relies on AI support. The application costs a monthly subscription, but there is a free version with limited functionality. Download Cursor for your operating system and install it. On first launch, you can choose between different layouts. The agent layout is well suited for getting started.
In Cursor, you click Clone Repository and paste the copied GitHub address. Then you choose a local folder where the project will be saved, and open it. On the left side, you now see all the files: the application, the ChatKit components, and the example configuration.


Step 5: Create and Enter the API Key
The starter app requires an OpenAI API key. You get it in the API Keys section of the OpenAI platform. Click Create new secret key there and select the appropriate project. You only see the key in full once, so you should store it securely. It begins with sk and is very long. Never share it publicly, for example in a screenshot or in a code repository that is visible to others.

In the project, you will find a file named example. It contains the variables the application needs. Use it to create a new local file named .env.local. Enter your API key there after the variable for the OpenAI key. Then save the file.

Step 6: Copy the workflow ID
In addition to the API key, you need the workflow ID. It identifies exactly the workflow you have published. To find it, open your agent again, select the desired workflow, and make sure it is published. In the code section under ChatKit, you will find the workflow ID, which begins with wf. Copy it and paste it into the .env.local file at the variable for the workflow ID. Then save the file.


Step 7: Start the application locally with an AI
In Cursor, you can ask the integrated AI to run the code. It creates the necessary configuration, starts a local server, and shows you where the repository information is stored. In a test, in this example, a local environment file additionally had to be created so that the application could access the credentials. The AI tells you the exact steps. Environment variables are a clean alternative here, but for getting started, the local file is sufficient.


Once the server is running, open the local address in the browser. In the example, a ready-made widget appears in which you can chat with the agent. The example showed an ebook workflow with an approval step: The user confirms an interim result, and only then does the agent continue with the next steps. Test your own workflow in the same way before you put it online.

Step 8: Bring the widget to your website
The last step is publishing on your own web space. The AI in Cursor can help you adapt the application so that it runs on your domain. It explains where to enter the domain in the repository and shows you the deployment options. It is important that you publish again after every change to the workflow. Since the project is connected to GitHub, the application retrieves the current information, and after deployment you get your live version again.

Before you venture into the integration, you should be aware that this approach takes time. You need access to a repository and a basic understanding of programming. If you still feel unsure, you can first use the Widget Builder to adjust the output format, and then work your way into the code step by step.

Summary ??? Publishing and integrating an OpenAI Agent workflow with ChatKit
You publish your workflow in the Agent Builder and choose ChatKit as the way to integrate it. Then you get the starter app from GitHub, open it in Cursor, and enter the API key and the workflow ID in a local environment file. With AI support, you start the application locally, test the workflow, and then bring the widget online. Plan for some time to get up to speed on this approach, because without basic knowledge of Git and Python you won't get far.
FAQ
Do I need to be able to program to integrate my workflow?For ChatKit, you need less programming than with the Agent SDK, but basic knowledge of Python, Git, and working with a repository is helpful.
Is it enough to publish my workflow for it to run on my website?No, publishing only makes the workflow accessible. You additionally need a frontend, a configuration with API key and workflow ID, and a deployment on your domain.
Where do I find the API key?You can find it in the OpenAI platform in the API Keys section. There you create a new secret key, which you should store securely, because it will not be displayed in full later.
Where do I find the workflow ID?It is located in the code section of your published workflow under ChatKit. It begins with wf and must be entered in the environment file.
Why shouldn't I share the API key publicly?With the key, anyone can access your account and incur costs. Therefore, store it only in local files and do not publish it in public repositories.
Can an AI help me with the code?Yes, the integrated AI in Cursor can run the code, create configurations, and suggest adjustments. You should still understand and test its suggestions.
Is Cursor free?Cursor offers a limited free version. For the full range of functions, a paid subscription is required.

