
A workflow in Google Opal looks at first glance like a diagram with many boxes connected to each other. Behind each of these processes, however, there is always the same basic structure made up of three central building blocks. Once you can confidently distinguish between inputs, logic steps, and outputs, the structure of any automation becomes much easier for you. That is exactly what this guide is about. It explains the basics to you step by step and shows which options you have in the Generate area, with the outputs, and with the assets.
The video is only loaded from YouTube when you play it – data (including your IP address) is then transmitted to YouTube/Google. More in the privacy policy
Key Takeaways
- Inputs are the starting points of a workflow. They provide the data that is worked with, for example typed-in text, uploaded files, or a trigger such as an incoming email.
- Logic steps process this data. In Google Opal, an artificial intelligence usually handles tasks such as summarizing, analyzing, filtering, or creative generation.
- Logic steps can be combined flexibly. You can chain them one after another, build in conditions, or create branches.
- Outputs display the final result. You can output it, present it as a web page, or have it saved directly in Google Docs, Google Slides, or Google Sheets.
- Assets such as files, YouTube links, or self-drawn graphics can additionally supplement your workflow.
Step-by-Step Guide
Step 1: Define the input as the starting point
Every workflow begins with an input. This includes everything you feed into your workflow. It can be a text that you enter directly by hand, for example via a form. But you can also upload a file. The stored data is then processed in the further course of the workflow. Always keep in mind that the input forms the foundation for everything that follows.

Step 2: Integrate files from Google Drive
If your data is already in Google Drive, you don't have to download it first. You can take it directly from Drive as an input. Alternatively, you can upload data manually. In both cases, the contents are then available in the workflow and can be processed by the subsequent steps.

Step 3: Use a trigger as an automatic starter
In addition to manual inputs, there are so-called triggers. A trigger waits for a specific event and starts the workflow automatically as soon as this event occurs. A typical example is an incoming email. The trigger monitors your email program and is activated as soon as a new message arrives. This way, your automation runs in the background without you having to start it manually each time.
Step 4: Formulate a concrete input
A practical example helps with understanding. Suppose you want to build an app that automatically creates product descriptions for an online shop. Your input can then be a short keyword phrase, such as "Running shoes men waterproof lightweight". This brief input is the basis on which the entire workflow is built. The more precisely you formulate it, the more targeted the subsequent steps will work.
Step 5: Understand the logic steps as the heart of the workflow
After the input come the logic steps. This is where the actual processing takes place, which is often referred to as the magic of a workflow. A logic step can, for example, summarize a text, analyze content, filter data, or generate a creative output. You describe to the AI in simple language what it should do. A sentence like "Summarize this text in three bullet points" is enough, and Google Opal does the rest.
Step 6: Open the Generate area and check the model
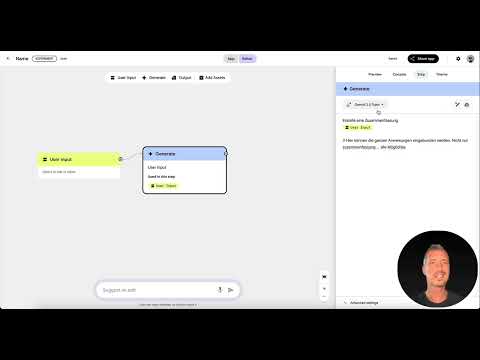
You can find the AI functions in the Generate area. When you click on Generate, you can see on the right-hand side which model is currently active. In the video, this was Gemini 2.5 Flash. Note that Google Opal is currently still in a beta phase. For this reason, not all models or functions work reliably. Before building your workflow, therefore, take a close look at which options are actually available.

Step 7: Use the available AI models at a glance
Google Opal offers you various Gemini models and functions to choose from. These include Gemini 2.5 Pro, the Plan and Execute function with Gemini 2, and Deep Research with Gemini. The advantage: you don't access them through a separate API but use the functions directly in Opal, as they are firmly integrated. For images, Gemini Flash Image is available, which was described in the video as very powerful. For instrumental music from text, there is the Lyria model. Choose the model that suits your task.
Step 8: Create Multiple Generate Blocks for Different Tasks
You don't have to define just a single AI task. You can build multiple Generate blocks with different functions. One block can create a summary, another can extract keywords from the text, and a third can generate an image. Keep in mind that image generation has only limited free quotas. Also give each block its own name. That way, you can immediately recognize later which step is responsible for what.

Step 9: Chain and Pass On the Results
The result of a Generate block doesn't end up nowhere. It is output as the output of that block and can serve directly as input for the next step. This creates chains that can theoretically become very long. However, make sure that each block fulfills only one clearly defined task. Otherwise, the workflow becomes confusing, and you quickly lose track. Then connect the blocks to each other so that the data flows correctly. Using the button at the bottom edge, you can also bring all elements onto one screen.

Step 10: Select the Appropriate Output Type
The output is at the end of the workflow. It shows the finished result. Several options are available to you. With Manual Output, the result is simply displayed. Webpage with Auto Layout presents it as a web page. Save to Google Docs writes it directly into a Google document, Save to Google Slides into a presentation, and Save to Google Sheets into a spreadsheet. For a quick test, the simple output is often enough. You can then copy the text and paste it into a blog post, for example.
Step 11: Add Assets as a Supplement
In addition to inputs, logic steps, and outputs, there are assets. With them, you extend your workflow with additional content. You can upload a file, include a file from your Google Drive, or provide a YouTube link whose content is to be processed. You can also draw something directly in the workflow. This drawing then also flows into the process. Assets are not a mandatory component, but they offer you many possibilities for individual results.

Summary – Google Opal Workflows: Understanding Inputs, Logic Steps, and Outputs
A workflow in Google Opal consists at its core of three elements. The inputs supply the data, the logic steps process it with the help of AI, and the outputs present the result. These building blocks are supplemented by assets such as files, links, or drawings. If you plan the connections between the individual blocks cleanly and limit each block to a clear task, you can build even complex automations in an organized way. It's best to experiment with simple examples before you create larger chains.
FAQ
What is an input in Google Opal?An input is everything you feed into your workflow. This includes typed text, uploaded files, or a trigger, such as an incoming email.
What does a logic step do?A logic step processes the data from the input. Typical tasks include summarizing texts, analyzing content, filtering data, or generating creative outputs.
Do I need to know a programming language to build a workflow?No. You describe to the AI in simple language what it should do. A sentence like "Summarize this text in three bullet points" is enough for many tasks.
Can I combine multiple logic steps with each other?Yes. You can chain steps one after another, build in conditions, and create branches. However, make sure that each step has only one clear task so that the workflow stays clear and organized.
What output options are there?You can output the result as Manual Output, display it as a web page with Auto Layout, or have it saved directly in Google Docs, Google Slides, or Google Sheets.
Are all AI models in Google Opal immediately usable?No. Google Opal is currently in a beta phase. Not all models and functions are reliably available, so you should check in advance which options work.
Are there limitations on image generation?Yes. Image creation has only limited free quotas. For unlimited use, you need a corresponding version from Google.
What are assets in a workflow?Assets are additional elements that supplement your workflow. These include uploaded files, files from Google Drive, YouTube links, and your own drawings.

