
When you open Google Opal for the first time, you see many buttons, tabs, and input fields all at once. This overview helps you find your way around quickly. You will learn where to name your workflow, how to switch between the app view and the editor view, and what the User Input, Generate, and Output areas are for. I will also show you how a simple workflow is created by hand. You don't need any programming knowledge for this, just curiosity and a Google account.
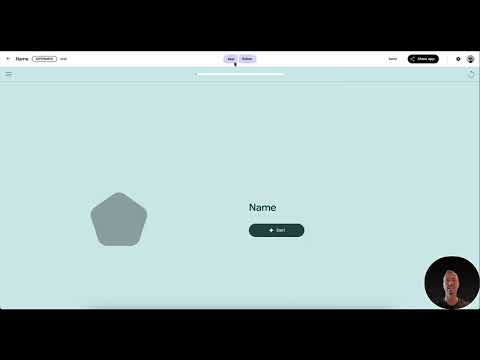
The video is only loaded from YouTube when you play it – data (including your IP address) is then transmitted to YouTube/Google. More in the privacy policy
Key Takeaways
- The workflow has its own name at the top, which you can change at any time.
- The editor is used to build individual steps, while the app shows the finished result.
- Using a prompt, you can have a workflow created via text input or voice input.
- The User Input, Generate, and Output areas form the basic framework of every step.
- Assets such as images, texts, or files from Google Drive can be integrated into the workflow.
Step-by-Step Guide
Step 1: Name the workflow
At the very top of the screen, you will find the name field of your workflow. Click on it and assign a meaningful name, such as "Blog Article Ideas". A clear name will help you keep multiple projects apart later, especially if you create many workflows in parallel.

Step 2: Switch between app mode and editor mode
Right next to the name is the toggle between App and Editor. In the editor, you build the individual steps of your workflow and connect them with each other. The app view, on the other hand, shows what the result will look like to users in the end. You should therefore switch back and forth between the two views to check whether your connections lead to the desired result.

Step 3: Use full screen and zoom
Above the workspace, you will find the tabs for Preview, Console, and another area that the speaker refers to as "SAM". With the full-screen option, you gain significantly more space for the editor. This is particularly helpful once your workflow consists of many steps. In addition, you can zoom in and out of the view so that you keep an overview without losing touch with the details.
Step 4: Enter a prompt
The prompt field works similarly to a chatbot. You describe what your workflow should accomplish and submit the input. Opal then creates a structure of steps from it. Alternatively, you can also dictate the prompt via voice input. After submitting, in addition to the generated workflow, you receive additional hints and suggestions that you can use as a basis for your own adjustments.
Step 5: Use the demo as a template
Below the prompt area, there is a demo that shows step by step how a workflow is structured. Open it if you are unsure how to combine individual building blocks. You can study the demo and then recreate its logic in your own project. This way, you learn the structure without starting from scratch.
Step 6: Understand the core functions
The three most important building blocks of a step are User Input, Generate, and Output. With User Input, you define what information the user should provide, such as a topic or a section of text. With Generate, you select the language model that processes the input. Finally, in the Output area, you determine what should happen with the result. Think of the three fields as a chain: input, processing, output.

Step 7: Define output options and connect
In the Output area, various options are available to you. You can choose a manual output, have a web page generated with an automatic layout, or save the result directly in Google Docs. You establish the connection between the steps by dragging the output of one step to the input of the next step. Once the connections are correct, your workflow is ready for testing.

Step 8: Switch to the Application view and start
When you have finished building the workflow, switch to the Application view. There you see the application the way a user will see it later. With a click on Start, you run the workflow. Make sure that all steps are connected to each other, because a workflow without content or without connections will not deliver a result.
Step 9: Integrating Assets
Under Assets, you will find options for adding content to your workflow. You can upload your own files, access Google Drive directly, or embed content from YouTube. You can also add texts or drawings. You can insert an image as well and then connect it to a step. This way, you enrich your workflow with your own materials.

Step 10: Checking Preview, Console, and Steps
A simple workflow is basically finished at this point. The Preview shows you the app in a preview. The Console displays outputs and any error messages that help you with troubleshooting. In the Steps area, you see all the individual building blocks you have added. Check these three places after every major change, so that errors are noticed early.

Summary – Google Opal Navigation: Editor, App Mode, and Core Functions Explained
You have now gotten to know the most important areas of the interface. You name your workflow at the top, switch between Editor and App, and use full screen and zoom for complex projects. With a prompt or voice input, you create a first draft, which you adjust with the building blocks User Input, Generate, and Output. Assets supplement your content, and Preview, Console, and the Steps help you with checking. The next step continues with the basics of workflows.
FAQ
What is the difference between Editor and App in Google Opal?In the Editor, you build and connect the individual steps. The App shows you the finished result as a user would see it.
What are the User Input, Generate, and Output areas used for?User Input determines what information the user provides. Generate determines the language model used, and Output determines what happens with the result.
Can I also create a workflow without building it manually?Yes, using the prompt field you can describe what the workflow should accomplish. You can also dictate the prompt via voice input.
How do I start my workflow?Switch to the Application view and click Start. Beforehand, make sure that all steps are correctly connected to each other.
Which assets can I use in Google Opal?You can upload your own files, access Google Drive and YouTube, and add texts, drawings, and images.
Where do I find error messages for my workflow?Error messages and outputs appear in the Console. There you can check why a step is failing.

