

You know the problem: two shapes are lying on top of each other, and you want to remove the overlapping area, punch one shape out of the other, or combine both into a single path. Doing it by hand takes a long time and quickly becomes inaccurate. The Pathfinder palette in Adobe Illustrator handles these tasks with just a few clicks. In this tutorial, you will learn the most important functions and see how to check results and undo them if necessary.
The video is only loaded from YouTube when you play it – data (including your IP address) is then transmitted to YouTube/Google. More in the privacy policy
Key Takeaways
- You open the Pathfinder via the Window menu and select Pathfinder there.
- The top four functions (Unite, Intersect, Exclude, and Minus Front) cover most tasks.
- The Minus Front function cuts the front shape out of the shape underneath it.
- Minus Back is the counterpart to this and cuts the back shape out of the front one.
- A result is created as a compound path. Using Expand back, you can separate the original objects again.
Step 1: Open Pathfinder
First, open the Pathfinder palette. To do this, go to Window in the top menu and select Pathfinder there. The palette then appears as its own panel in your workspace. You can move it like all other palettes and dock it permanently in the workspace if needed.

Step 2: Prepare test objects
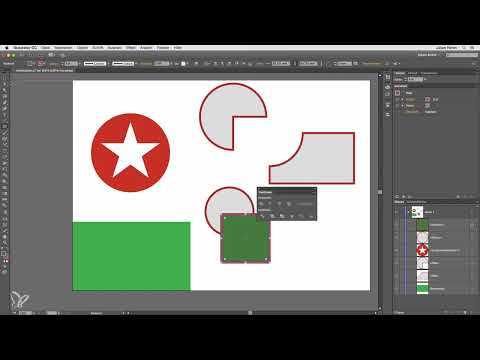
Before you work with the Pathfinder, you need two overlapping objects. For example, create a red circle and place a star with a white fill color on top of it. On a white background, it now looks as if the star has been cut out of the circle. However, this illusion disappears as soon as you place a colored background underneath. The white area is a real object and does not let the background show through.
Step 3: Minus Front
Select both objects, for example by dragging a selection with the mouse button held down. Then click the Minus Front function in the Pathfinder palette. The front object, in our example the star, is punched out of the circle. At first glance, little changes visually because the white area remains visible. In the Layers palette, however, you can immediately see that the two objects have now become a compound path.

Step 4: Check the result
To check whether the cutting worked, drag the result onto a colored background. Now the difference shows: the background shines through the cut-out area. So you have actually created a cut-out in the circle and not just laid a white area over it.

Step 5: Unite objects
The Unite function merges overlapping shapes into a single path. To do this, create a circle and a rectangle that partially overlap. Select both objects and click Unite in the Pathfinder palette. The intersections disappear, and you get a single continuous shape. With the keyboard shortcut Command plus Z, you can undo the step if needed.

Step 6: Create an intersection
With the Intersect function, only the area where the two objects overlap is retained. All parts outside this area are removed. To do this, select both objects again and click Intersect. The result is useful, for example, when you want to trim a shape exactly to the outline of another.
Step 7: Exclude overlap
The Exclude function reverses the principle. Here, exactly the overlapping area disappears, while all remaining parts are retained. Note that this function only affects the fill color and not the strokes. The result consists of several objects, which are automatically created as a group in the Layers palette. If you drag an object out of this group, you can then edit it individually.
Step 8: Overview of the lower functions
In the lower area of the Pathfinder palette, you will find further tools such as Divide, Trim, Merge, Crop, Outline, or Minus Back. These functions are useful in certain situations. Try them out at your leisure by experimenting with different test shapes. For most of your tasks, however, the top four functions are enough.

Step 9: Subtract Back Object
This function is the counterpart to Subtract Front Object. To do this, create a new circle and a rectangle and give the rectangle a different color so you can better tell the two shapes apart. Select both objects and choose Subtract Back Object. In this case, the back circle is subtracted from the front rectangle. If you want to achieve the opposite, choose Subtract Front Object. Then the rectangle is cut out of the circle. This way you control exactly which shape cuts through the other.
Step 10: Convert Compound Path Back
Sometimes you realize later that you want to edit the objects separately again after all. To do this, select the compound path. Then go to Object in the menu, move to Compound Path, and click Release. Afterwards, the original objects are separate again in the Layers panel and can be moved and edited individually. This trick also helps you when you have combined something with the Pathfinder and want to undo the process.

Summary – Pathfinder in Illustrator: Combining and Cutting Out Shapes
The Pathfinder is a central tool when you want to combine shapes in Illustrator or remove parts of them. Open the panel via Window and Pathfinder, and then use the top four functions for most tasks. Subtract Front Object and Subtract Back Object cut shapes off from each other in a targeted way, Unite joins them together, and with Intersect and Exclude Overlap you select the overlapping area or hide it. Results appear as compound paths, which you can dissolve again if needed via Release.
FAQ
What is the Pathfinder in Illustrator mainly used for?The Pathfinder is used to combine multiple shapes with each other or to cut away parts of them, for example by punching out or uniting.
Why does the star still look the same as before after subtracting on a white background?The star's fill is white and does not let the background show through. Only when you place the result on a colored background do you see the real cutout.
What is the difference between Subtract Front Object and Subtract Back Object?Subtract Front Object cuts the front shape out of the back one. Subtract Back Object does the opposite and cuts the back shape out of the front one.
What happens with the Intersect function?Only the area where the objects overlap is retained. All other parts are removed.
Does the Exclude Overlap function also affect the strokes?No, the function only affects the fill color. The strokes remain unchanged.
How do I separate a Pathfinder result back into individual objects?Select the compound path and go to Object, Compound Path, and Release in the menu.
Can I undo a Pathfinder step?Yes, with the keyboard shortcut Command plus Z (on Windows Ctrl plus Z) you undo the last step.

