

Turning a photo into a vector graphic sounds like hours of manual work with the Pen tool. With Image Trace in Adobe Illustrator, the software does it for you, usually within a few seconds to minutes. The result looks like a hand-drawn template made of flat colors and clear outlines. In this tutorial, I will guide you step by step through the most important settings: from the first time you call up the command, through fine-tuning, to converting to real vector shapes and saving the colors in your own color library.
The video is only loaded from YouTube when you play it – data (including your IP address) is then transmitted to YouTube/Google. More in the privacy policy
Key Takeaways
Image Trace automatically converts pixel images into vectors. The results depend mainly on the settings for photo fidelity, number of paths, colors, and corner points. You can save your own presets and apply them to other images. Only after converting to vector shapes do you get editable paths, and the colors used can be saved as swatches.
Step-by-Step Guide
Step 1: Finding Image Trace
First, open the image you want to vectorize. As soon as you select a pixel image, the "Image Trace" command appears at the top in the control bar. You can click it directly to apply the default preset.

Step 2: Calling Up Presets and Opening the Dialog
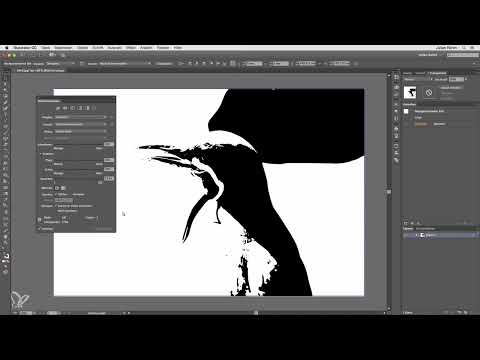
Next to the command you will find a small arrow. A list with various presets opens there. For your first attempt, you can simply choose "Trace Image". If you don't like the result, use the button on the dialog to open the complete overview, where all settings can be changed.
Step 3: Looking at the First Result
After selecting the default preset, you see a first result. It usually already shows the basic shape of the subject, such as the bird in our example, but often looks too rough or unsuitable. That is exactly why it is worth taking a look at the detailed settings.

Step 4: Switching to High Fidelity Photo
For photos, I recommend choosing the "High Fidelity Photo" preset in the dialog. It reproduces the original as accurately as possible. Depending on your computer's performance and the image size, the calculation can take a few seconds or somewhat longer. So be patient until Illustrator is finished.

Step 5: Checking the Result More Closely
When the calculation is complete, you can clearly see the difference. Small color breaks may appear in the image. This is because the result now consists of individual vector shapes and no longer of pixels. Zoom in closer to assess the shapes. Especially for artistic effects, this look can be very appealing.

Step 6: Adjusting Colors and Number of Paths
In the dialog, you can set the number of colors. Set the value higher if you want to keep as many color nuances as possible, or lower if you prefer a reduced style. With the number of paths, you determine how many paths Illustrator creates. The higher the value, the more fine details are created, but the longer the calculation takes. A value of around 70 percent often offers a good middle ground.

Step 7: Setting Corner Points Sensibly
With the corner points, you determine how much the result consists of straight lines and sharp corners. High values produce many corners and can make the graphic look angular. Low values smooth the edges, so that almost only curves remain. Here too, a balanced value is usually the best choice. It is best to try out the settings one after the other and observe the preview each time.
Step 8: Trying Out Color Modes
The dialog also offers various color modes. You can work with just three colors, with grayscale, or with a fixed number of colors such as 16. Especially with simple subjects, reduced color modes create appealing poster looks. Use the preview to check the effect directly before you accept the settings.

Step 9: Save your own preset
Once you are satisfied with the result, you can save your settings as a preset. To do this, open the "Presets" menu and choose "Manage Presets" or "Save as New Preset". Give it a fitting name, for example "High Fidelity Photo", and confirm with "OK". You will then find the preset at the very bottom of the list.

Step 10: Apply the saved preset to other images
If you want to restore the original, simply undo the steps. After that, you don't need to open the large dialog again. Select the image, click the arrow next to the command, and choose your saved preset. Image Trace then calculates the result with exactly your settings. This is especially handy if you want to treat several similar images the same way.

Step 11: Convert the image into true vector shapes
Once you are satisfied with the result, you convert the image into editable vector shapes. To do this, go to "Object" in the menu, then "Expand". Illustrator asks whether you want to expand the object and the fill. Confirm both with "OK". Afterwards, the graphic consists of many individual paths that can be edited. At first glance this looks very cluttered, but it is exactly the result that makes Image Trace so valuable.

Step 12: Note the layer structure and the drawback
In the Layers panel you will now find no image file anymore, but a group containing all the elements. Note that subsequent changes to individual paths are very time-consuming. Image Trace is therefore mainly worthwhile for images that you want to design artistically, and less so for graphics that you want to rework piece by piece later.

Step 13: Adopt colors as swatches
Another advantage shows up in the Swatches panel. In the panel's small menu, choose the command "Add Used Colors". After a short calculation, you get all the color tones of the image as individual swatches. This way you can take colors from a photo in a targeted manner and build your own color palette for the project.

Step 14: Save the swatch library
So that you can use the colors in later projects as well, you save them as a swatch library. You will find the appropriate command in the Swatches menu under "Save Swatch Library". This way the palette is available to you again at any time.

Summary ??? Image Trace in Illustrator: Vectorizing Images
With Image Trace, you turn pixel images into vector graphics that you can continue to use creatively. The command offers you presets for quick results and detailed settings for fidelity, colors, paths, and corner points. You save your own presets for recurring tasks, and after expanding you can save the colors used as swatches and as a library. Take your time to try out the options, because the possibilities are nearly limitless.
FAQ
What is Image Trace in Illustrator?Image Trace is a tool that automatically converts pixel images into vector graphics with shapes and paths.
Where do I find Image Trace?As soon as you have selected an image, the command appears at the top in the Control bar.
Why does my first result look rough?The default preset is a quick basic setting. For better results, you should adjust settings such as fidelity or number of paths in the dialog.
How long does the calculation take?That depends on your computer, the image size, and the chosen settings. High values for paths and fidelity noticeably lengthen the calculation.
How do I save my settings?Open the presets, choose "Manage Presets" and then "Save as New Preset". Give it a name and confirm with OK.
Can I apply a preset to multiple images?Yes, select the image, open the preset list via the arrow, and choose your saved preset.
What does "Expand" mean?Only after expanding via Object and then Expand do true, editable vector shapes and paths result.
How do I adopt the colors of an image?In the Swatches panel, use the command "Add Used Colors" to get every color of the image as a swatch.
How can I keep using the color palette?Save it via "Save Swatch Library", then it will be available to you in other projects.

