

Hardly any tool in Illustrator delivers impressive results as quickly as the Blend tool. With just a few clicks, you can create flowing color gradients, evenly spaced intermediate shapes, and even curves that look as if you had drawn them by hand. In this tutorial, I'll guide you step by step through the most important settings, show you the differences between the options, and give you ideas on how to use the tool creatively.
The video is only loaded from YouTube when you play it – data (including your IP address) is then transmitted to YouTube/Google. More in the privacy policy
Key Takeaways
- The Blend tool creates intermediate steps between two or more objects or lines.
- In the options, you specify whether you want to use Specified Steps, Specified Distance, or the Smooth Color option.
- With the preview, you can see the result before you apply the blend.
- With the Direct Selection tool, you can move anchor points, and the blend adjusts automatically.
- You can adjust the blend again at any time by double-clicking the tool.
Step-by-Step Guide
Finding and Opening the Blend Tool
You can find the Blend tool in the toolbar. Double-clicking the icon opens the options window. There you have all the settings you need for blending.

Understanding the Options
In the options window, you specify how the intermediate steps are calculated. You can choose between "Specified Steps," "Specified Distance," and "Smooth Color." To start, it's best to stick with specified steps and set, for example, four. Then confirm with OK.
Blending Two Lines
The preview is grayed out at first. This is normal, because there is no object yet to which it can be applied. Therefore, confirm your setting with OK. Then click first on the upper line and afterward on the lower line. Illustrator then creates four intermediate steps between the two lines.
Checking the Result and Activating the Preview
If you now open the options again, the preview is active. You can change the number of steps with the up or down arrow keys and see the changes immediately. This way, you can quickly see how the intermediate steps behave.

Creating a Gradient with High Step Counts
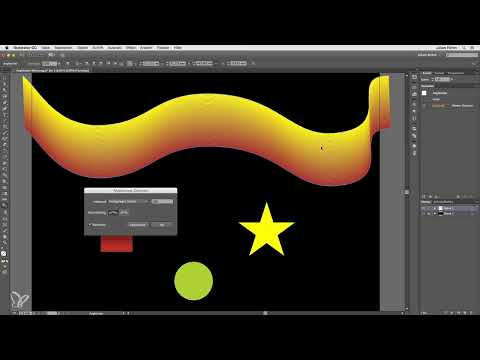
Now set the number of steps very high, for example to 500. The individual lines then lie so close together that you can no longer tell the difference between a filled area and individual paths. The shape looks like a clean color gradient. This effect is ideal for backgrounds or soft transitions.

Reducing the Step Count Gradually
If you reduce the number gradually, for example to 200, 100, and finally 50, you will see the individual lines become visible again. In this way, you find the step count that matches your desired style. This allows you to create complex shapes very quickly and easily without having to draw each line individually.

Modifying Anchor Points with the Direct Selection Tool
The blend can also be shaped afterward. Select the Direct Selection tool and click on an anchor point of one of the original lines. If you move this point, the blend adjusts automatically. In this way, you create, for example, the impression of a bulge, as if a curve were arching forward and tapering off again toward the back.

Adjusting the Blend at Any Time
You can reset the settings at any time. To do so, double-click the Blend tool again, activate the preview, and change the steps. If you also hold down the Shift key while pressing the arrow keys, you jump up or down in steps of ten. This saves time with larger adjustments.

Blending objects instead of lines
The tool works not only with lines but also with objects. First select the square, then activate the Blend tool and click first on the square and then on the circle. If you want to connect several shapes, also click on the star in turn. This creates a blend between three shapes.

Adjusting the orientation
If you open the options window again and activate the preview, you will find the orientation. By default, it is set to "Align to Page". If you choose "Align to Path" instead, the blend is rotated along the path. This opens up entirely new creative possibilities for you.

Working with "Smooth Color"
Instead of the specified steps, you can also choose the "Smooth Color" option. This gives you a smooth color gradient. Note that not only the color is blended, but also the shape. From a rectangle and a circle, for example, an intermediate shape with a curve is created.

Using the specified distance
Another option is the "Specified Distance". If you set it to 50 mm, for example, Illustrator places a blend step every 50 mm. If you choose 1 mm instead, you get practically the same result as with the specified steps with a correspondingly high number of steps. This comparison shows you how closely the two methods are related.
Achieving a smooth gradient
If you set the number of specified steps back up, you again get a smooth gradient. With a little practice, you will quickly find the right combination of steps, distance, and orientation for your project.

Summary – Blend Tool in Illustrator: Creating Creative Gradients and Shapes
The Blend tool is versatile. You can connect lines and objects, create color gradients and intermediate shapes, and adjust the results at any time via the options or the Direct Selection tool. Take your time trying out the settings. The more often you experiment with steps, distance, and orientation, the more purposefully you will use the tool in your own projects.
FAQ
How do I find the Blend tool in Illustrator?You will find it in the toolbar; double-clicking the icon opens the options.
Why is the preview in the options window initially grayed out?The preview is only available once you have already selected objects or lines for the blend.
What does a high number of steps do?With high values, the intermediate lines lie so close together that a flowing color gradient is created.
How can I change the shape of a blend afterwards?Move an anchor point with the Direct Selection tool, and the blend adjusts automatically.
Can I connect more than two objects with the Blend tool?Yes, you can select multiple objects one after the other, for example a square, circle, and star.
How do I set the number of steps more quickly?Use the arrow keys to change the number; together with the Shift key, you jump in steps of ten.
What is the difference between specified steps and specified distance?With specified steps, you determine the number of intermediate steps; with specified distance, you set the distance between the steps.

