

An artwork can be as successful as you like: if the file is handled incorrectly when saving, it can no longer be opened later, white edges appear at the edge of the paper in print, or the image is missing in the layout program. The save options in Illustrator seem inconspicuous, but they decide whether your work can be reused without problems.
The video is only loaded from YouTube when you play it – data (including your IP address) is then transmitted to YouTube/Google. More in the privacy policy
In this tutorial, you will learn when to save the original Illustrator file, when a PDF makes sense, how to account for bleed and crop marks when exporting a PDF, and how to export graphics as a pixel image, for example as a PNG with transparency. The steps are based on a flyer that I show you in a practical example.
Key Takeaways
- With "Save As" (Cmd + Shift + S), you save your Illustrator file in the AI format. This is the working file with which you can make changes at any time later.
- Choose the Illustrator version that matches your recipient. Older versions display warnings about possible limitations.
- Embed linked files if you share the file or do not want to lose the links. The file size increases significantly as a result.
- Illustrator 8 is suitable for import into 3D programs such as Cinema 4D, Illustrator 3 for many cutting and plotting programs.
- When exporting to PDF, you use the bleed to determine how much bleed allowance is exported. Activate the "Trim Marks and Bleed" option so that the settings are applied.
- Via "Export," you create pixel images such as PNG, JPEG, or TIFF. With PNG, the transparency option ensures that empty areas remain empty later.
Step-by-Step Guide
Step 1: Open Save As and name the file
Open your document and go to "File" and "Save As." It is faster with the keyboard shortcut Cmd + Shift + S. A window appears in which you enter a file name and specify the save location. Make sure to choose a meaningful name that indicates the project and version, for example "Flyer_Summer_v2".


Step 2: Choose the right file format
At the bottom of the window, you will find the selection of the document format. Illustrator's own formats such as AI are available here, as well as formats such as EPS, PDF, or SVG. For your working file, you should always choose "Adobe Illustrator (ai)." This allows you to open the file easily later and make changes quickly. The other formats are suitable for sharing or further processing, but are less suitable for ongoing editing. Then confirm with "Save."

Step 3: Set the Illustrator version
In the following window, you can make various settings. First, you select the Illustrator version in which you want to save. If you are sure that you will continue working with the current version later, you can simply leave the preset version as it is.
However, if you are working with a client who uses an older version such as CS5 or CS4, you select it directly. Illustrator then warns you that individual objects may no longer be editable or that the text layout may change. You do, however, get the option to create a file that can be opened in the older version. In such cases, check your texts and objects thoroughly after opening.


Step 4: Embed linked files
In the lower area of the window, you will find the option for linked files. Placed images in Illustrator are only linked, meaning the file only stores a reference to the image's storage location. If you select the "Embed" option, all placed images are written directly into the Illustrator file. You then no longer have to worry about missing links. The downside: the overall file size grows significantly. Therefore, use this option primarily when you share the file or open it on another computer.
Step 5: Special formats Illustrator 8 and Illustrator 3
In addition to the standard options, there are two versions that you only need in special cases, but should know about.
You need the Illustrator 8 format if you want to reuse a path from Illustrator in Cinema 4D or another 3D program. Other formats do not work reliably in Cinema 4D, so Illustrator 8 is the right choice here.
The Illustrator 3 format is especially important for cutting machines and plotters. Many cutting programs handle this format very well. Newer cutting programs do support current formats as well, but with Illustrator 3 you are on the safe side when you submit a file for plotting or cutting.
Step 6: Create a PDF via Save As and select artboards
Now you choose "File" and "Save As" again, but this time the PDF format. If you have multiple artboards, you can specify in the "All Artboards" area whether all pages or only individual pages are exported. For a two-page document, for example, you can select only page 1 or only page 2. If you want to export both pages, you set the range back to "All" and click "Save".


Step 7: PDF options, marks and bleed
After clicking "Save", the window with the PDF options opens. At the top you will find predefined presets, such as "High Quality Print" or "Smallest File Size". For most applications, these presets work well. The individual settings are very extensive, so first concentrate on the most important option for printing: marks and bleed.
With a flyer that has bleed, you see two lines in the document. The black line marks the final format, that is, the later size after trimming. The red line indicates the bleed. Everything between the two lines will no longer be visible after cutting. If you enter 0 mm for the bleed, only the area inside the black line is exported. If the print shop then cuts slightly inaccurately, unsightly white stripes appear at the edge. That is why you check the box for "Marks and Bleed" when you have set up a bleed. The bleed values are then automatically applied.


Step 8: Display the PDF directly and check the format
In the "General" section of the PDF options, also check the box for "View PDF after Saving". After saving, the PDF then opens directly in Acrobat Reader. This saves you a step and helps you check the result immediately.
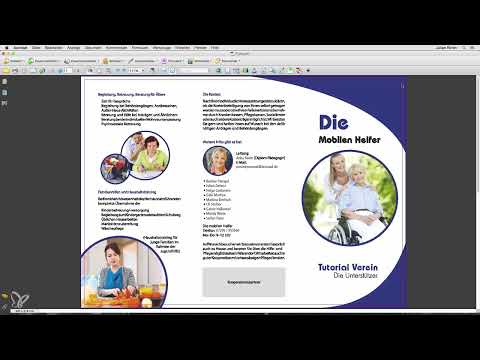
In the opened PDF, you now see the lines the other way around: The red line belongs to the final format, the blue line to the bleed. At the bottom you will find the format specification, in this example 303 x 216 mm. To verify, do the math: The final format is A4 at 297 x 210 mm. If you add 3 mm of bleed on each side, so 6 mm in total per dimension, you get exactly this format. The calculation confirms that your bleed is correctly included in the PDF.


Step 9: Save graphics as PNG via Export
Besides saving, there is the "Export" function, which you use to save graphics as a pixel image. You can find it in the menu under "File" and "Export". There you choose formats such as PNG, JPEG, TIFF or even Photoshop files. For this example, you use PNG.
In the export window, you decide at the bottom whether the artboards should be used. If you deactivate the option, you get one large PNG with both artboards. If you activate it, Illustrator writes a separate PNG file for each artboard. If you want both pages in a single document, deactivate the option and click "Export".


Step 10: Set the resolution and use transparency
In the window with the PNG options, you first set the resolution. For the web, 72 ppi is enough; for print, you choose 300 ppi. Of course, you can enter other values, but in practice you will mostly stick with 300 ppi.
Under "Preview" you will find a particularly useful setting for transparency. A PNG can store transparent areas. If you select "Transparency", all unfilled areas remain empty. Alternatively, you can set a background color, for example white, black, or a custom color value such as green. The entire background is then filled with this color. As a rule, you keep the transparency to take full advantage of the PNG format. Then confirm with "OK".

Step 11: Reuse the transparent PNG in Photoshop
If you open the exported PNG in Photoshop, the benefit of transparency becomes apparent. All areas that were not filled in Illustrator are now transparent, including the gaps between individual paint splatters. You can create a new layer beneath the graphic and fill it with a color of your choice. This creates a new background without you having to cut anything out beforehand. The transparency setting during export from Illustrator does the work.


Summary ??? Saving an Illustrator document: Formats, PDF and export
You have seen that saving in Illustrator is much more than a click on "Save". The working file in AI format preserves your ability to edit it later. With the PDF export, you define artboards, marks, and bleed and ensure a clean print result. Via "Export" you create pixel images such as PNG, where transparency saves you a lot of work in Photoshop. Special formats such as Illustrator 8 and Illustrator 3 are needed for 3D programs and cutting machines. Feel free to try out the other formats, as they work similarly.
FAQ
Question: Which format should I choose for my working file?Answer: Always choose Adobe Illustrator (ai) for your working file so that you can open and edit it later without any problems.
Question: What does "Embed linked files" mean?Answer: Placed images are written directly into the Illustrator file. You then don't have to worry about links, but the file becomes significantly larger.
Question: When do I need the Illustrator 8 format?Answer: You need it if you want to import paths from Illustrator into Cinema 4D or another 3D program.
Question: Why is the Illustrator 3 format important?Answer: Many cutting programs and plotters handle this format well and deliver reliable results.
Question: What happens if I set the bleed to 0 mm during PDF export?Answer: Only the area within the final format is exported. This can result in white edges when trimming.
Question: How do I check whether the bleed in the PDF is correct?Answer: Calculate the final format plus the bleed on both sides. For A4 with 3 mm bleed, this results in 303 x 216 mm.
Question: Which resolution should I choose for a PNG?Answer: For the web, 72 ppi is enough; for print, you should choose 300 ppi.
Question: What does transparency offer in PNG export?Answer: Unfilled areas remain empty. You can later place the image on any background without having to cut it out beforehand.

