

A wine glass pictogram only looks clean when both sides are exactly identical. That's precisely why in this tutorial I'll show you a method that saves you a lot of rework: you trace only one half, mirror it, put the copy and the original together, and join the paths into a single object.
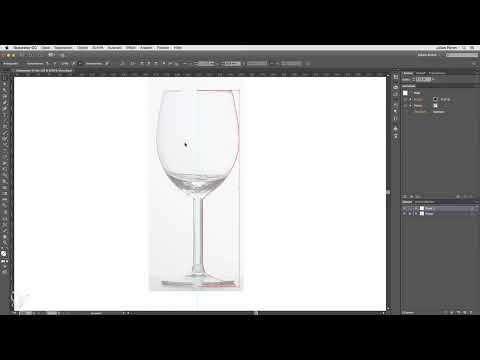
The video is only loaded from YouTube when you play it – data (including your IP address) is then transmitted to YouTube/Google. More in the privacy policy
Introduction
Imagine you want to create a pictogram for a drinks menu or an icon for a website. A photo as a reference helps you get the proportions right, but in the end the lines must be clean and vector-based. For this, I use a photographed wine glass that I place into Illustrator as a template. Along the way you'll learn the basics of the Pen tool, working with guides, and how to use mirroring and joining paths. All the steps work exactly the same if you use a different subject.
Key Takeaways
You lock a template layer so that it doesn't shift while you draw. You trace only one half of the object and use a guide as the mirror axis. You copy the mirrored path instead of mirroring it directly, so that you keep the original. With Command+J (Ctrl+J on Windows) you join separate paths together.
Step-by-Step Guide
Step 1: Prepare the Template
First, open your image file with the photographed wine glass. Then create a new layer and name it "Template". Place your photo in this layer. Double-clicking the layer opens the layer options. There you activate the "Template" box and confirm with OK. The image is then slightly dimmed, and you can lock the layer. That way you won't accidentally move it while drawing.


Step 2: Create a New Layer for the Drawing
Above the template layer, you create another layer. On this layer you draw the actual pictogram. This keeps the template untouched, and you can show or hide it at any time.
Step 3: Determine the Center with Guides
Before you get started, you need the center of the glass. Activate the rulers with Command+R (Ctrl+R on Windows). Then drag a vertical guide from the ruler to the middle of the glass. This line will later become your mirror axis. Make sure it sits exactly in the center, because the symmetry of the entire object depends on it.
Step 4: Prepare the Artboard for the Path
Select the Direct Selection tool and then the Pen tool. Before you draw, you remove the white fill color so that the shape stays transparent. You set the stroke to about 0.25 pt. This way you can see the template underneath, and the lines remain fine enough for a pictogram.
Step 5: Trace the Right Side of the Glass
Now zoom in closer on the glass so you can work precisely. Set the first anchor point at the bottom of the glass base. The bottom of the glass looks slightly slanted in the photo because the shot has perspective. That's why you draw the base as a straight line. For the transition to the body of the glass, you set another point and pull the line into a slight curve. Whether you choose a strong or subtle curve is a matter of taste. What matters is that the shape fits your style.

Work your way up point by point to the opening of the glass. That completes the tracing of half the glass.

Step 6: Understand the Problem of the Second Side
You could now trace the left side by hand. The problem with that: you will hardly manage to hit exactly the same points on the other side. A small deviation will be immediately noticeable later. That's why you mirror the path. The guide from Step 3 serves as the mirror axis.

Step 7: Finish the Path and Mirror It
Finish the path by pressing the Escape key. The path is then completed and no longer active. Next, select it with the Selection tool. Then go to the "Object" menu, then "Transform", and choose the "Reflect" command. In the dialog window you can already see a preview. Choose the "Vertical" option, because the mirror axis runs vertically through the glass. The "Horizontal" option would turn the glass upside down.


Step 8: Copy instead of mirroring directly
Now comes an important point: don't confirm the dialog window with OK yet. If you did, the existing path would simply be mirrored, and you would not have a second object. Instead, click "Copy". This way you keep the original path and also get a mirrored copy. You then move this to the other side of the glass.

Step 9: Tidy up the view
Now hide the template layer so that you only see your drawing. You can hide the guides with Command+Comma. Now you can clearly see what you have achieved.

Step 10: Join the paths
Zoom in on the spot where the two halves meet. At the bottom, the paths already close cleanly. At the top, a small gap may appear because a point was not placed exactly when mirroring. That is not a problem. Simply move the endpoints with the Direct Selection tool until they lie on top of each other.

Then select the two endpoints of the paths with the Direct Selection tool. In the Layers panel, you will initially still see two separate paths. With Command+J (Ctrl+J) you join them into a single path. Alternatively, you can also choose "Object" in the menu, then "Path", and then "Join". The shortcut is displayed to you in the menu bar.

Step 11: Remove superfluous anchor points
In the lower area of the glass, two anchor points remain after joining. Select them and also join them with Command+J. After that, you can remove a superfluous point. To do this, move the Pen tool over the point. A minus symbol appears next to the cursor. Click once, and the point disappears. This keeps the path clean and without unnecessary nodes.
Step 12: Continue editing the finished object
The glass is now a symmetrical, closed object. You can fill it with any color you like and edit it again at any time later, for example adjust the outline or move individual anchor points. Thanks to the vector shape, the quality is retained even at high magnification.

Summary – Symmetrical Pictograms in Illustrator: Mirroring and Joining Paths
With a locked template, a guide as the mirror axis, and the "Copy" command when mirroring, you can create a symmetrical object in a few minutes. Afterwards, you join the paths with Command+J and remove superfluous anchor points. This procedure can be applied to almost any symmetrical motif, from glasses and vases to icons.
FAQ
Why should I lock the template layer?A locked layer cannot be accidentally moved or selected while drawing. This way, your template stays in its position.
Why do I mirror vertically and not horizontally?With the wine glass, the mirror axis runs vertically through the center. A vertical reflection therefore creates the left side from the right. Horizontally, the object would flip upward or downward.
What happens if I confirm directly with OK in the dialog window?Then the existing path is only mirrored and not copied. You will then have only one object and no second half. Therefore, click "Copy" if you want to keep both the original and the reflection.
What does Command+J do?With Command+J (Ctrl+J on Windows) you join separate paths into a single path. The matching endpoints are linked together in the process.
How do I remove a single anchor point?Select the Pen tool and move the cursor over the point. If a minus symbol appears, click once, and the point is removed.

