

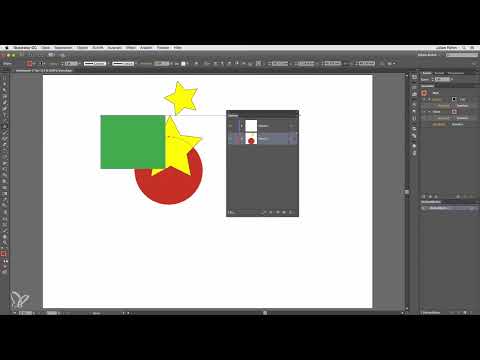
As soon as your graphic consists of multiple elements, the Layers panel determines which object is in front and which one is hidden. Here you control stacking order, visibility, and locking in Adobe Illustrator. In this chapter, you will learn how to open the panel, rearrange objects via drag and drop, name layers, hide elements, and lock them. Finally, I will show you how to dim an image to use as a template for tracing. A small document with a rectangle, a circle, and a star serves as an example. However, the principles apply equally to extensive projects.
The video is only loaded from YouTube when you play it – data (including your IP address) is then transmitted to YouTube/Google. More in the privacy policy
Key Takeaways
- You open the Layers panel via Window > Layers or faster with the F7 key.
- Objects higher up in the list are in the foreground, objects further down are in the background.
- You move objects via drag and drop within a layer or into another layer.
- The eye icon hides, the lock locks objects or entire layers.
- You set up an image as a template via the layer options by activating "Template" and "Dim Images".
Step-by-Step Guide
Step 1: Open the Layers panel
If the panel is not visible, you can find it in the Window menu under the entry Layers. It is even quicker with the F7 key. In a new document, you immediately see Layer 1. It is empty at first because you have not created any objects yet.

Step 2: Objects are automatically placed in a layer
If you draw a rectangle, it is automatically placed in Layer 1. The same applies to every additional object, such as a circle. If you color the rectangle green and the circle red, both shapes overlap. The stacking order then shows you exactly which object is in front.
Step 3: View contained objects
Next to the layer, you will find a small arrow. If you click on it, the layer expands and shows all contained objects. This way, even with multiple elements, you keep track of which object is in which layer.
Step 4: Change the stacking order via drag and drop
If the red object is in front and the green one is in the back, you can reverse the order directly. To do this, grab the rectangle in the Layers panel, drag it over the circle via drag and drop, and release the mouse button. The order changes immediately. Remember the basic rule: the topmost object in the list is always in the foreground, the bottommost always in the background.

Step 5: Sort an object in between others
Now add a yellow star. It is initially at the very top and therefore in the foreground. If you drag it via drag and drop between the rectangle and the circle, it sits exactly in the middle of the stack. This approach is suitable whenever an element is to be given a specific position in the order.

Step 6: Name layers and objects
Illustrator assigns names based on the tool used, for example Rectangle, Star, or Ellipse for a circle. With many objects, the list quickly becomes confusing. Therefore, double-click on the name, enter your own designation, and confirm with Enter. The entire layer can also be renamed, for example to "Objects". Then you can see at a glance which elements are grouped there.

Step 7: Show and hide objects
The eye icon on the left controls visibility. If you click it for a layer, the entire content is hidden. If you only want to hide a single object, expand the layer and click the eye for the relevant object, such as the star. Clicking again makes it visible again.
Step 8: Lock objects
To the right of the eye, there is a field for the lock. A click on it locks the object. If you then select all elements with the Selection tool, the locked object remains unchanged. With another click on the lock, you remove the lock again. If, on the other hand, you lock the top layer, all objects within this layer are locked as well.
Step 9: Creating Additional Layers
With large files, a single layer quickly becomes confusing. Using the small icon at the bottom of the palette, you create a new layer, which is automatically named Layer 2. New objects then land directly there. If you want to move existing objects, drag and drop them onto Layer 2. The circle then lies above the other objects because Layer 2 is above Layer 1.

Step 10: Rearranging Entire Layers
If the circle should stay in Layer 2 but lie behind the other objects, you don't move the individual object, but the entire Layer 2. Drag and drop it downward. Afterwards, Layer 2 lies beneath Layer 1, and the objects remain in their layer.
Step 11: Enlarging Thumbnails
If the thumbnails are too small, open the menu via the small arrow in the palette and choose the panel options. There you can set the size to Large or Small. Alternatively, enter a custom value, for example 50 pixels, and confirm with OK. The preview images then become larger, and when you expand a layer, you can see more precisely which object is located where.

Step 12: Moving Objects via the Selection Square
With small documents, moving things directly in the palette works well. With files containing 500 or 600 objects, however, it becomes tedious. In that case, select the desired object directly in the document. A small square appears to the right of the layer. Drag and drop this square onto the target layer, such as Layer 2, and release it. The object then switches to the other layer, even if you haven't expanded the palette.

Step 13: Dimming an Image as a Template
If you load an image into Illustrator for tracing, you should protect it from accidental shifting. To do this, don't double-click on the name of the layer, but on the thumbnail of the layer containing the image. The layer options then open. Activate "Template" there. The layer is then locked, and the editing functions are hidden. Additionally, activate "Dim Images" and set, for example, 50 percent. This setting is similar to the opacity in the upper area. Confirm with OK.

Step 14: Drawing with the Dimmed Template
Next, create a new layer and trace the path on it with the Pen tool. Because the template is dimmed, you can clearly see the course of the lines. Black paths stand out well against the light image. If you want to remove the dimming again, open the layer options again and deactivate "Dim Images". The template then has 100 percent opacity again, and your path is much harder to see on it.

Summary – Layers Palette in Illustrator: Arranging and Locking Objects
The Layers palette is the control center for stacking order, visibility, and locking in Illustrator. You have learned how to rearrange objects via drag and drop, name layers and objects, hide and lock individual elements, and create new layers. With the selection square, you can quickly move objects to another layer even in large files. You also now know how to set up an image as a template, dim it, and trace it safely.
FAQ
How do I open the Layers palette in Illustrator?Via the Window menu and the Layers entry, or faster with the F7 key.
Which object is in the foreground?The object at the very top of the Layers palette is in the foreground, the bottom one in the background.
How do I move an object to another layer?You drag and drop it onto the target layer or use the small selection square to the right of the layer.
What happens if I lock the top layer?All objects within this layer are then locked and cannot be edited.
How do I dim an image as a template?Open the layer options by double-clicking the layer thumbnail, activate Template and Dim Images, and confirm with OK.

