The StreamBossis an exciting feature that allows your streaming community to interactively engage and work towards a common goal. In this guide, I will show you how to set up the Stream Boss in StreamlabsOBS and customize it to your needs.
Main Takeaways
- The setup of the Stream Boss is done through the sources in Streamlabs OBS.
- You can set health points, various game modes, and visual adjustments.
- Your viewers can directly influence the Boss through donations and other actions.
Step 1: Select the Scene
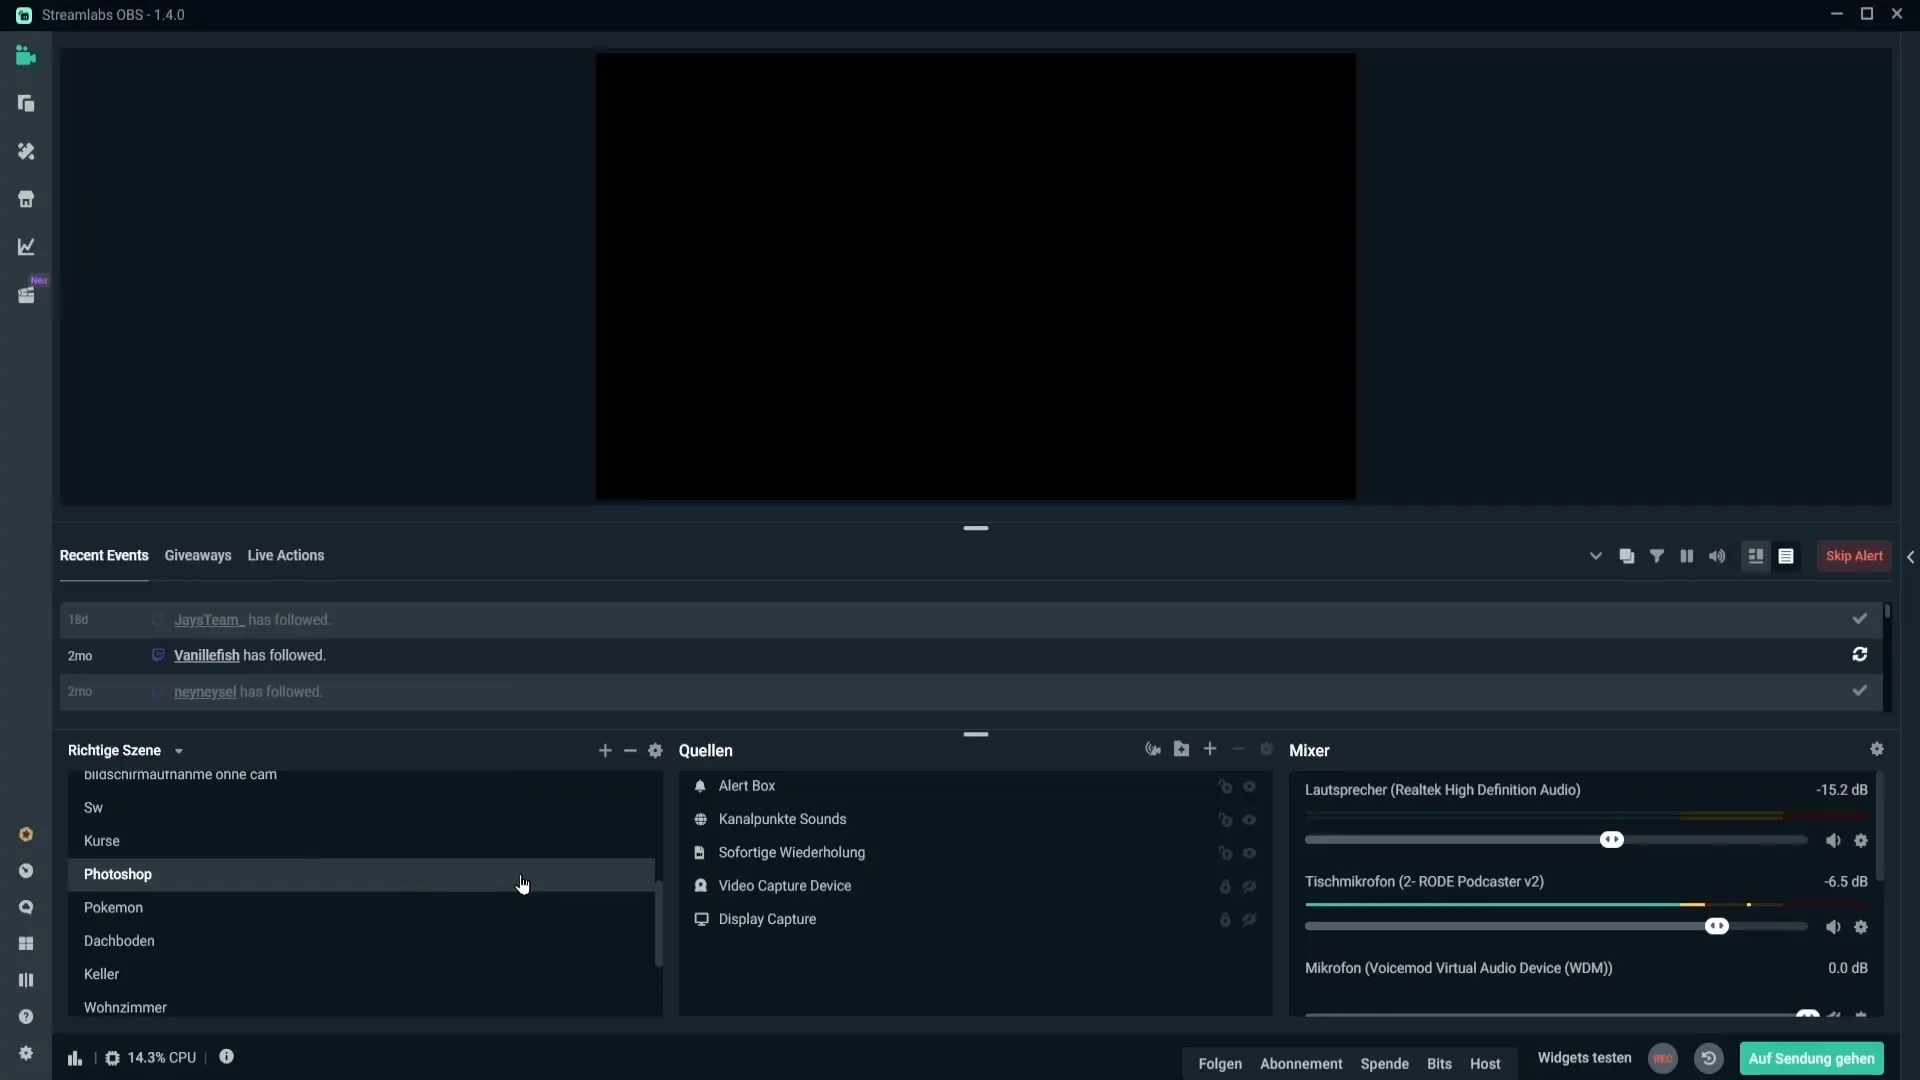
To set up the Stream Boss, first choose the scene in which the Boss should be displayed. Click on your desired scene in Streamlabs OBS and then go to the sources.

Step 2: Add the Source
Here, click on the plus symbol in the source list. Select the Stream Boss from the widgets and click on it.
Step 3: Name the Source
You have the option to give the new source a name. If you want, you can keep the default name "Stream Boss." Click on "Add Source" to proceed.

Step 4: Set the Health Points
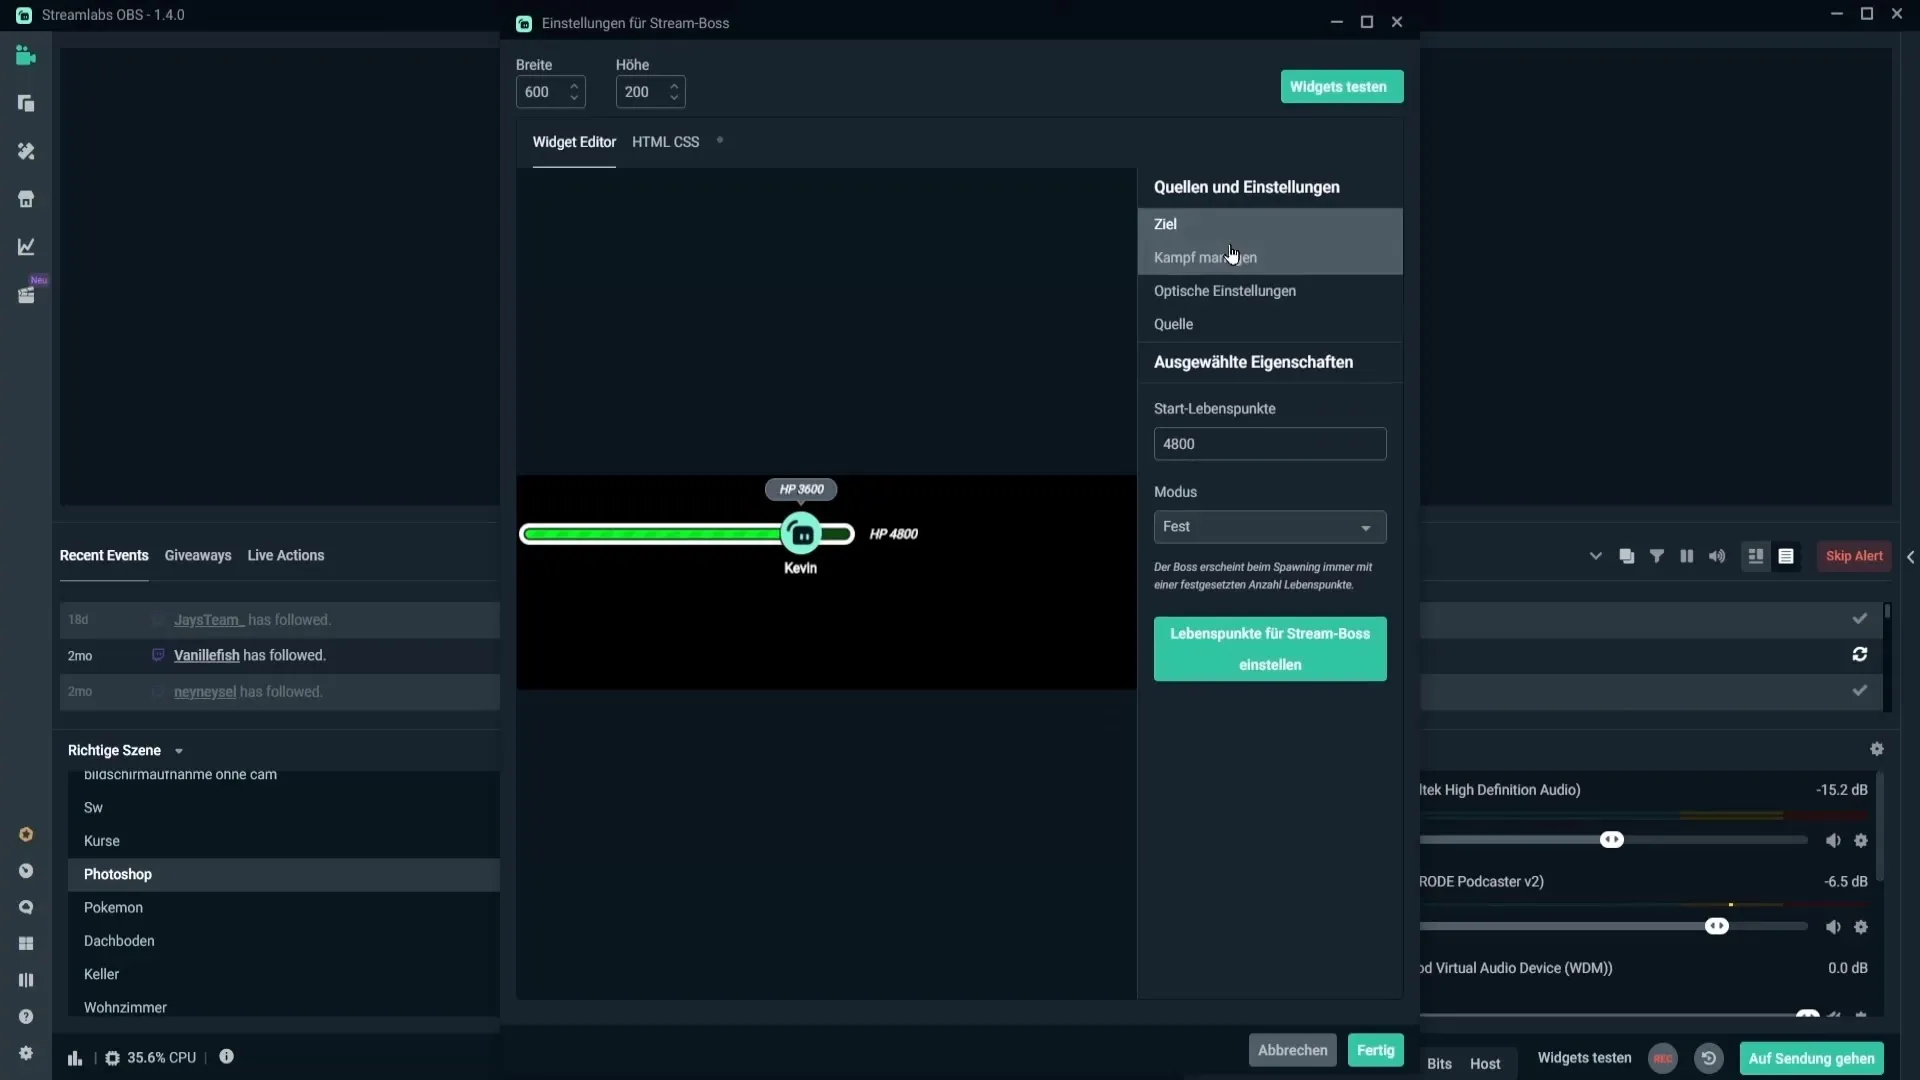
Now you can configure the health points of your Stream Boss in the widget editor. Set the starting health points, for example to 4800.
Step 5: Choose the Mode
You can choose from different game modes. The default mode ensures that the Boss returns with the set number of health points after being defeated for the first time. There are also options like "Automatically Increasing" or "Overkill."
Step 6: Overkill Mode
In Overkill mode, the Boss becomes stronger depending on the damage it takes. Set the necessary settings to activate this mode.
Step 7: Combat Management
Here, you set the fade-out time for the Boss. If you set this to 0, the Boss remains permanently visible. Otherwise, turn on the timer to determine how long the Boss is displayed after a viewer action.
Step 8: Activate Boss Healing
You can decide whether the Boss should receive healing. If you activate this, it will not be damaged by viewer actions, but will instead heal itself.
Step 9: Choose Design
In the next step, you can choose from various Boss designs. Try out a few designs to find the one that you and your audience like best.
Step 10: Damage and Customizations
Set the damage the Boss takes from viewer actions. This includes damage from bits, subscriptions, follows, and donations.
Step 11: Animation Setting
You have the option to select a kill animation that will be displayed when the Boss is defeated. Test different animations to see which fits best with the style of your stream.
Step 12: Color Customization
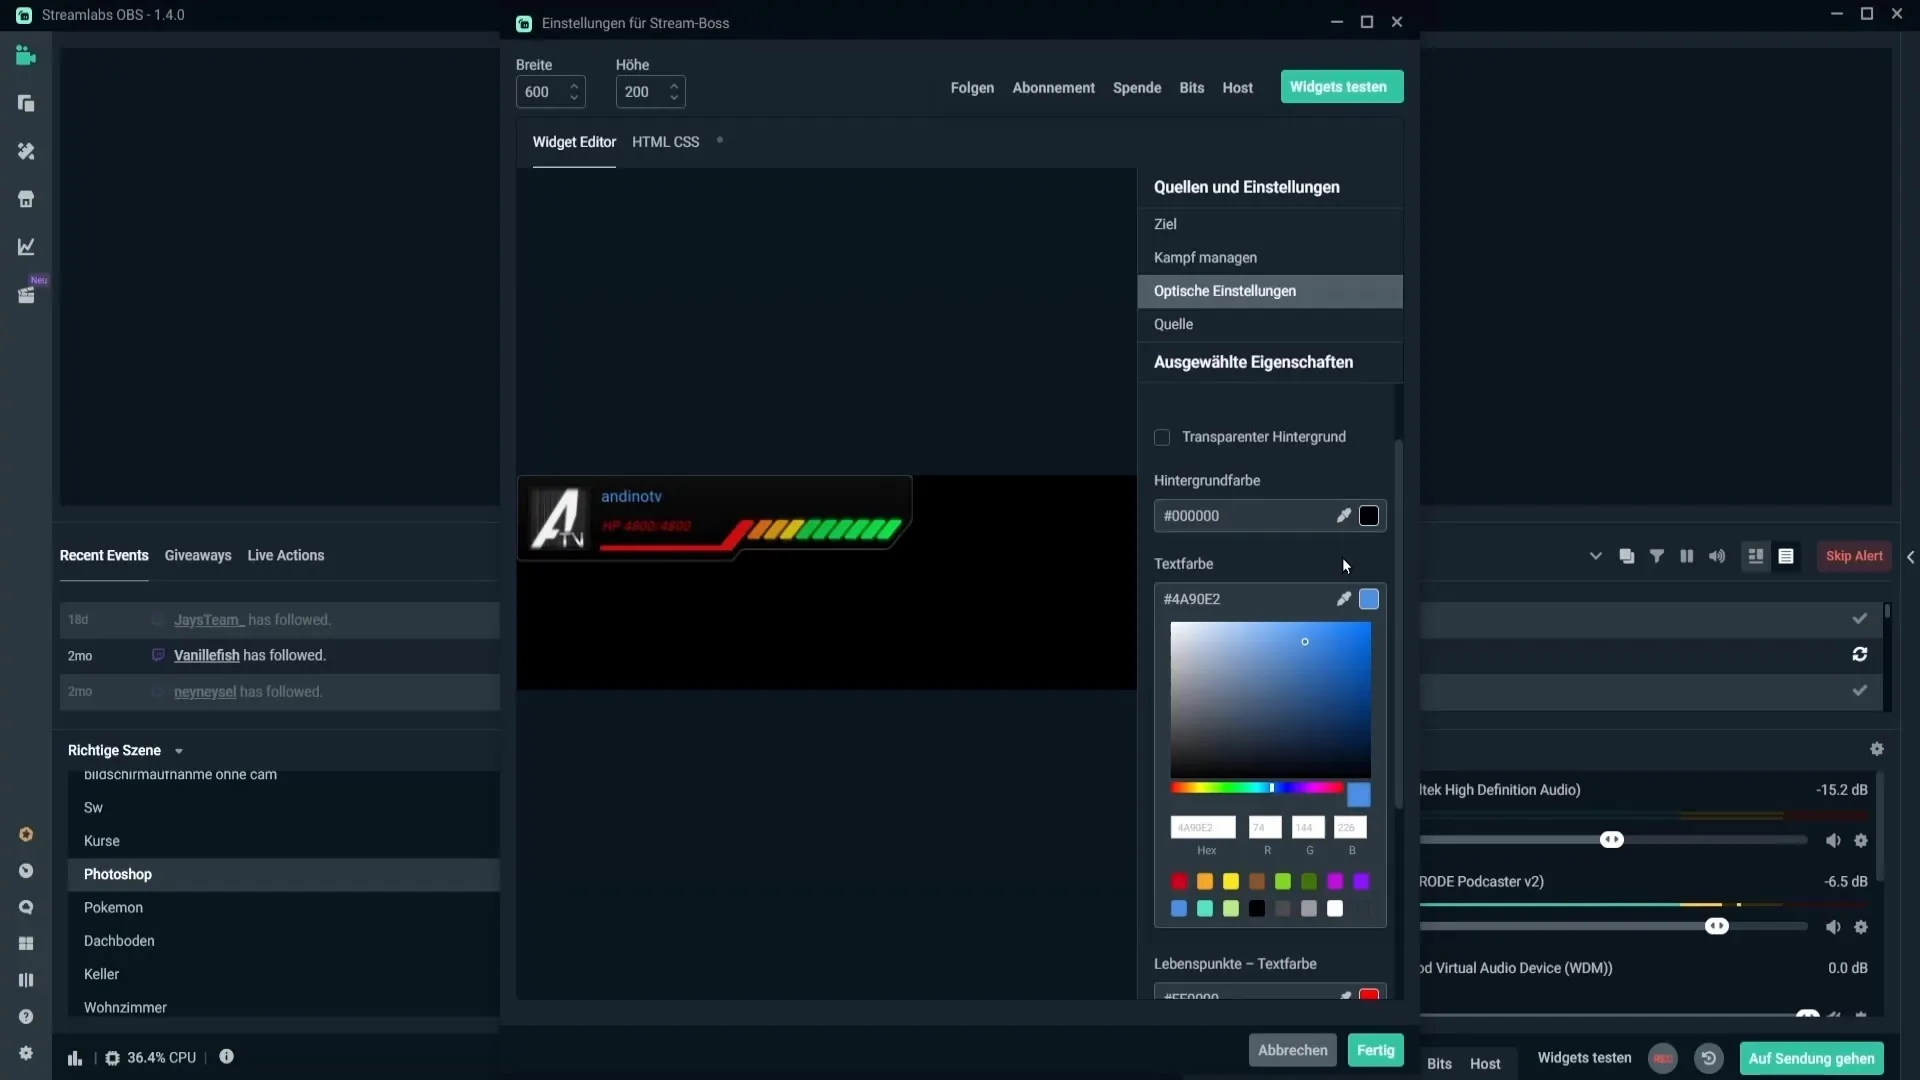
Here you can customize the colors for the text, health points, and background of the Boss. Click on the color fields and choose your preferred colors.

Step 13: Font
Choose a readable font for your Boss's name and health points. Make sure it is clearly visible.
Step 14: Visibility Settings
These settings are important to ensure that the Boss remains visible or not in other scenes, depending on your preferences. Check the visibility settings accordingly.
Step 15: Completion and Transformation
Once everything is set, click on "Done" and transform your source by dragging it to the desired spot on the screen.
Summary – A Guide to Setting Up the Stream Boss in Streamlabs
This guide has shown you how to effectively set up the Stream Boss in Streamlabs OBS. From choosing the right scene to the detailed customizations of your Boss, you have now learned all the necessary steps.
FAQ
How do I add the Stream Boss to my scene?Select the scene and click on the plus symbol in the sources to add the Stream Boss.
Can I change the Boss's health points?Yes, in the widget editor, you can customize the starting health points as desired.
What are the different modes for the Stream Boss?There are standard, automatically increasing, and overkill modes, depending on the desired gameplay.
How can I customize the appearance of the Stream Boss?Under the design tab, you can select various designs, colors, and fonts.
Do the health points of the Boss remain unchanged when changing scenes?Yes, you need to adjust the visibility settings accordingly.


