The insertion of small avatars in the stream adds a personal touch and is a fun way to interact with your viewers. These small figures use animations to, for example, greet viewers or thank them for subscriptions. Here I will explain how to insert such avatars into Streamlabs and use them effectively.
Key Insights
- You can use avatars from the website kappamon.com.
- A registration via Twitch or Trovo is required.
- The avatars are available for free or for a fee.
- You can customize animations and commands for each avatar.
- Avatars can be visually customized in Streamlabs.
Step-by-Step Guide
Start by selecting an avatar for your stream. First, visit the website kappamon.com. There you can log in with your Twitch or Trovo account by clicking the "Authorize" button to ensure you have the necessary permissions.
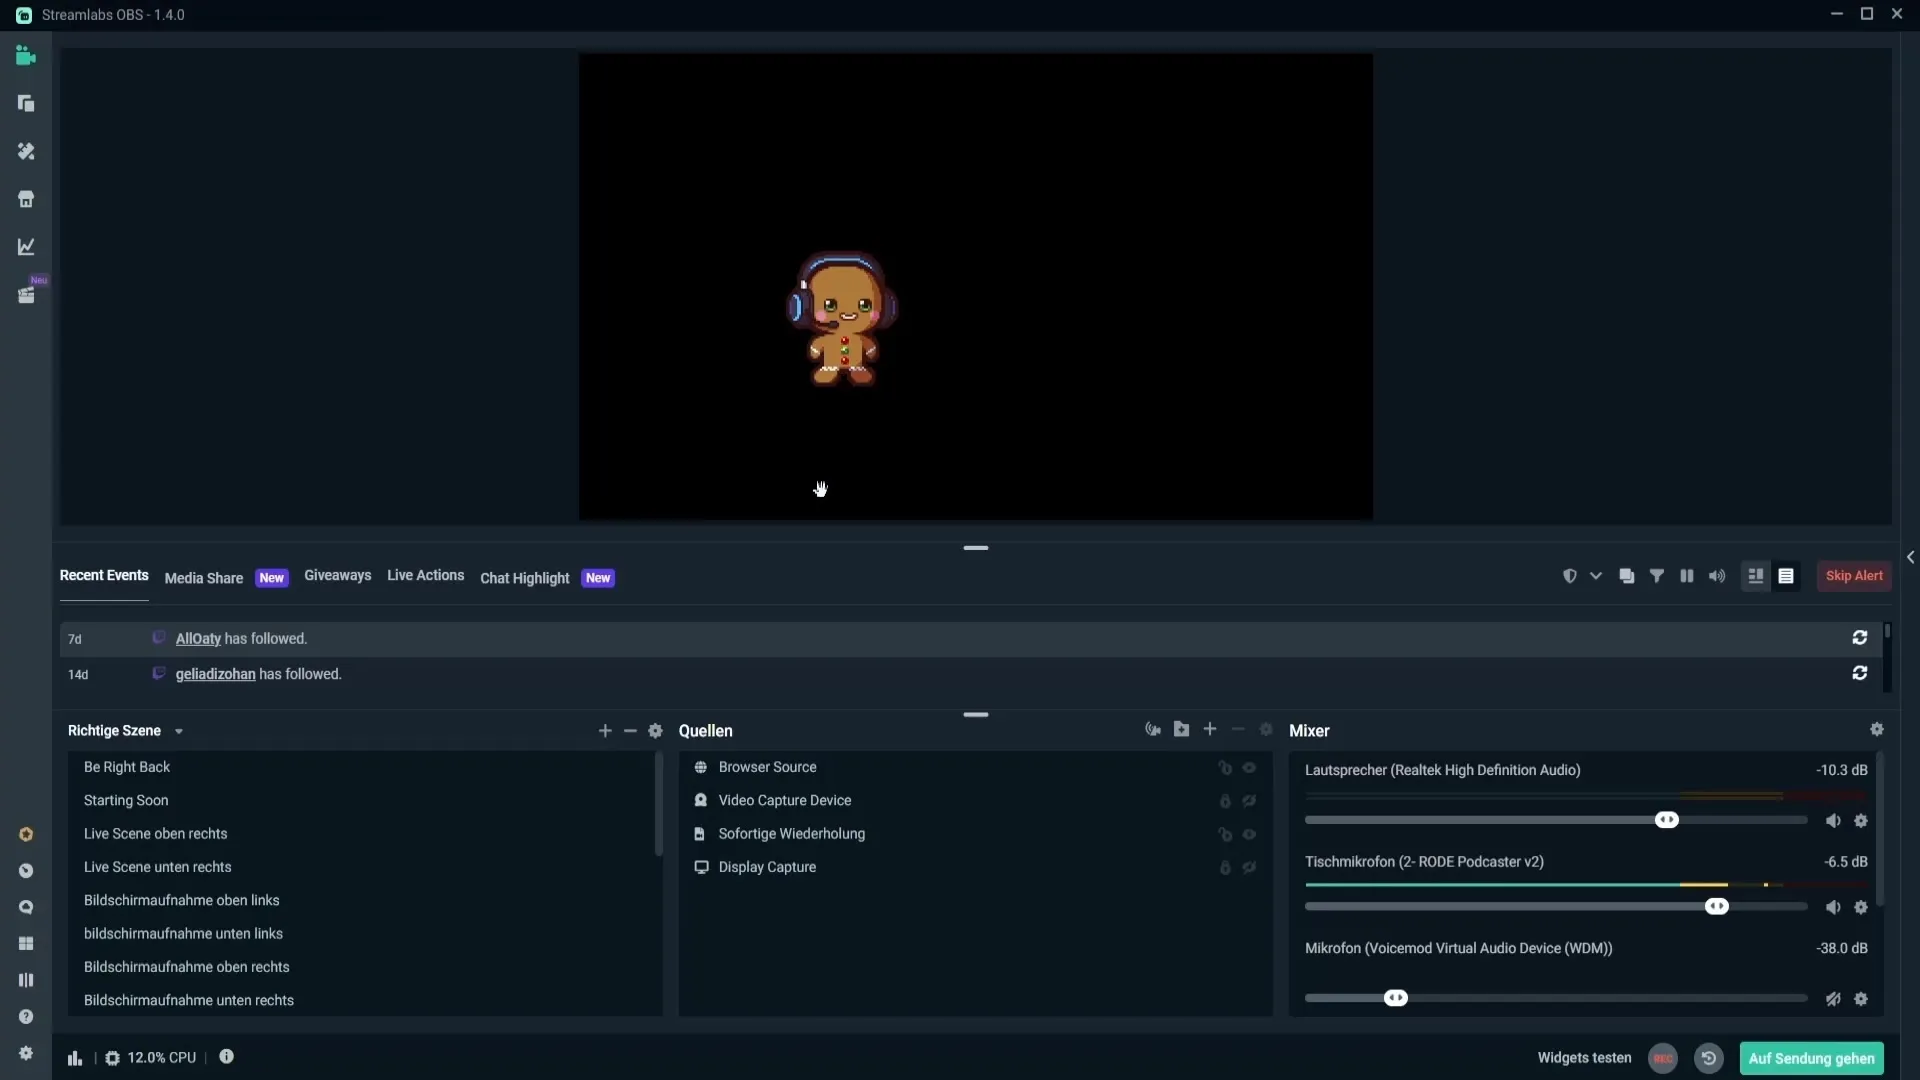
After logging in, you will see an overview of your avatar collection. There are already some avatars available for free. As you browse through this collection, you'll also find numerous paid avatars in the Marketplace. An example of a free avatar is the bee, which you can "purchase" for 0 €.
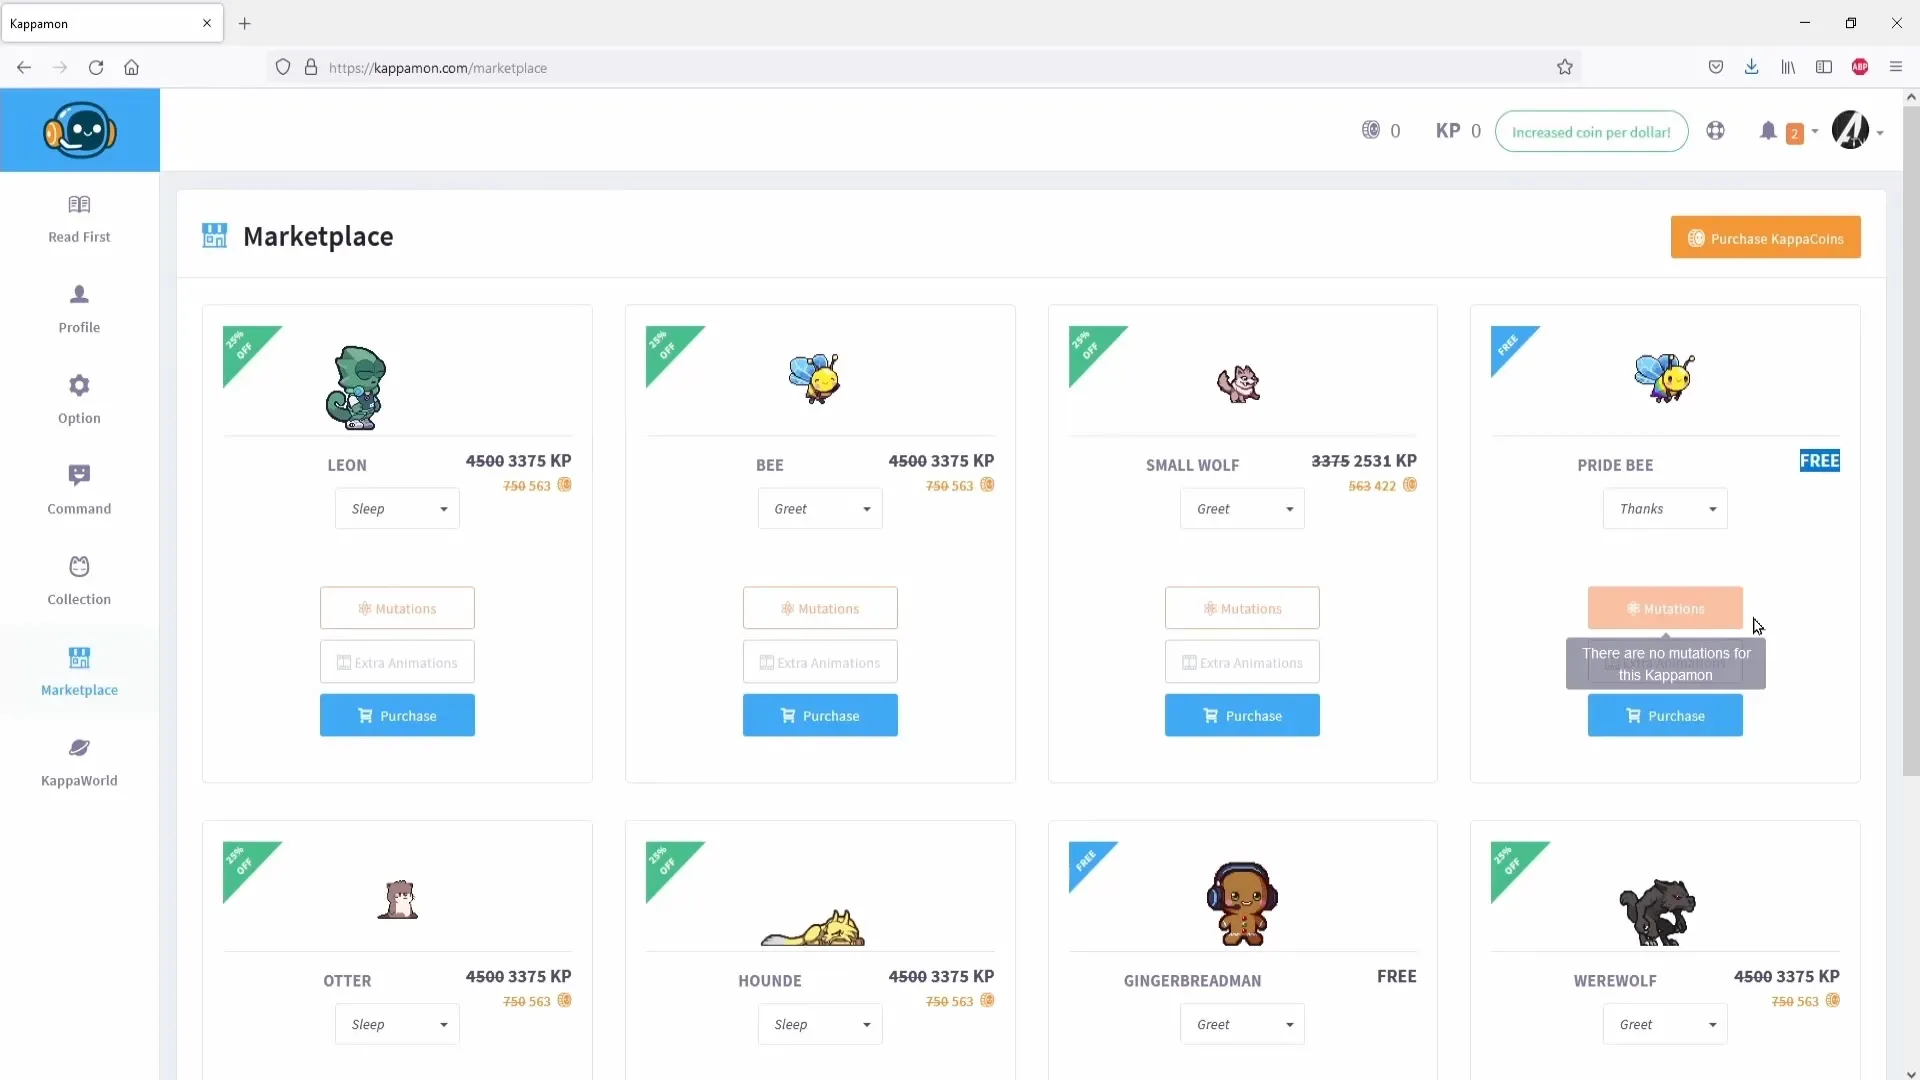
Now choose the avatar you want to use. Click on the avatar to see which animations are available (e.g., "attack," "eat," or "greet"). Select the desired animation and confirm it.
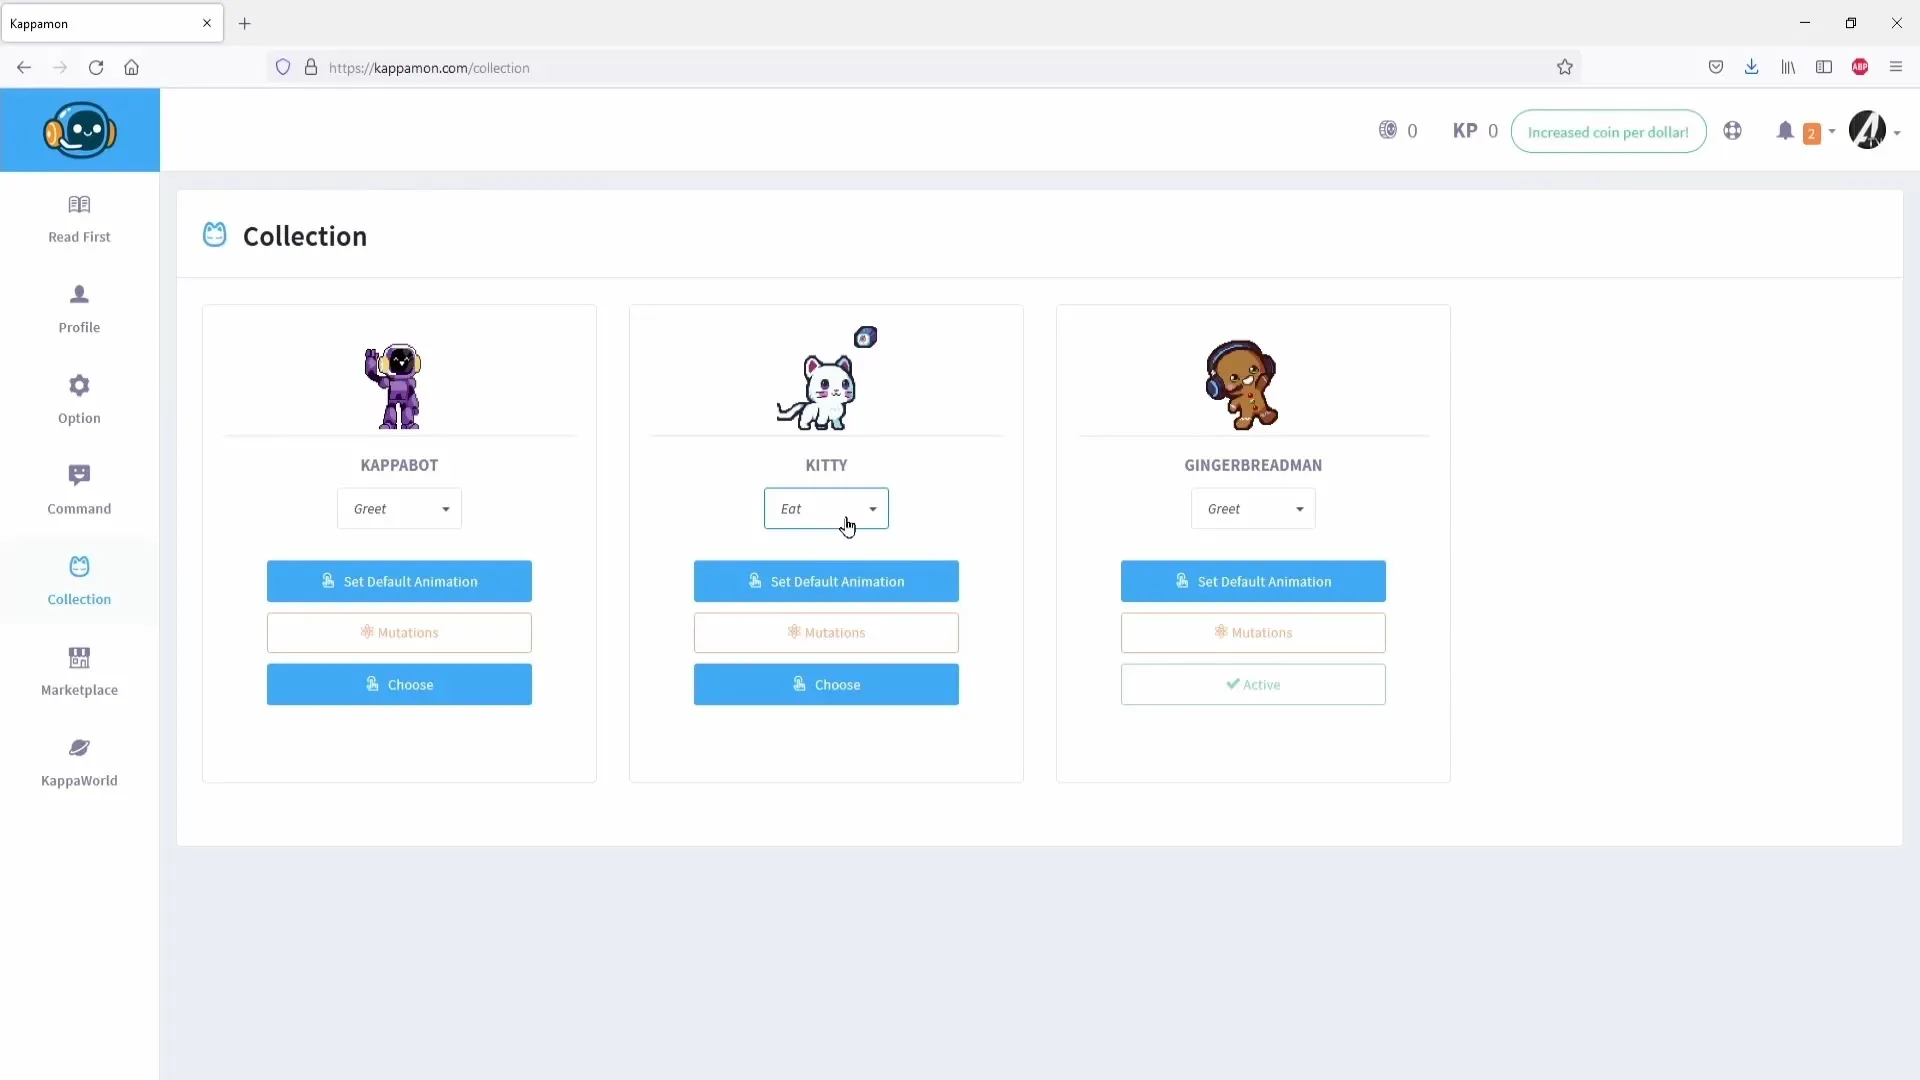
Now it's time to integrate the selected avatar into Streamlabs OBS. Open Streamlabs and go to the "Profiles" tab. Close the current window and click on the link you copied earlier.
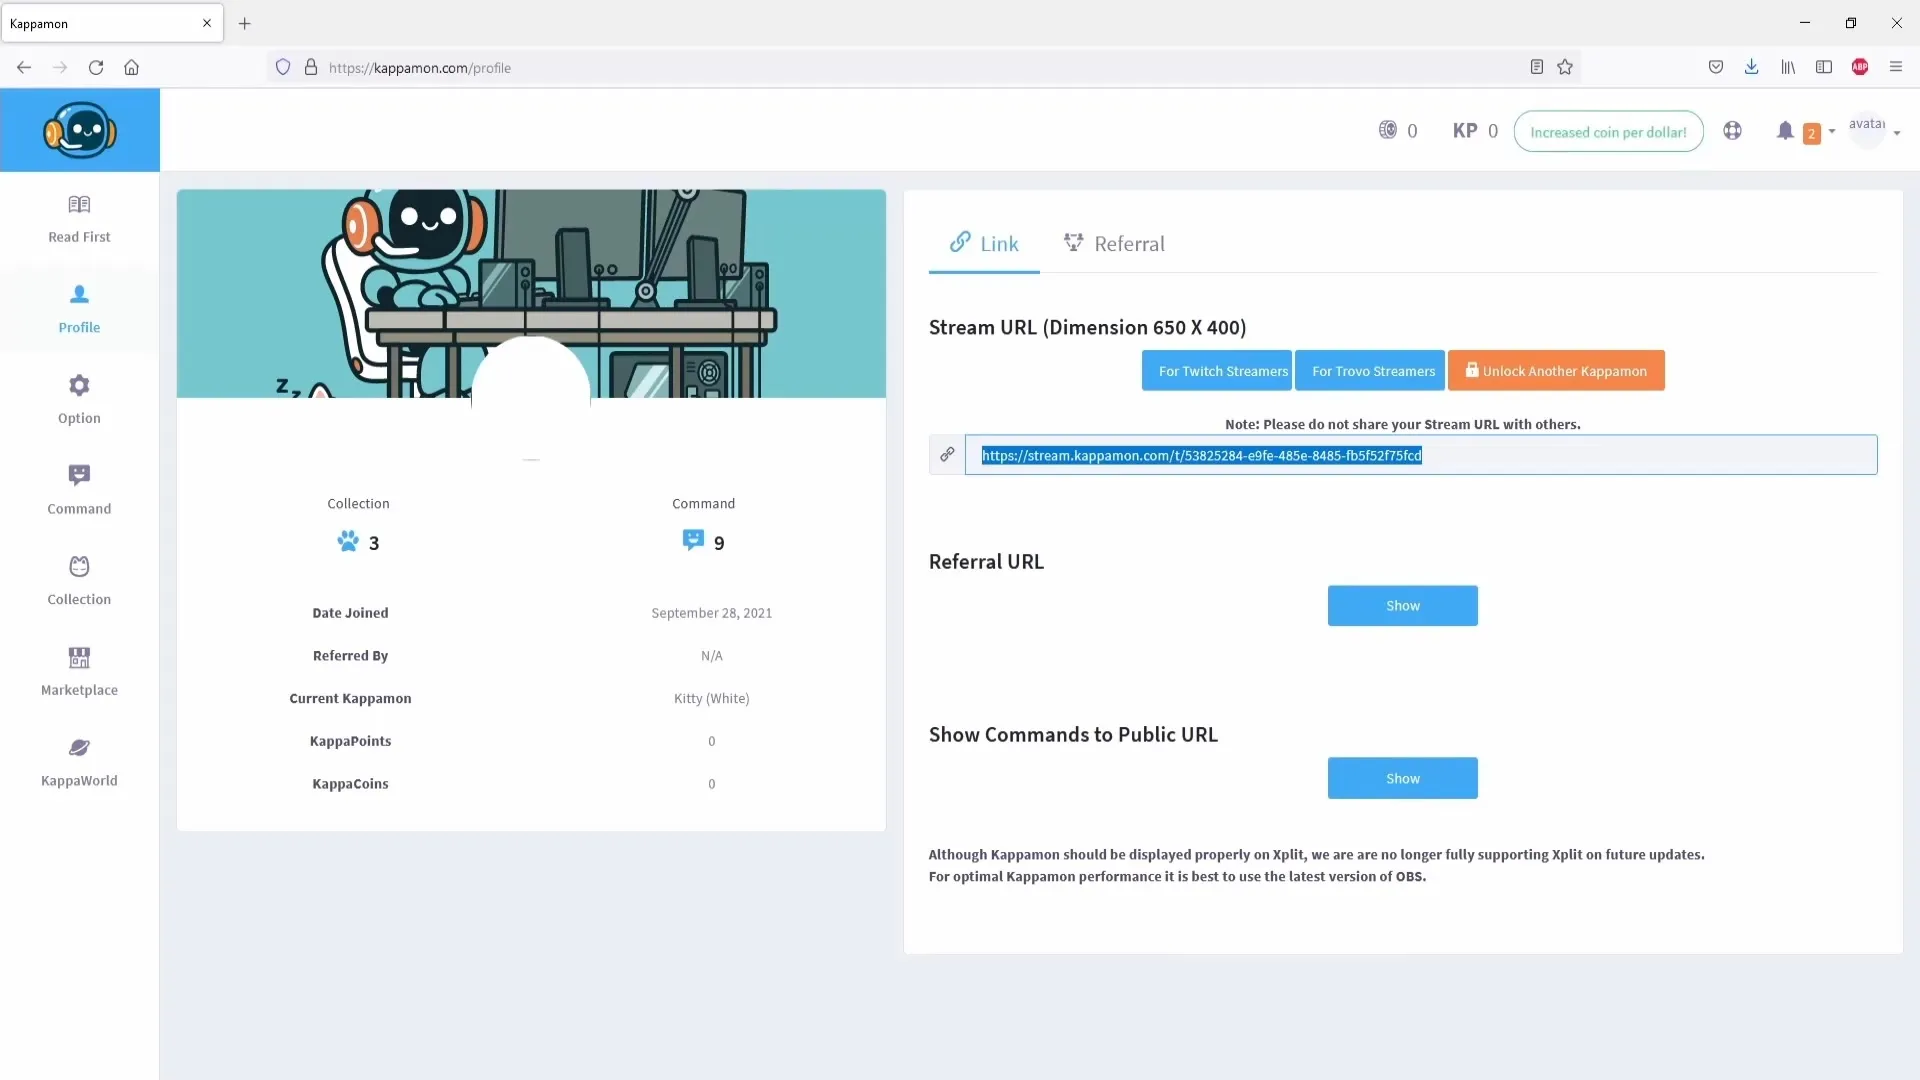
Now paste this link into Streamlabs OBS. Go to "Add New Source" and select "Browser Source." Give the source a name, such as "Avatar," and paste the copied link. You can leave the remaining settings unchanged for now.
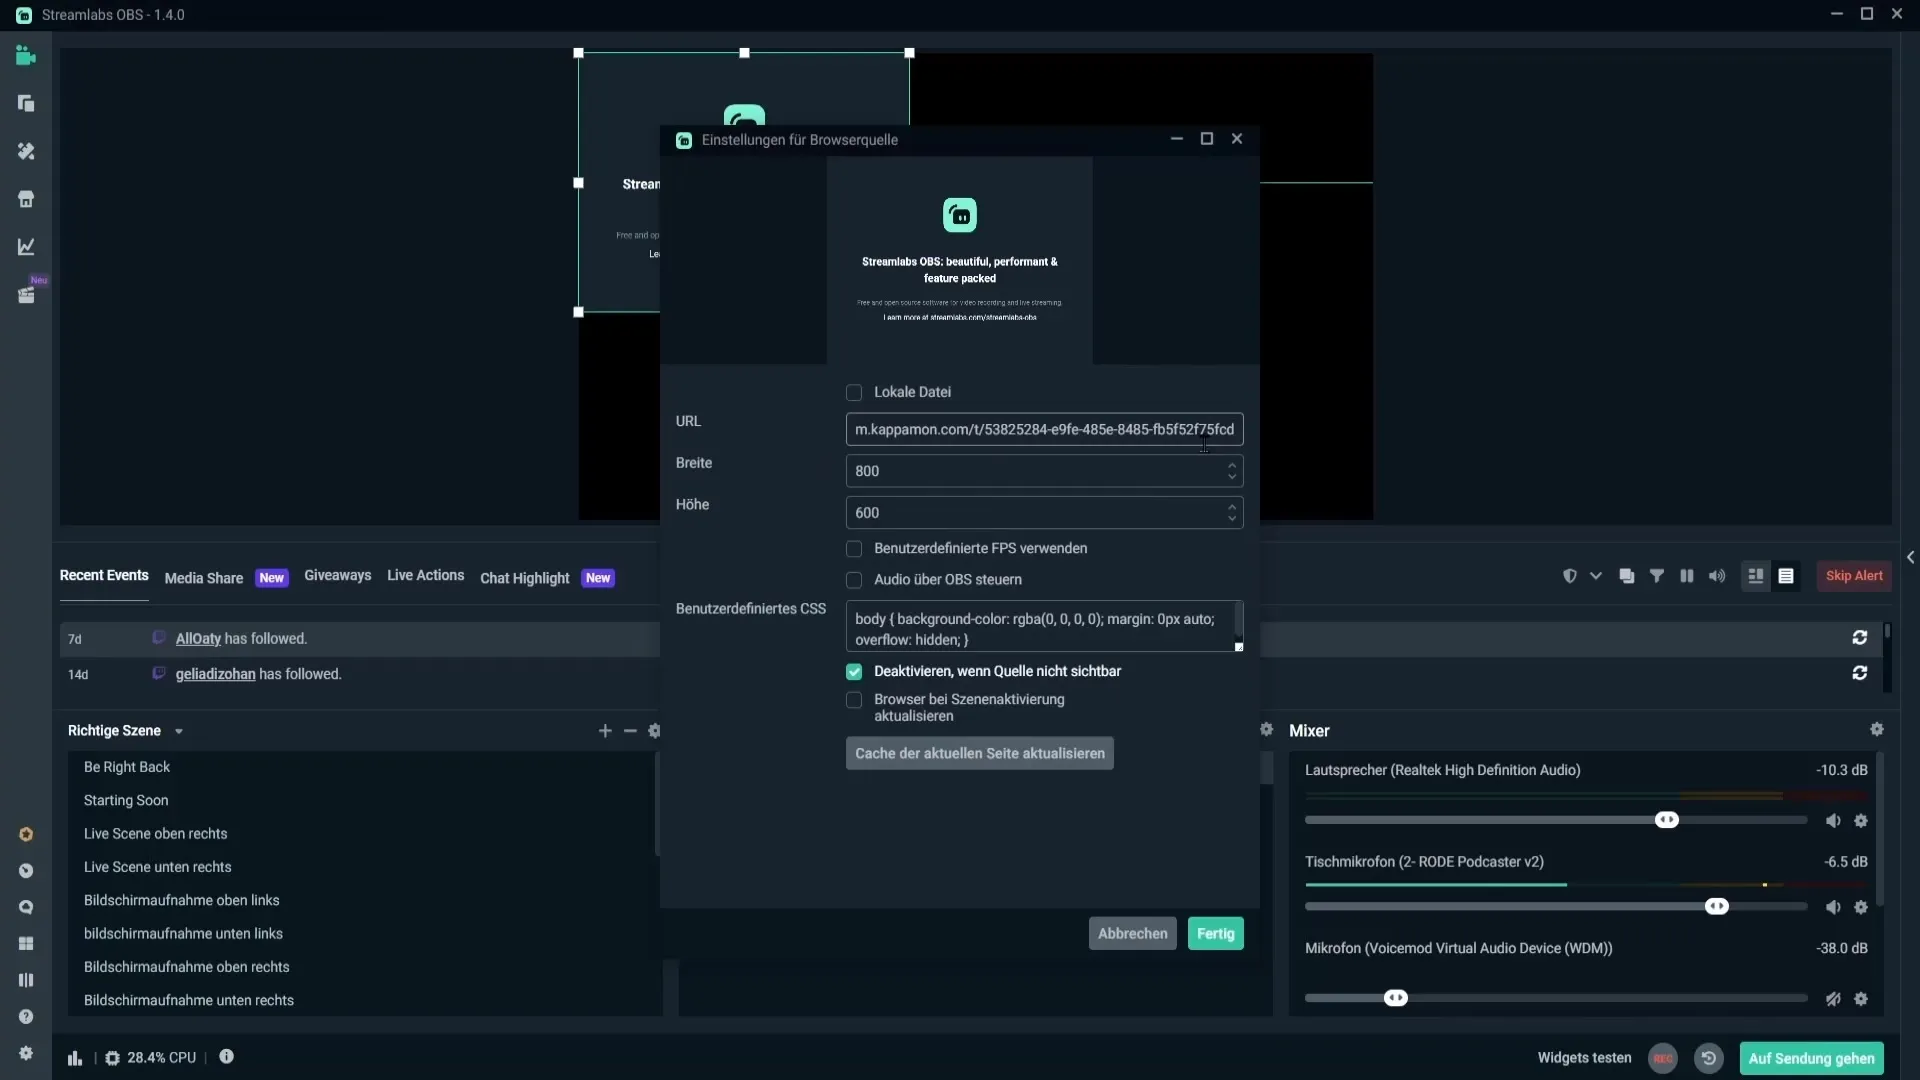
After the avatar has loaded, adjust its size. Right-click on the avatar to position it on the interface. You can place the avatar near your webcam or in another corner of the screen, depending on what works best for your stream.
Next, you can adjust the colors of the avatar. Click on the avatar, then right-click on "Filters," and select "Color Correction." Here you can make a variety of adjustments to better match the avatar to your design.
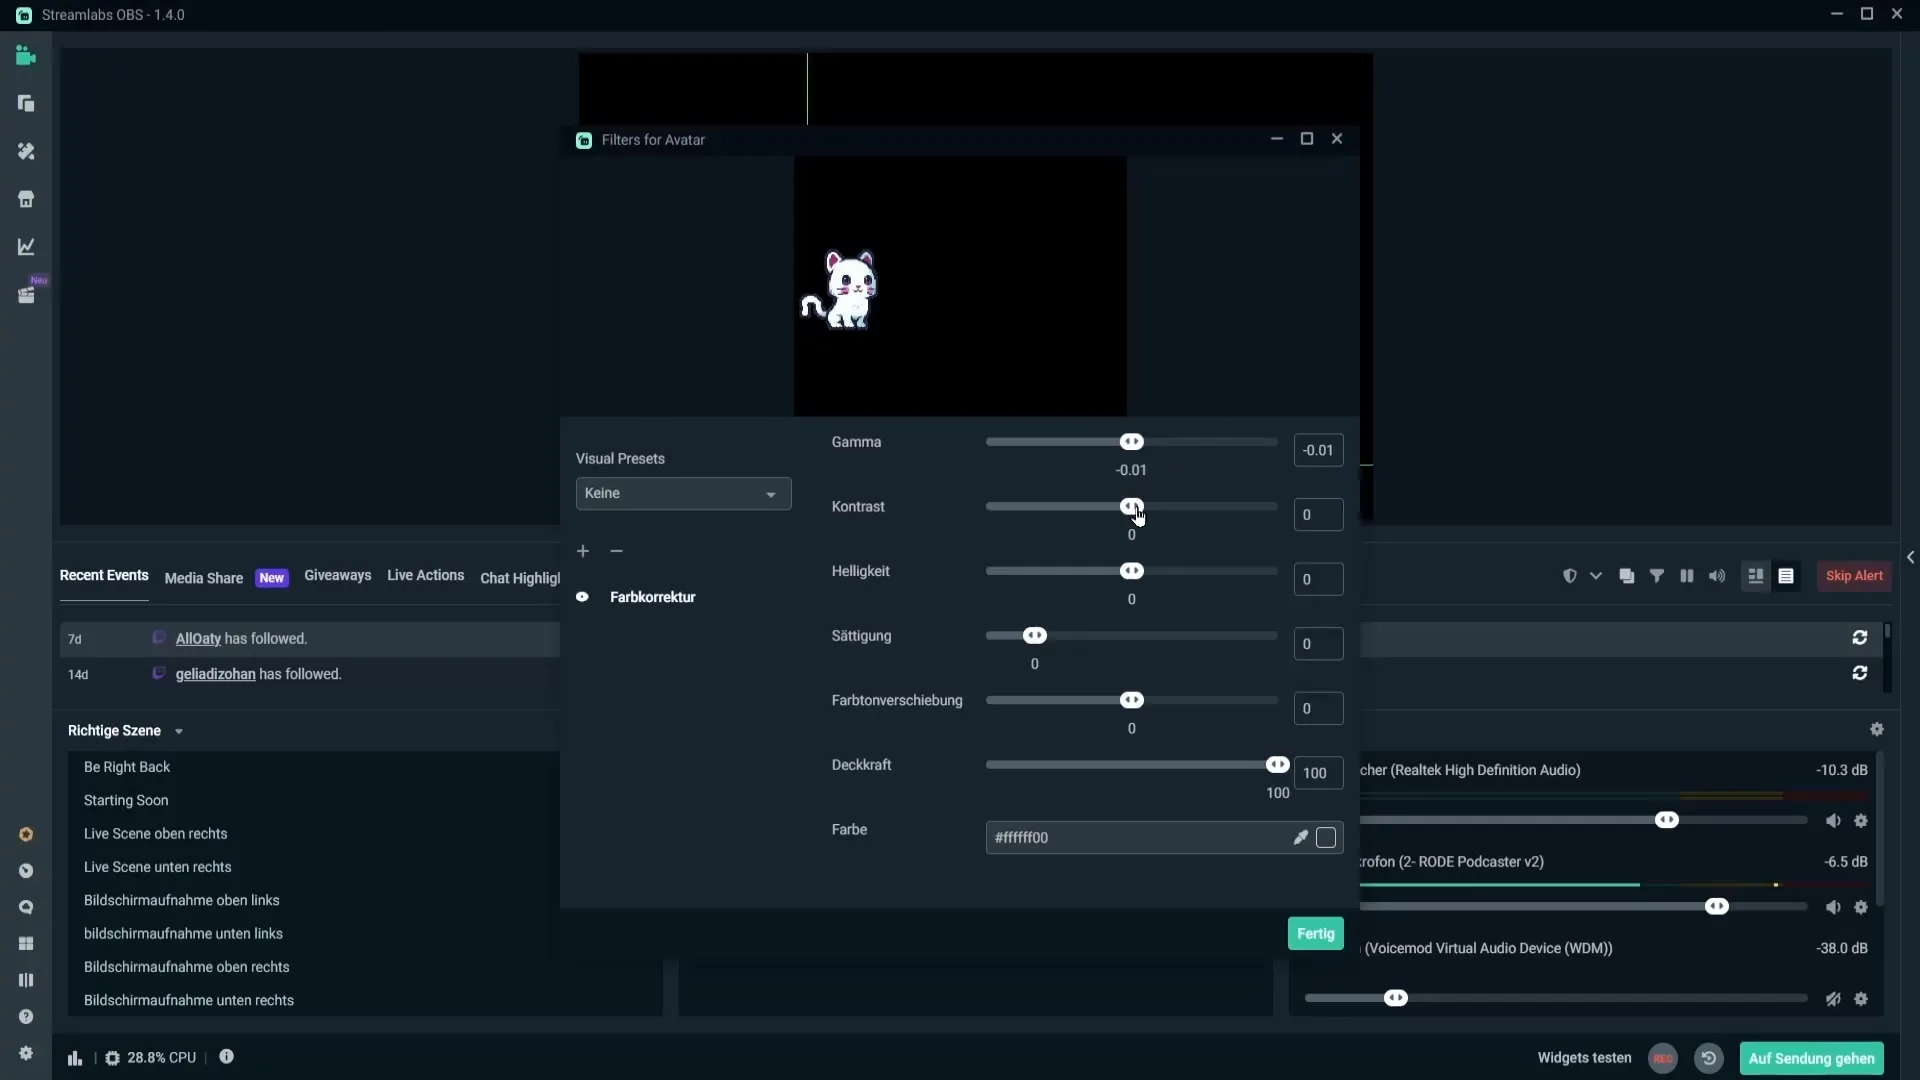
When you are satisfied with the visual aspect of your avatar, you can focus on the available commands that ultimately determine how and when the avatar reacts. Go back to the kappamon website and click on "Commands." You will see a list of predefined commands that you can activate, deactivate, or edit.
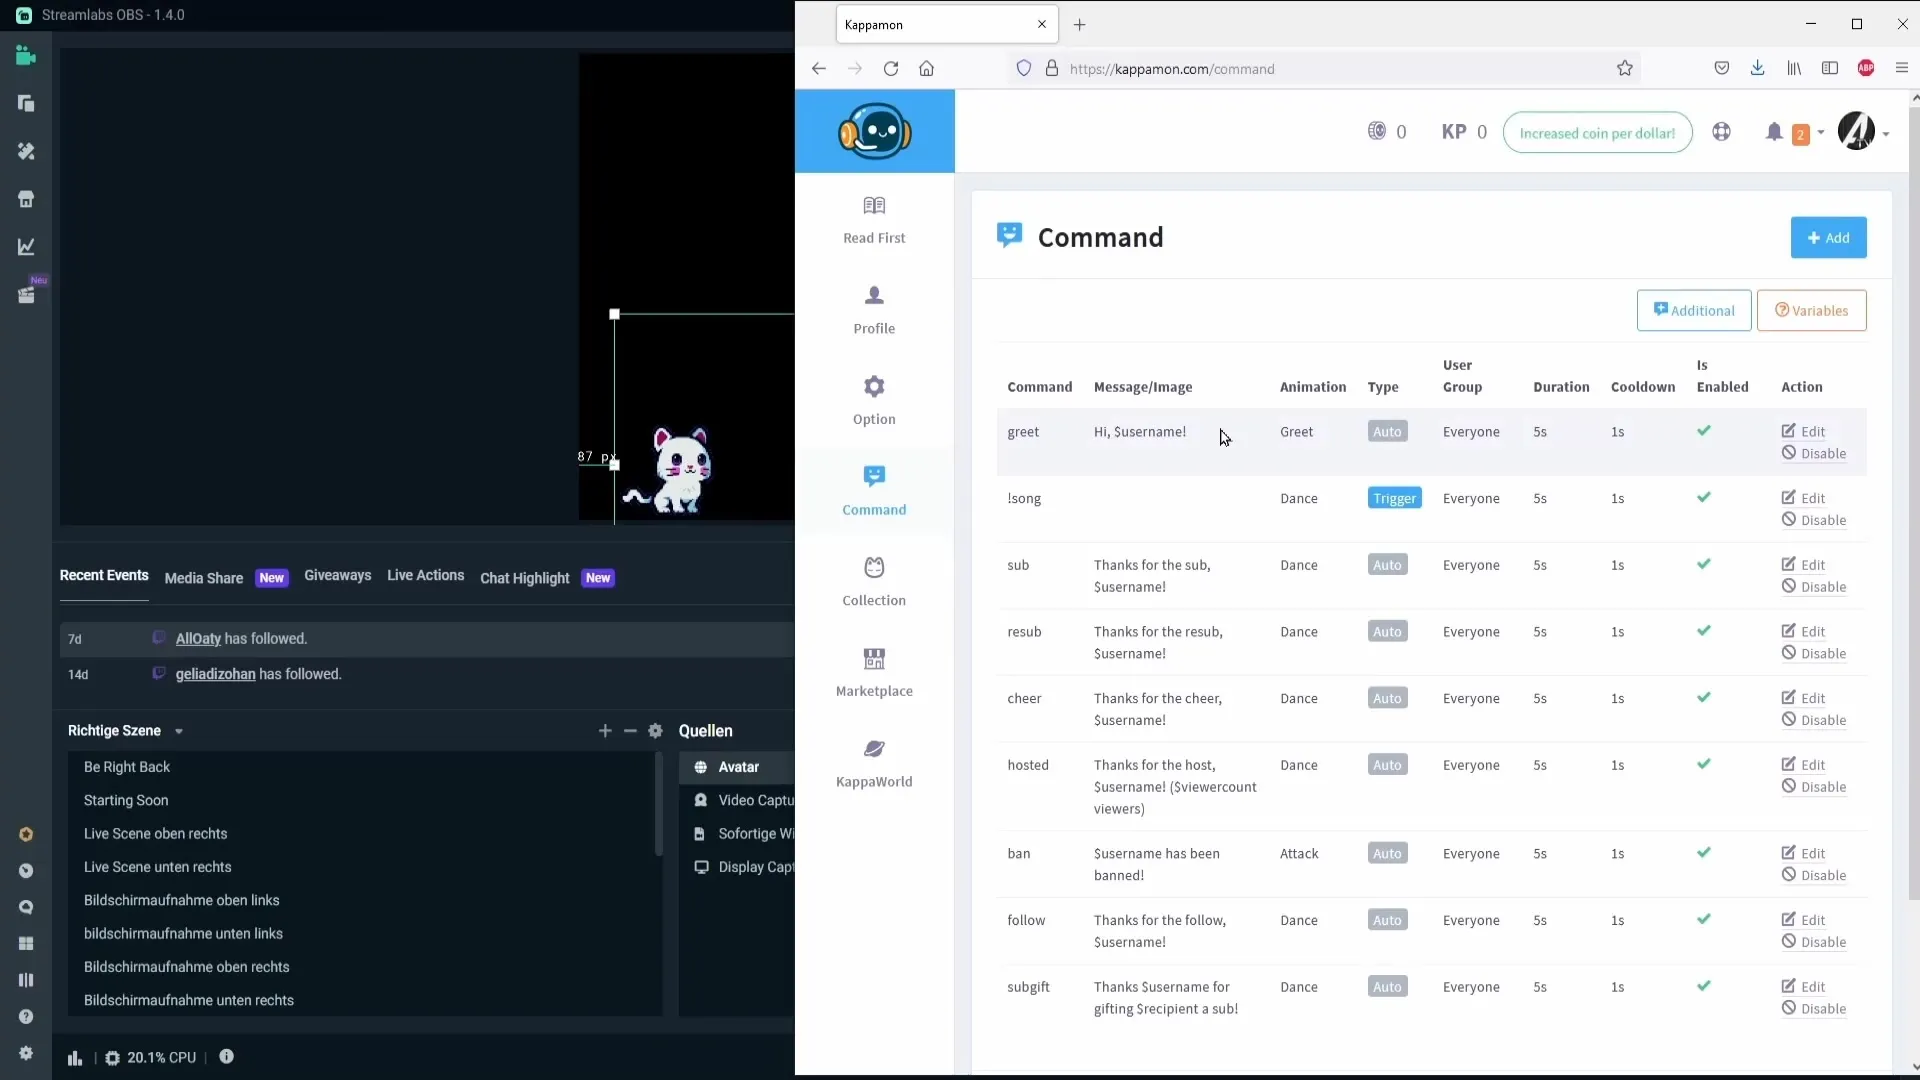
If the predefined command "greet" is activated, the avatar will automatically greet your viewers upon entering the stream. You can also activate commands for subscribes or cheers, allowing the avatar to respond accordingly.
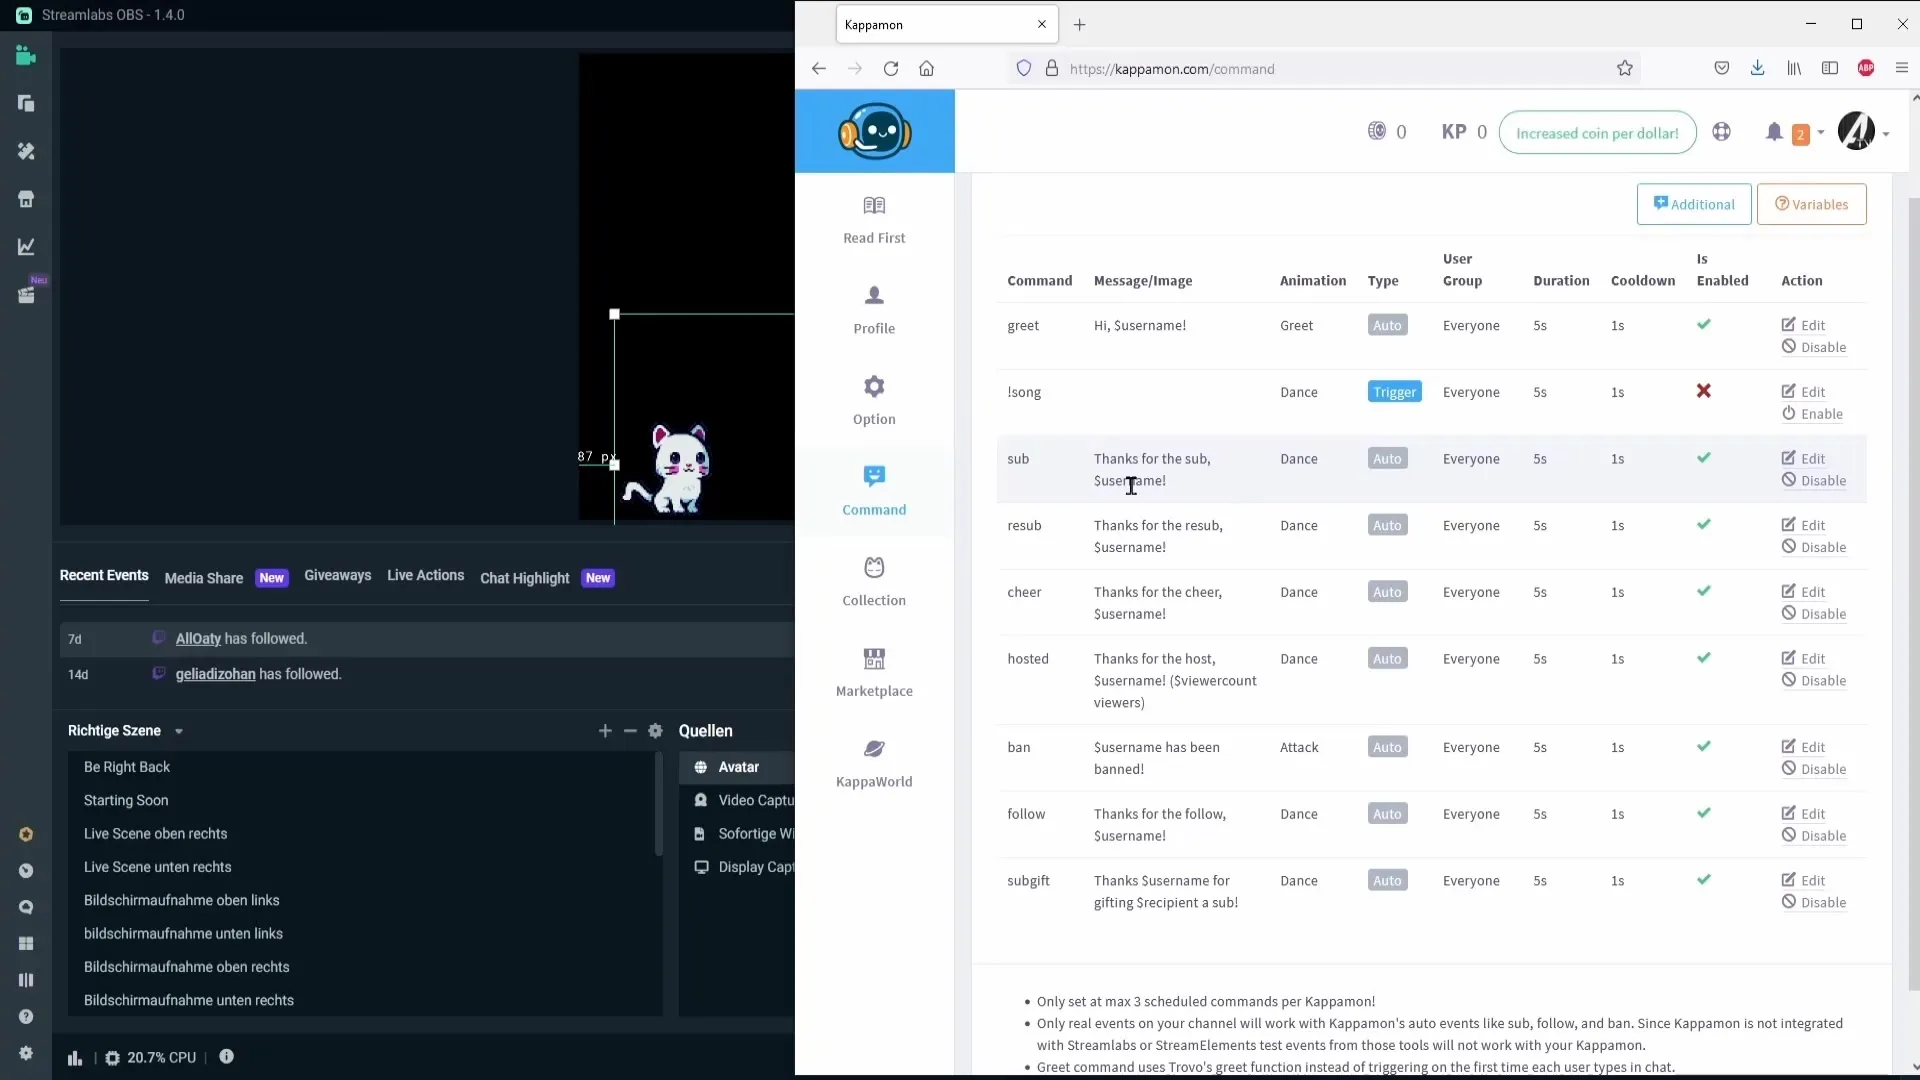
If you want to create your own command, click on "Add" and define when and how the avatar should react. For instance, the avatar could output a specific message when viewers type the word "lull" in the chat. Test the new command in your chat to ensure everything works.
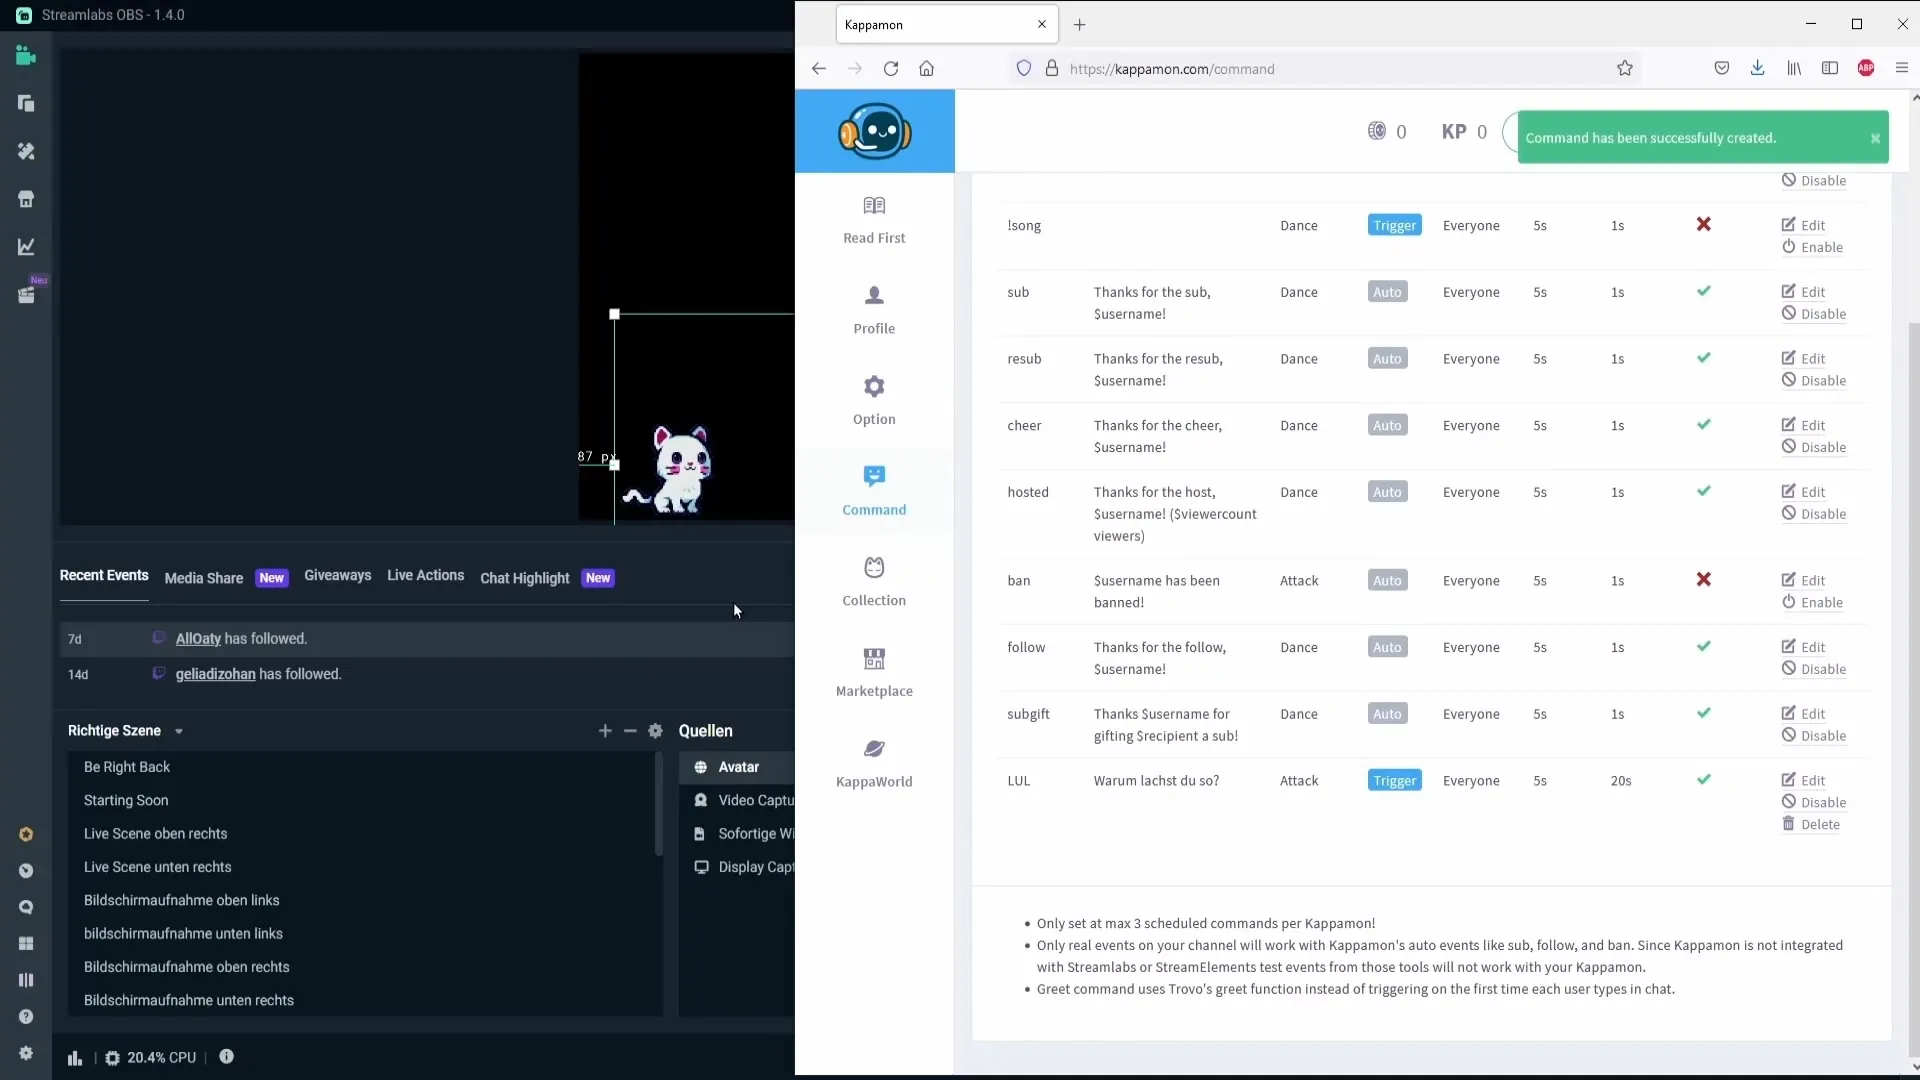
Be sure to check the configuration afterward: Click on the avatar and go to properties. Refresh the page to ensure the commands are active.
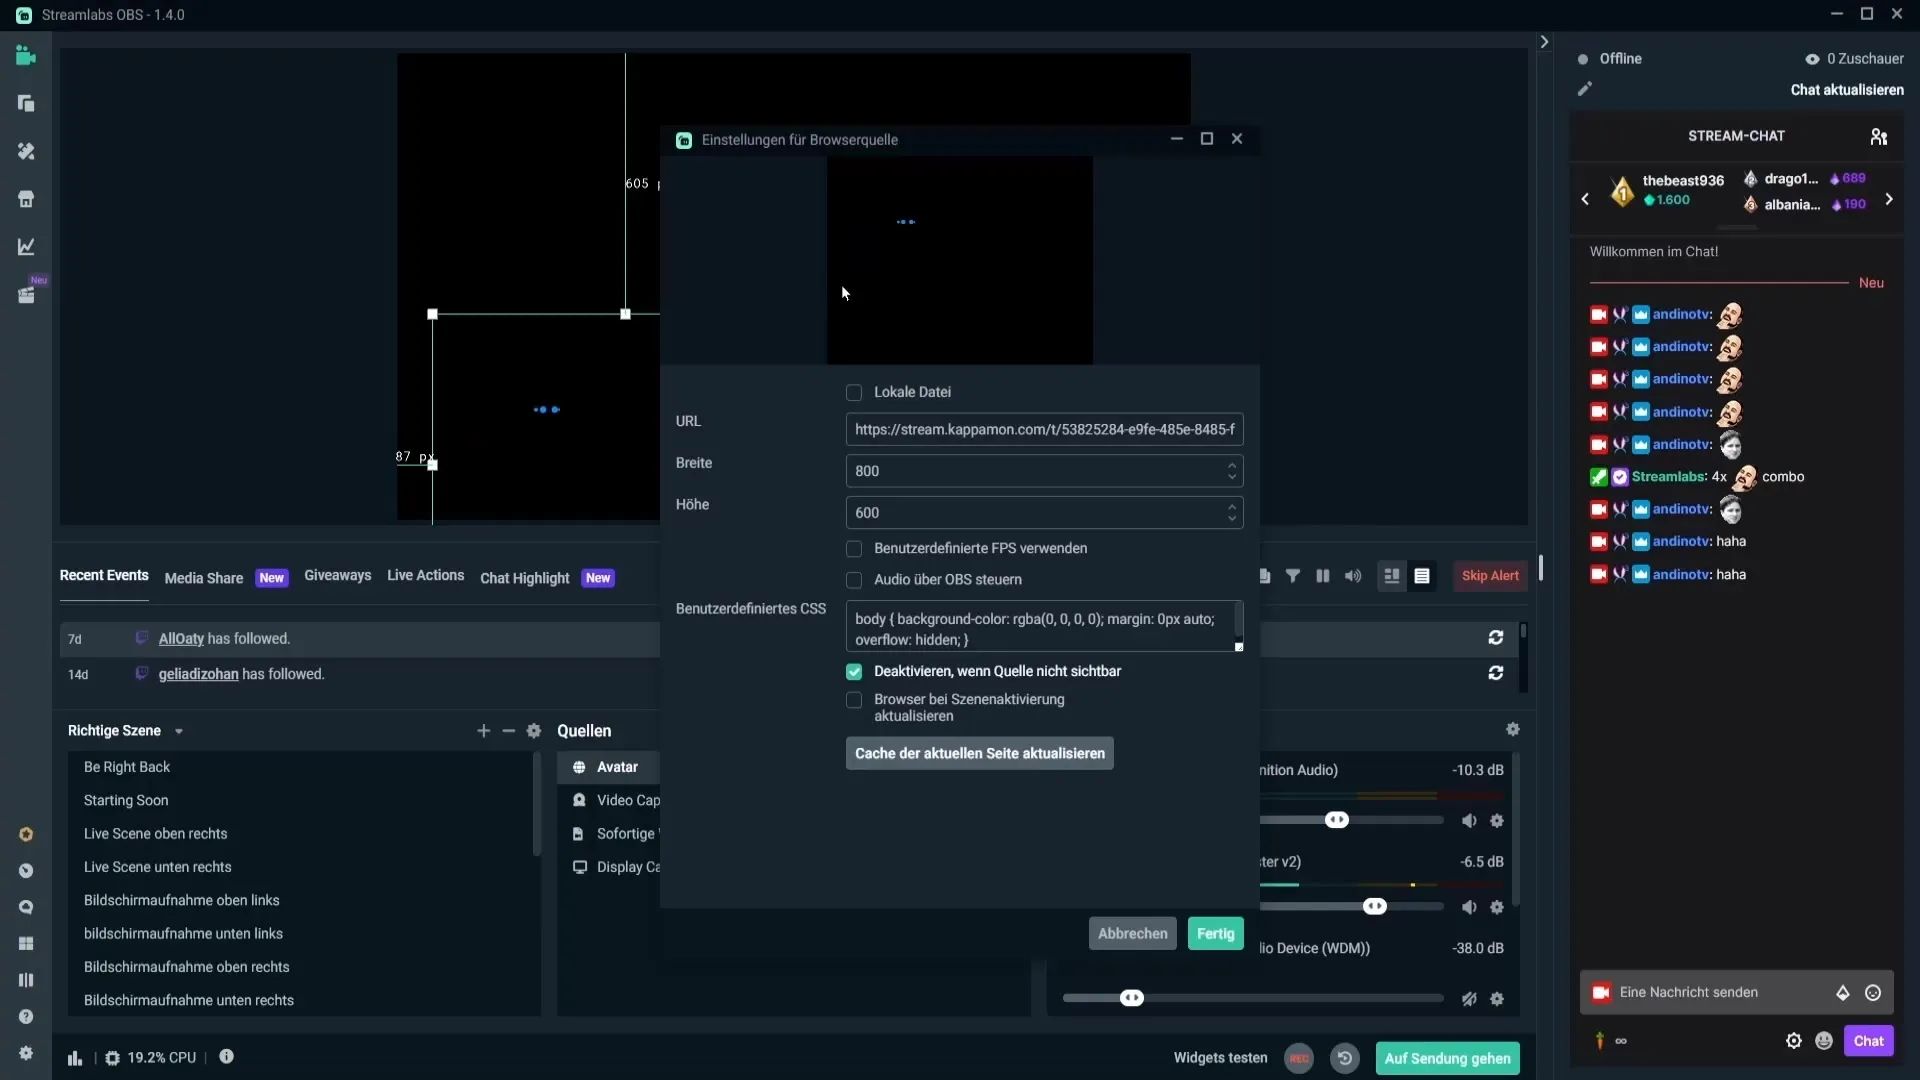
With these steps, you have successfully set up your avatar. Now your stream interacts automatically and personally with viewers in a fun way.
Summary - How to Insert Small Avatars into Streamlabs
Introducing small avatars into Streamlabs based on the type of event enhances the streaming experience and viewer engagement. The ease of use and customization of the avatars brings every interaction to life.
Frequently Asked Questions
How can I log in to kappamon.com?You can log in with your Twitch or Trovo account; YouTube login is currently not available.
Are all avatars free?No, there are both free avatars and paid ones available in the Marketplace.
How can I adjust the colors of my avatars?Right-click on the avatar, select "Filters," and then "Color Correction" to adjust the colors.
Can I create custom commands for the avatar?Yes, you can create your own commands to determine how the avatar should react.
How do I activate commands for my avatar?Go to the kappamon website and click on "Commands" to activate or edit the necessary commands.


