Whether you want to enhance your appearance as a streamer or make your video content more exciting, a greenscreen is an indispensable tool. In this guide, you'll learn how to effectively integrate your greenscreen into Streamlabs OBS to create a transparent background for your streams.
Key Insights
To achieve the best results with your greenscreen, you need to consider a few basic aspects. These include proper lighting, the correct positioning of the greenscreen, and optimizing the settings in Streamlabs OBS. These factors are crucial for achieving professional results.
Step-by-Step Guide
First of all, it is important to set up the Streamlabs OBS software correctly for your stream. A poorly configured program can significantly affect image quality.
Start by integrating your webcam or camera into Streamlabs OBS. Ensure that you are in the correct scene. Then right-click on your camera to open the context menu. Select "Filters" to access the filter settings.
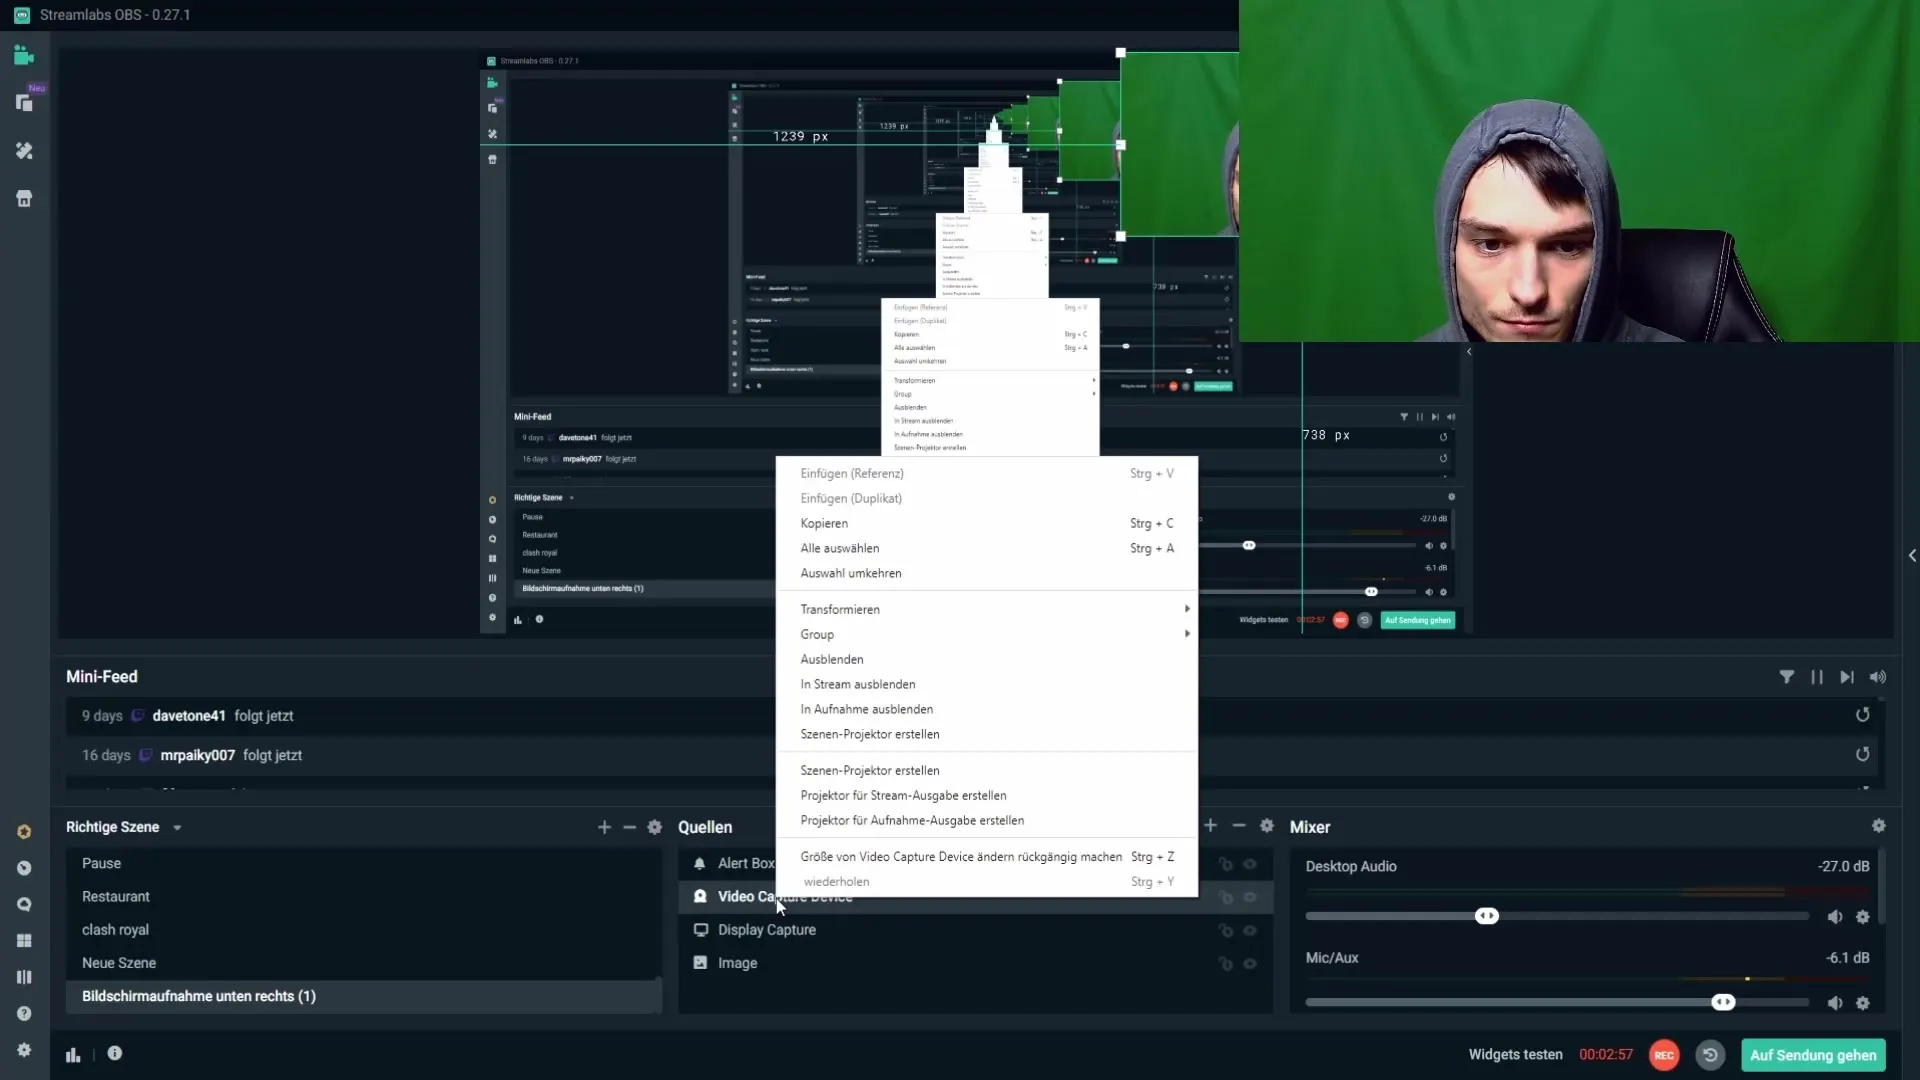
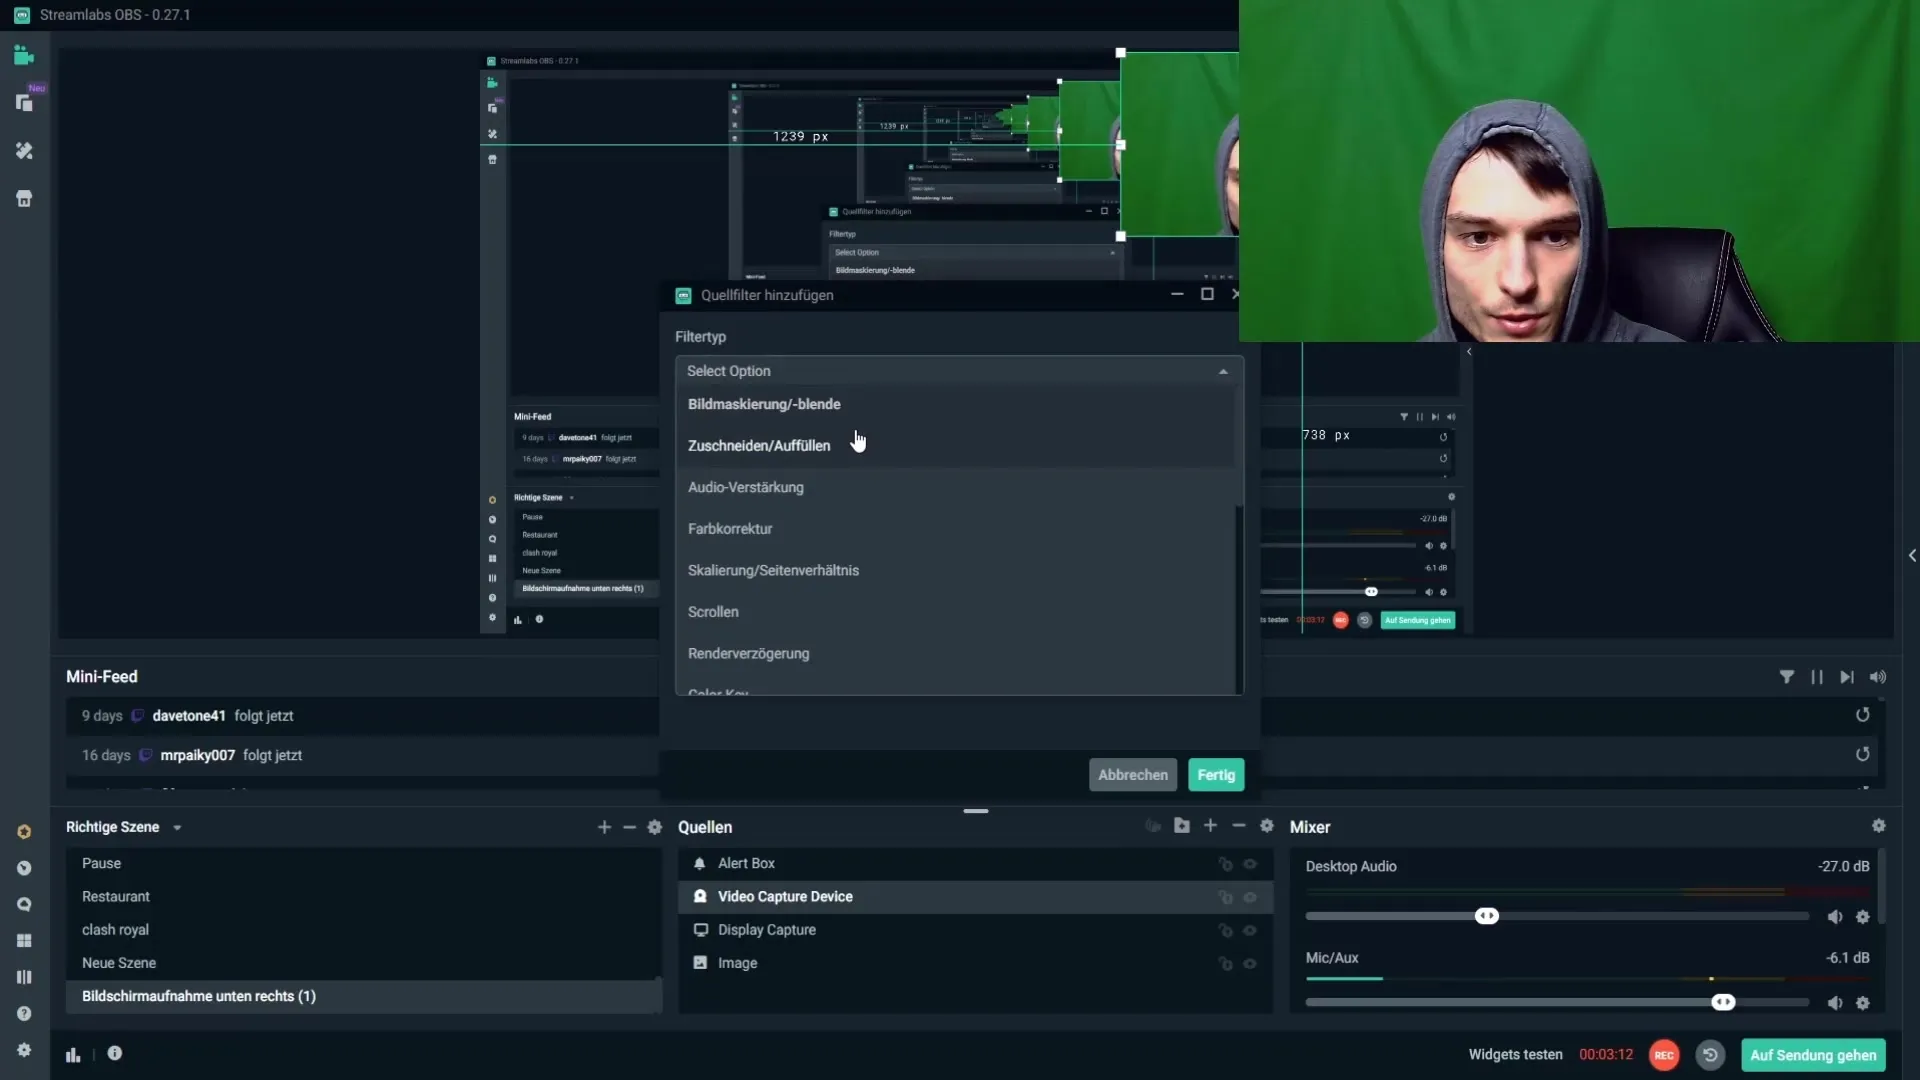
Now you can add the so-called “Color Key,” which is responsible for removing the greenscreen. Click on the plus symbol at the top to add a new filter type and select “Chroma Key” from the list. This is the heart of removing the greenscreen.
Before you start setting up your greenscreen, there are a few important factors to consider. First, you should ensure that your room is darkened. Light conditions outside your room can change constantly, which can lead to your greenscreen needing to be readjusted often. Darken the room by lowering the blinds; this will make your work significantly easier.

The distance between you and the greenscreen is also important. Make sure to leave enough space between you and the greenscreen. If you are too close, you will cast shadows, which can affect image quality. If you cannot move the greenscreen further away, try to adjust the lighting to minimize shadows.
Avoid pronounced wrinkles in the greenscreen. If your greenscreen is new, it may have wrinkles that affect quality. You can iron these wrinkles out or lightly spray them with water to try to smooth them out. A fabric greenscreen shows better results than paper, even if it is often more expensive. Make sure to stretch your greenscreen fabric tight and wrinkle-free, ideally using clamps on a holder.
Lighting is another critical aspect that you must not neglect. Do not use weak room lights for the greenscreen. Instead, I recommend using dimmable LED lights that you place on the left and right sides. This way, you can adjust and optimize the lighting by dimming it.
In addition to the side lamps, you should position a dimmable ring light in the center to illuminate your face well. A third light source from above is optional and can help further improve lighting, but it is not strictly necessary. Be careful not to use overly powerful softboxes, as they consume too much energy.
Be sure to be well-lit, as poor lighting can cause your image to appear “noisy.” If you notice noise, it’s time to optimize your light sources. Brighter lighting can minimize noise and improve image quality.
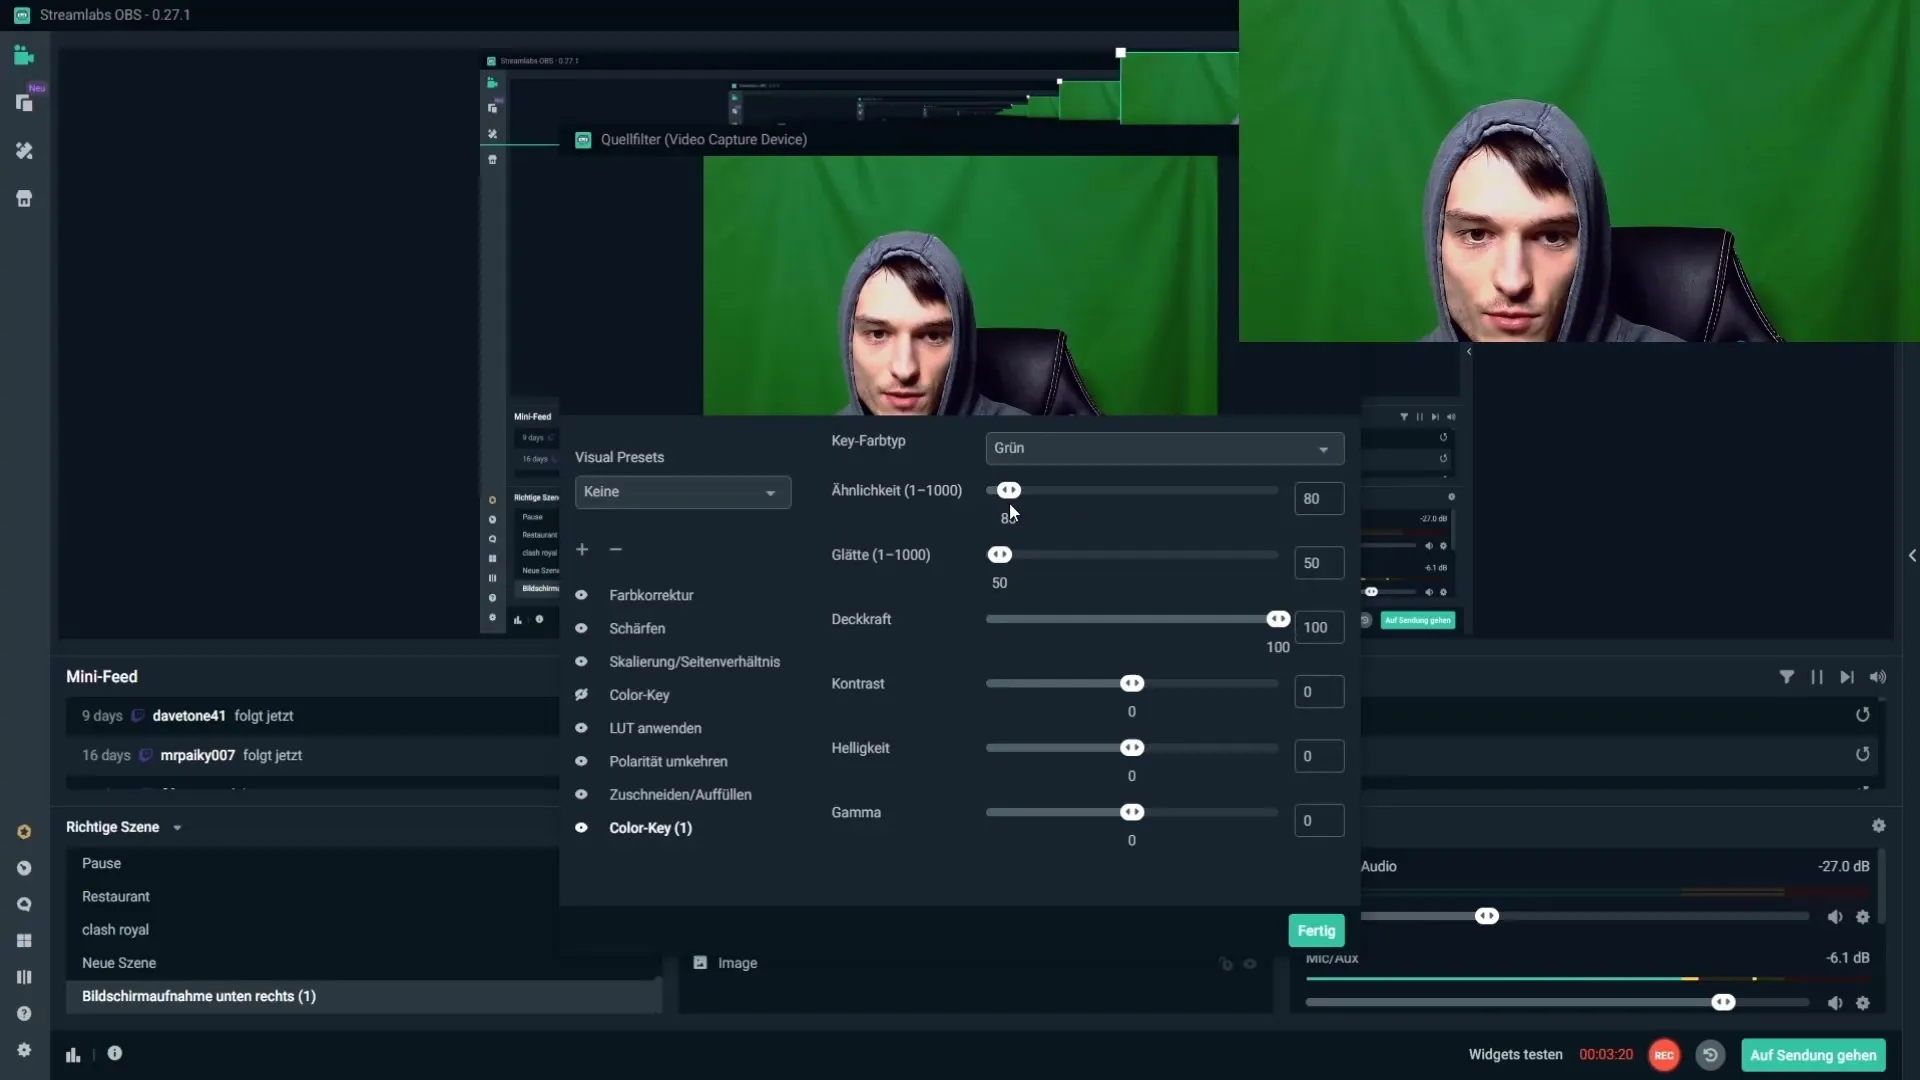
Once the basic settings are in place, you can adjust the “Similarity” and “Smoothness” to further optimize your greenscreen. Make sure to set the key color type to “Green” and increase the similarity until the greenscreen disappears. However, be careful not to set the values too high, as this may result in edges or unwanted artifacts.
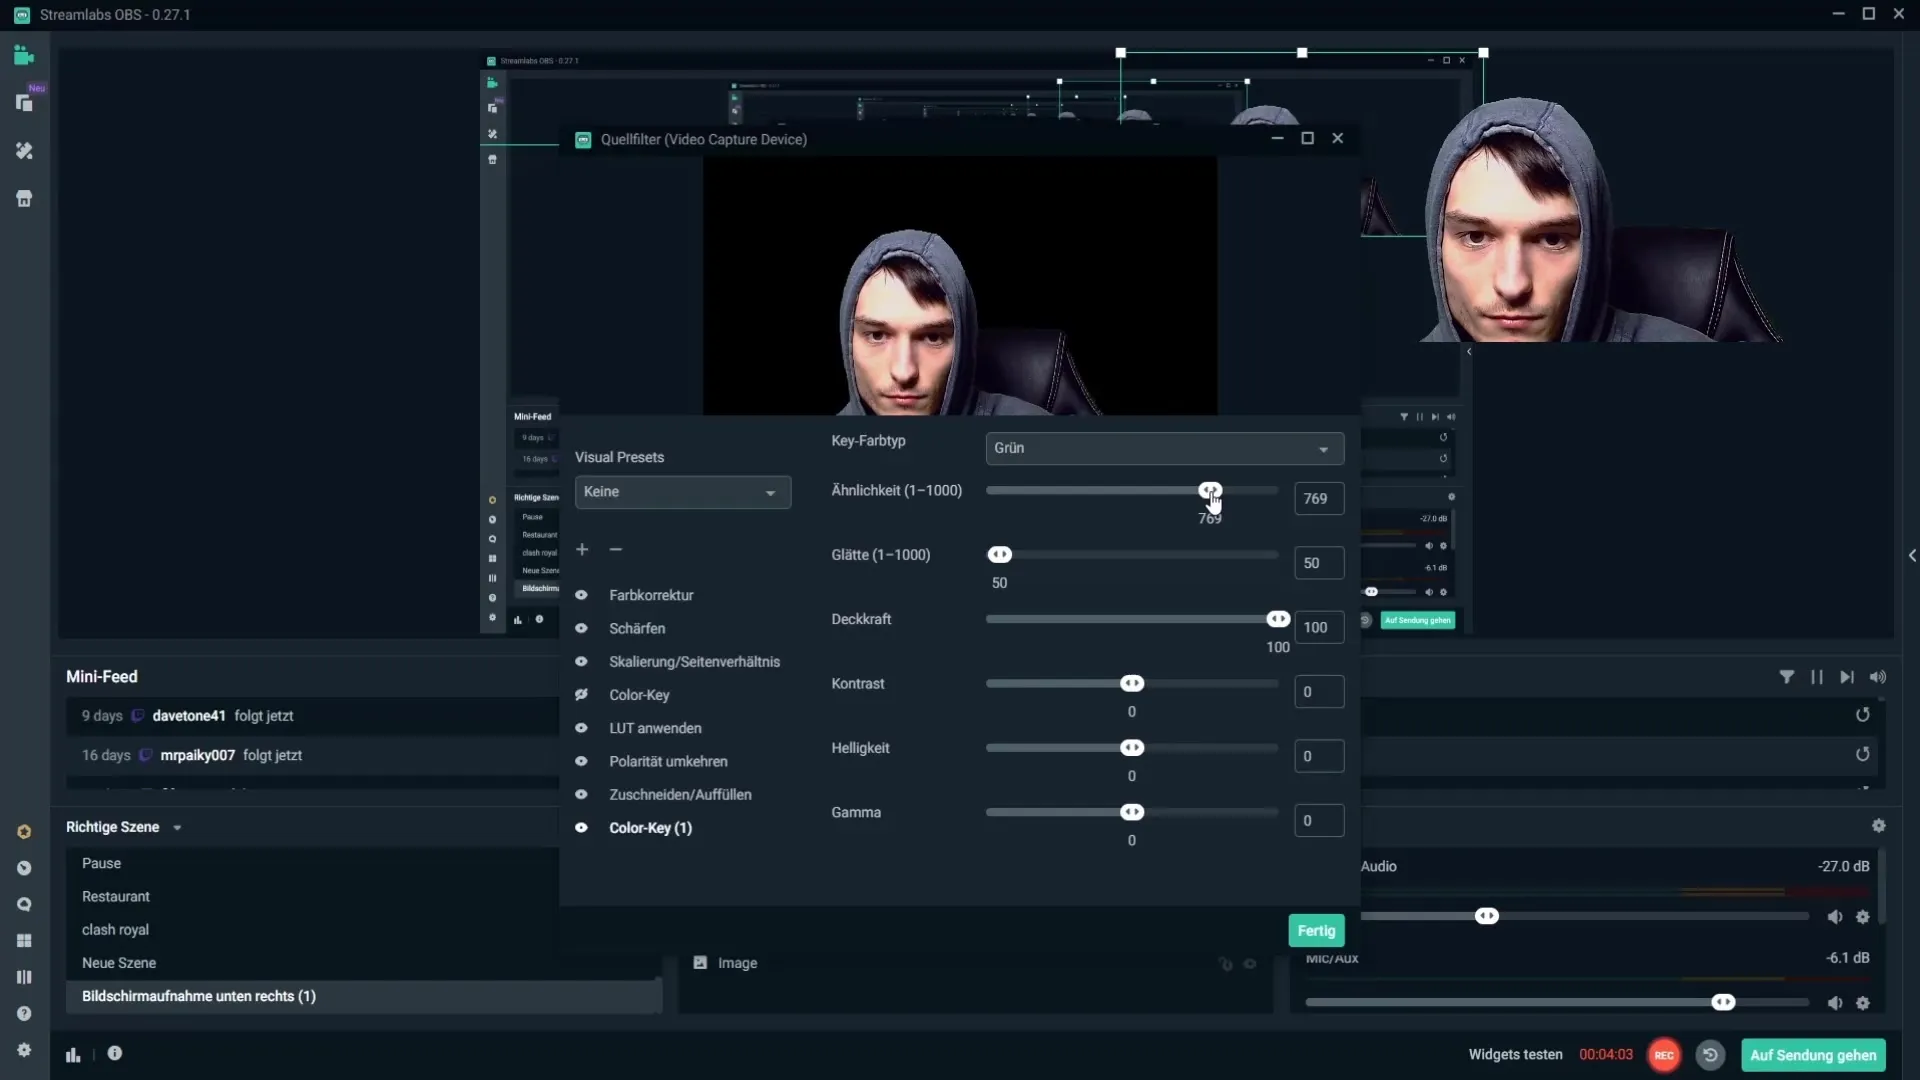
Smoothness ensures that you are not cut out too harshly. By increasing the smoothness, the edges will appear softer and more natural. It is advisable to experiment with the values to achieve the best possible result.
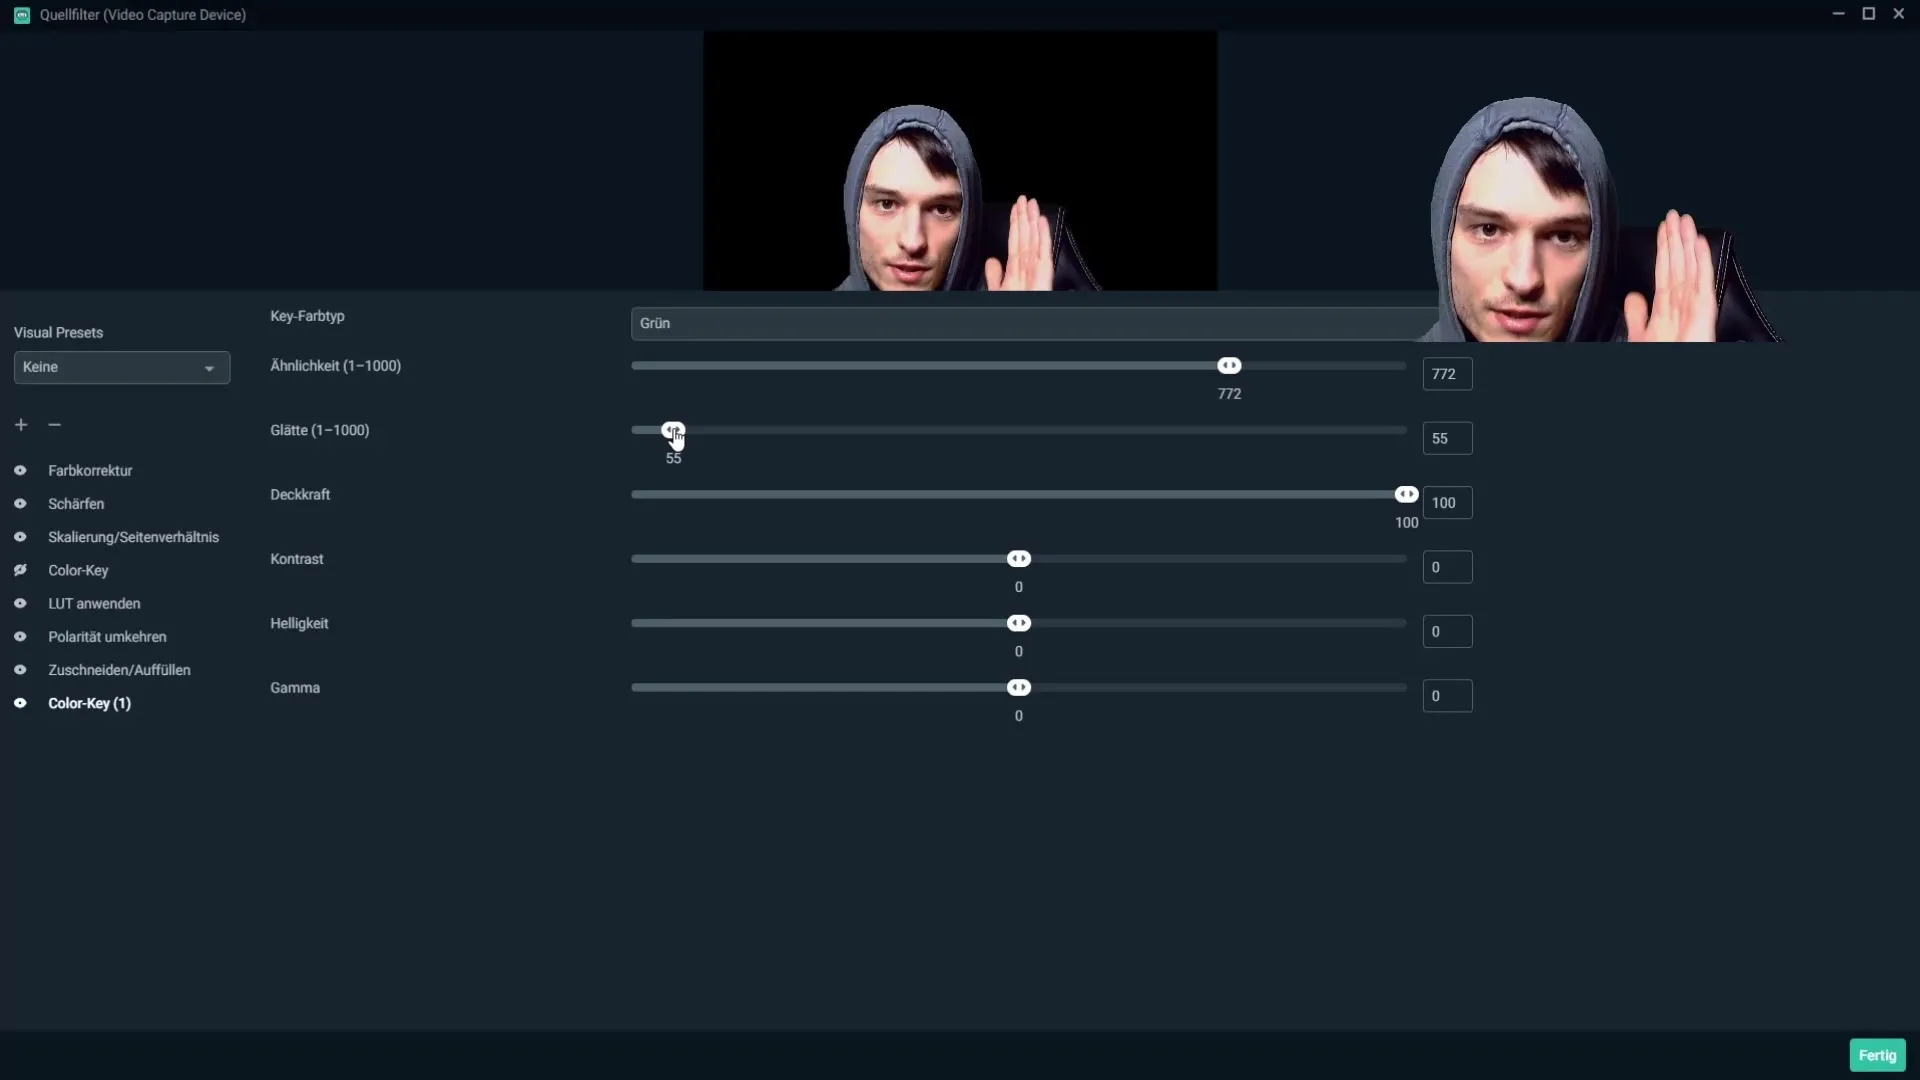
You also have the option to adjust the opacity, contrast, and brightness for your image. Use these options to make your image as appealing as possible. Be sure that your image is not too bright or too dark, and find a good balance that you like.
If you follow all these steps, you will be able to set up your greenscreen in Streamlabs OBS correctly and create professional-looking content. Practice, experiment, and adjust the settings to find your optimal configuration.
Summary – Guide to Setting Up a Greenscreen in Streamlabs OBS
In this guide, you learned how to effectively set up your greenscreen in Streamlabs OBS. The tips on lighting, positioning, and camera settings are crucial for achieving optimal results. Let your creativity flow and take your streams to the next level!
Frequently Asked Questions
How can I best illuminate my greenscreen?Use dimmable LED lights to control lighting conditions and place a ring light in the center.
How can I prevent shadows on the greenscreen?Make sure to maintain sufficient distance between you and the greenscreen.
Are wrinkles in the greenscreen a problem?Yes, wrinkles can affect quality. Iron the greenscreen or lightly spray wrinkles with water.
What color should I choose for the key?Set the key color type to "Green" to remove the green screen.
How can I reduce noise in my image?Better lighting can minimize noise. Ensure to use enough light sources.


