Creating quotes in your stream can significantly increase viewer engagement and entertainment. By using Streamlabs OBS, you can quickly and easily manage quotes to enhance interactivity and fun in the chat. This guide will take you step by step through the process of quote creation and management.
Key Insights
- Quotes can be created and managed via Cloudbot in Streamlabs OBS.
- You need to enable Cloudbot and enter an initial chat command in the Twitch chat.
- There are specific commands for adding, editing, and removing quotes.
- Multiple customization options for the quote display are available.
Step-by-Step Guide
1. Enable Cloudbot
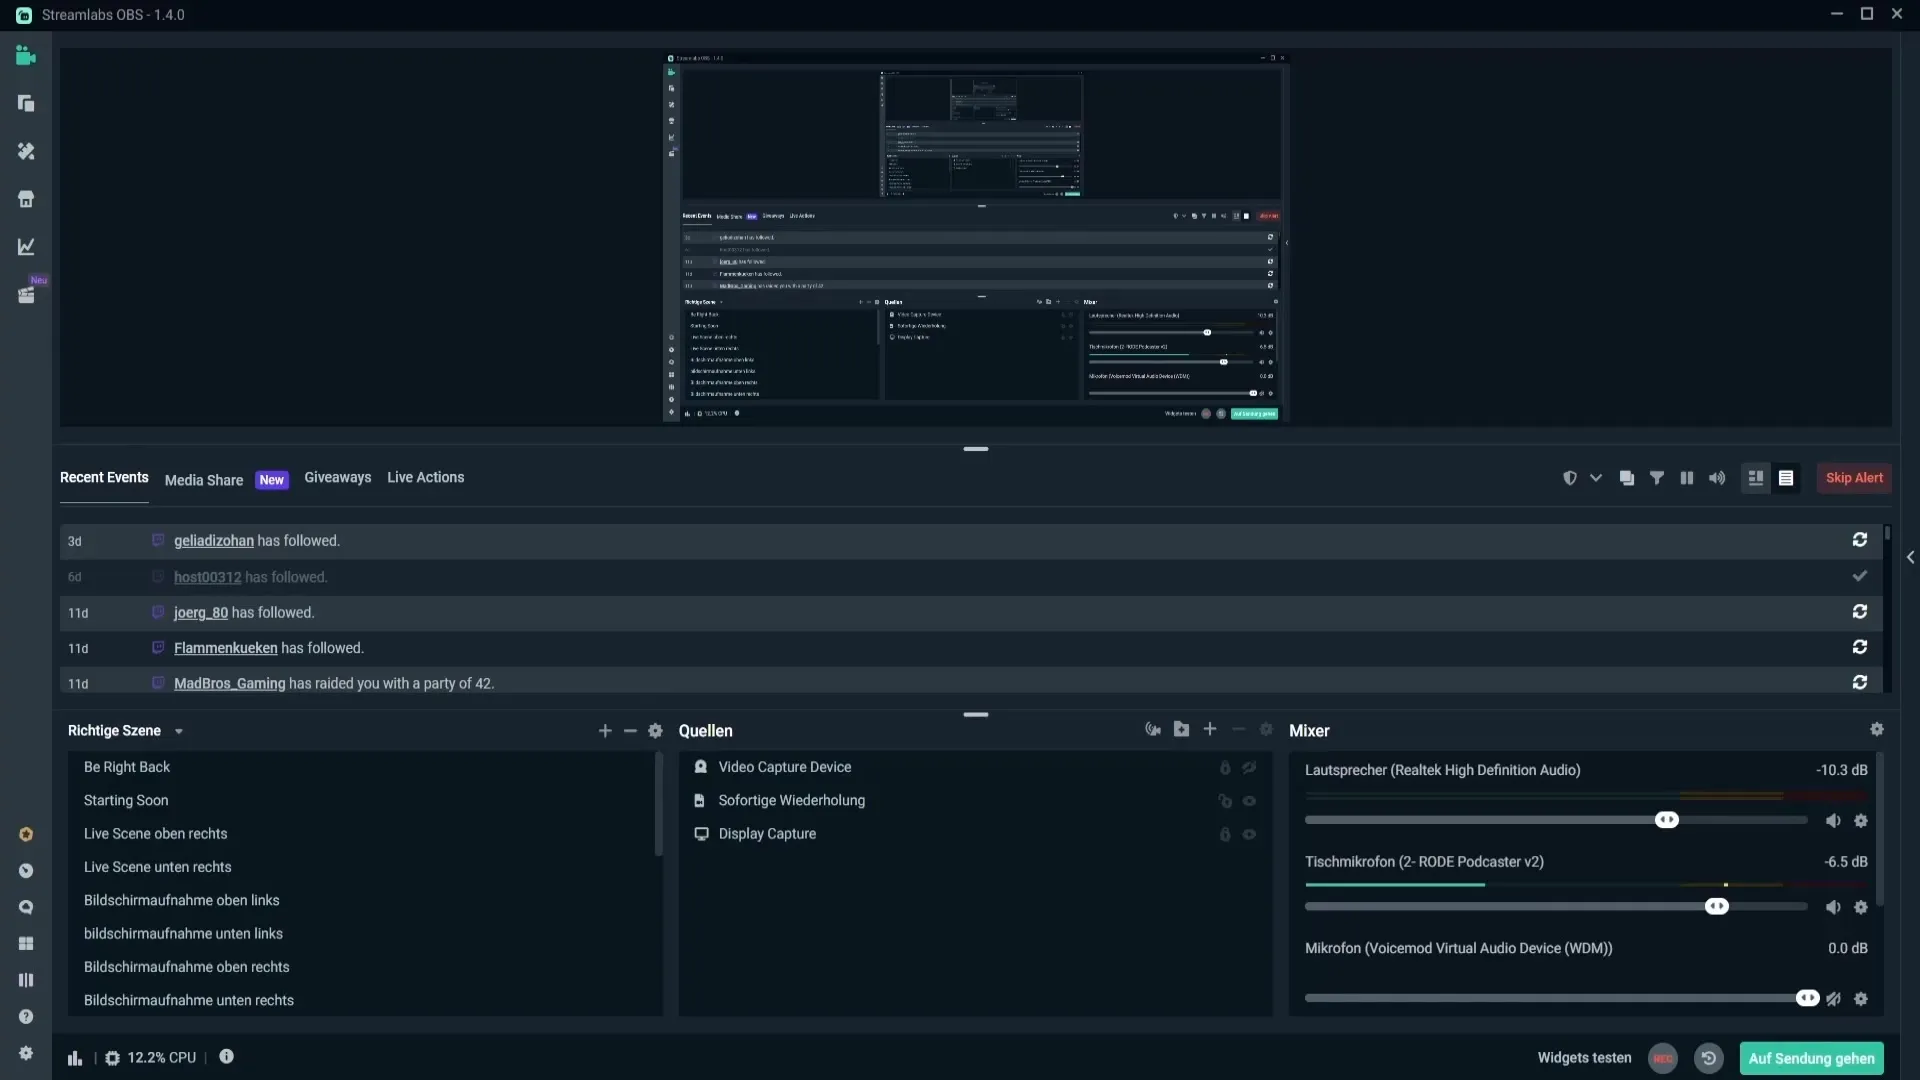
To start creating quotes, you must first enable the Cloudbot. Open Streamlabs OBS and click on the Cloudbot icon in the lower left corner.
2. Configure Cloudbot
After clicking the Cloudbot icon, a webpage will open that allows you to configure the settings for Cloudbot. Ensure that Cloudbot is enabled and type "Streamlabs" in the Twitch chat first to establish the connection.
3. Customize Quote Format
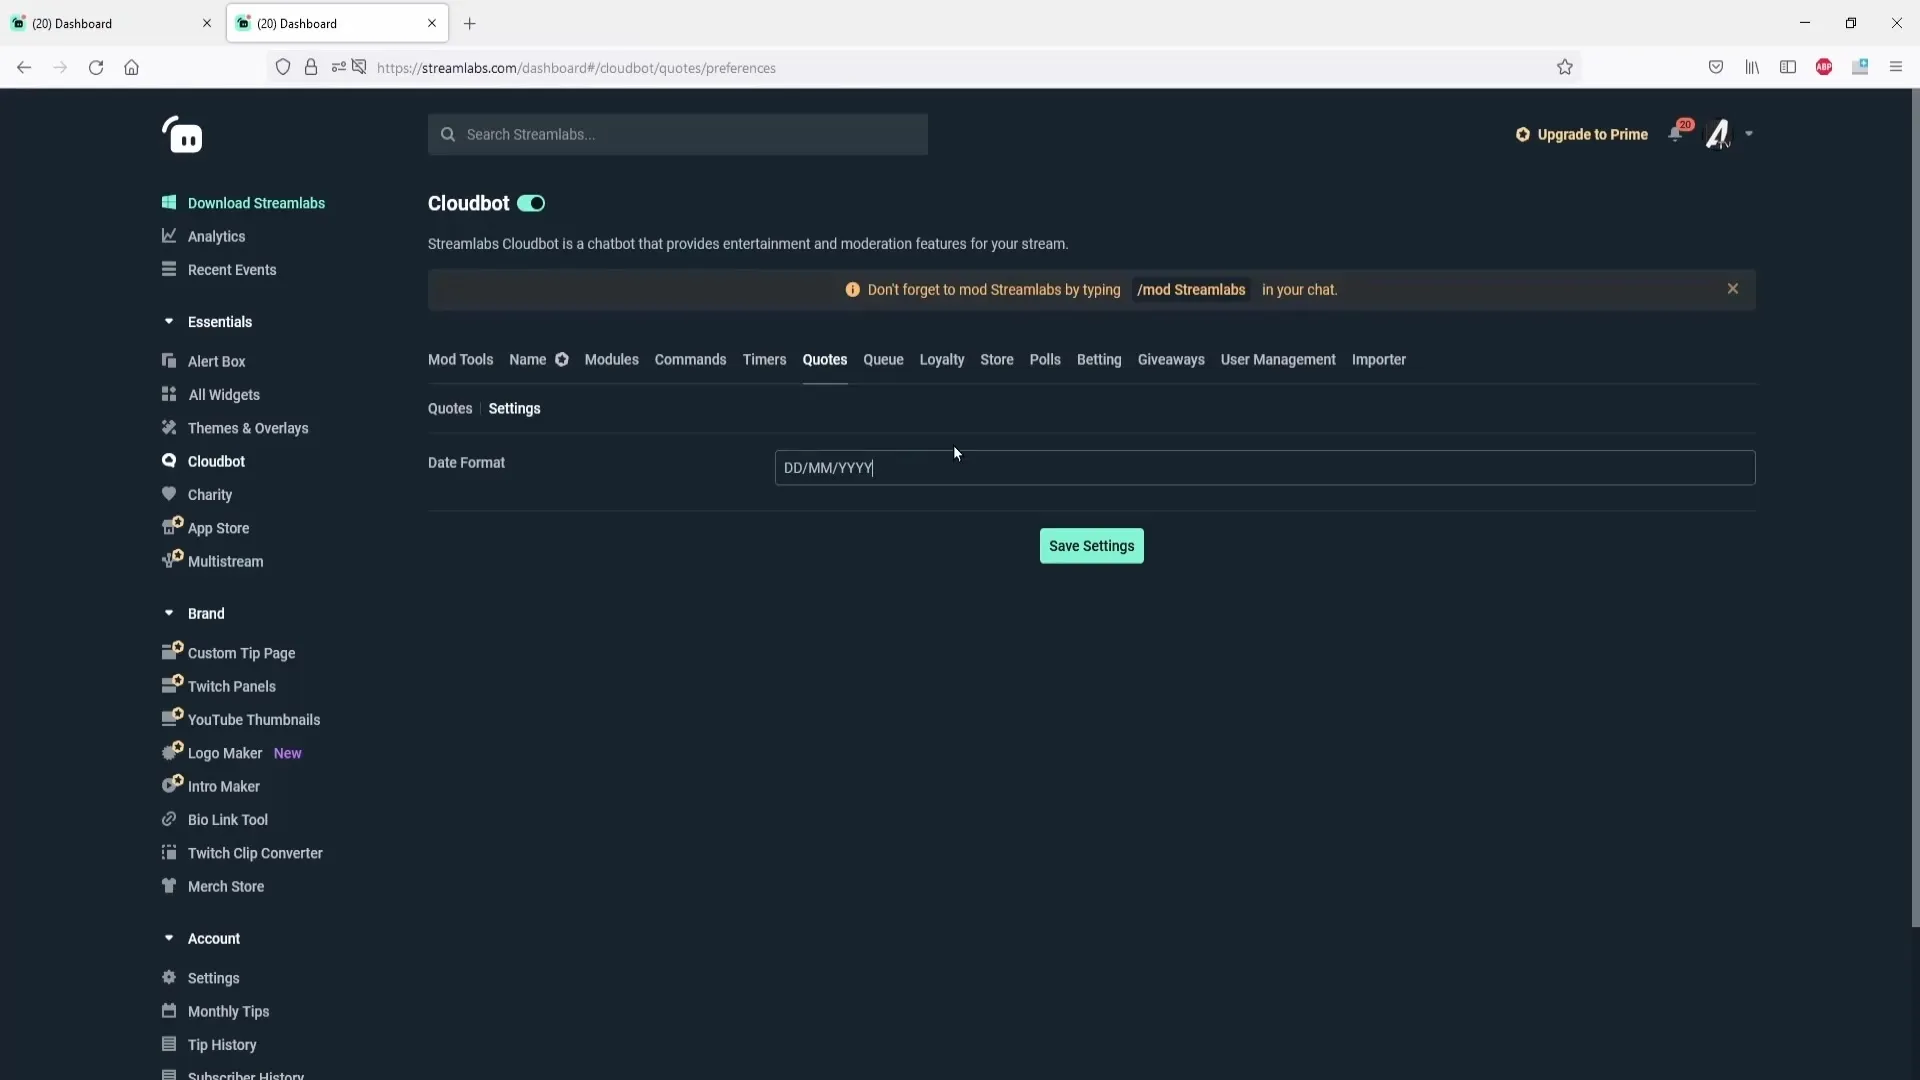
Before adding a quote, I recommend setting the date format. You can do this in the settings, where you can determine how the date is displayed in the chat. Options like DD for the day, MM for the month, and YYYY for the year are available. After making the adjustments, click on "Save Settings."
4. Add Quote
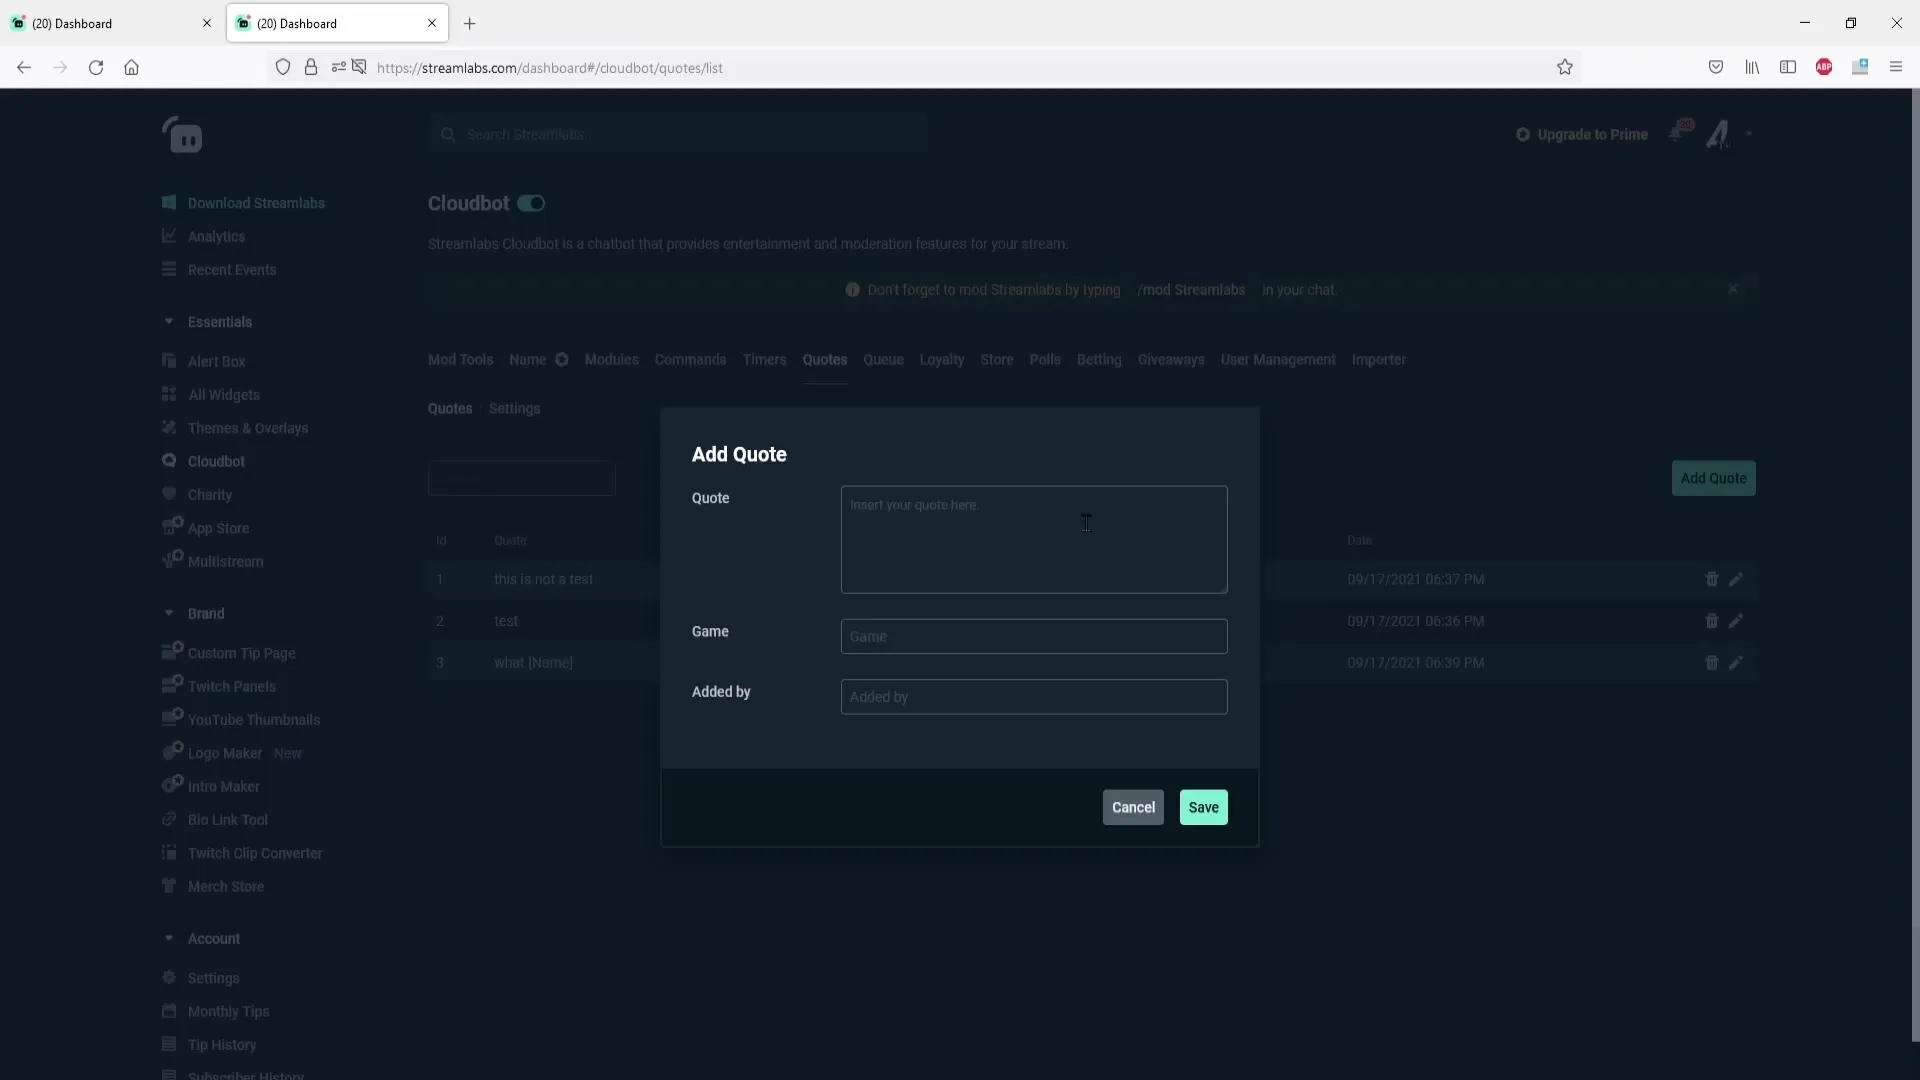
You are now ready to create your first quote. Click on "Add Quote" and enter your quote. For example, you could type "I stream Minecraft." Below, you have the option to specify the name of the game or the person from whom the quote originates. If the quote is added by a moderator, their name can also be entered. After entering, click "Save."
5. Manage Quotes
All added quotes are visible in a list. You can edit or delete them at any time. If you want to adjust a quote during the stream, simply click the edit icon or the trash icon next to the respective quote.
6. Use Quote Commands
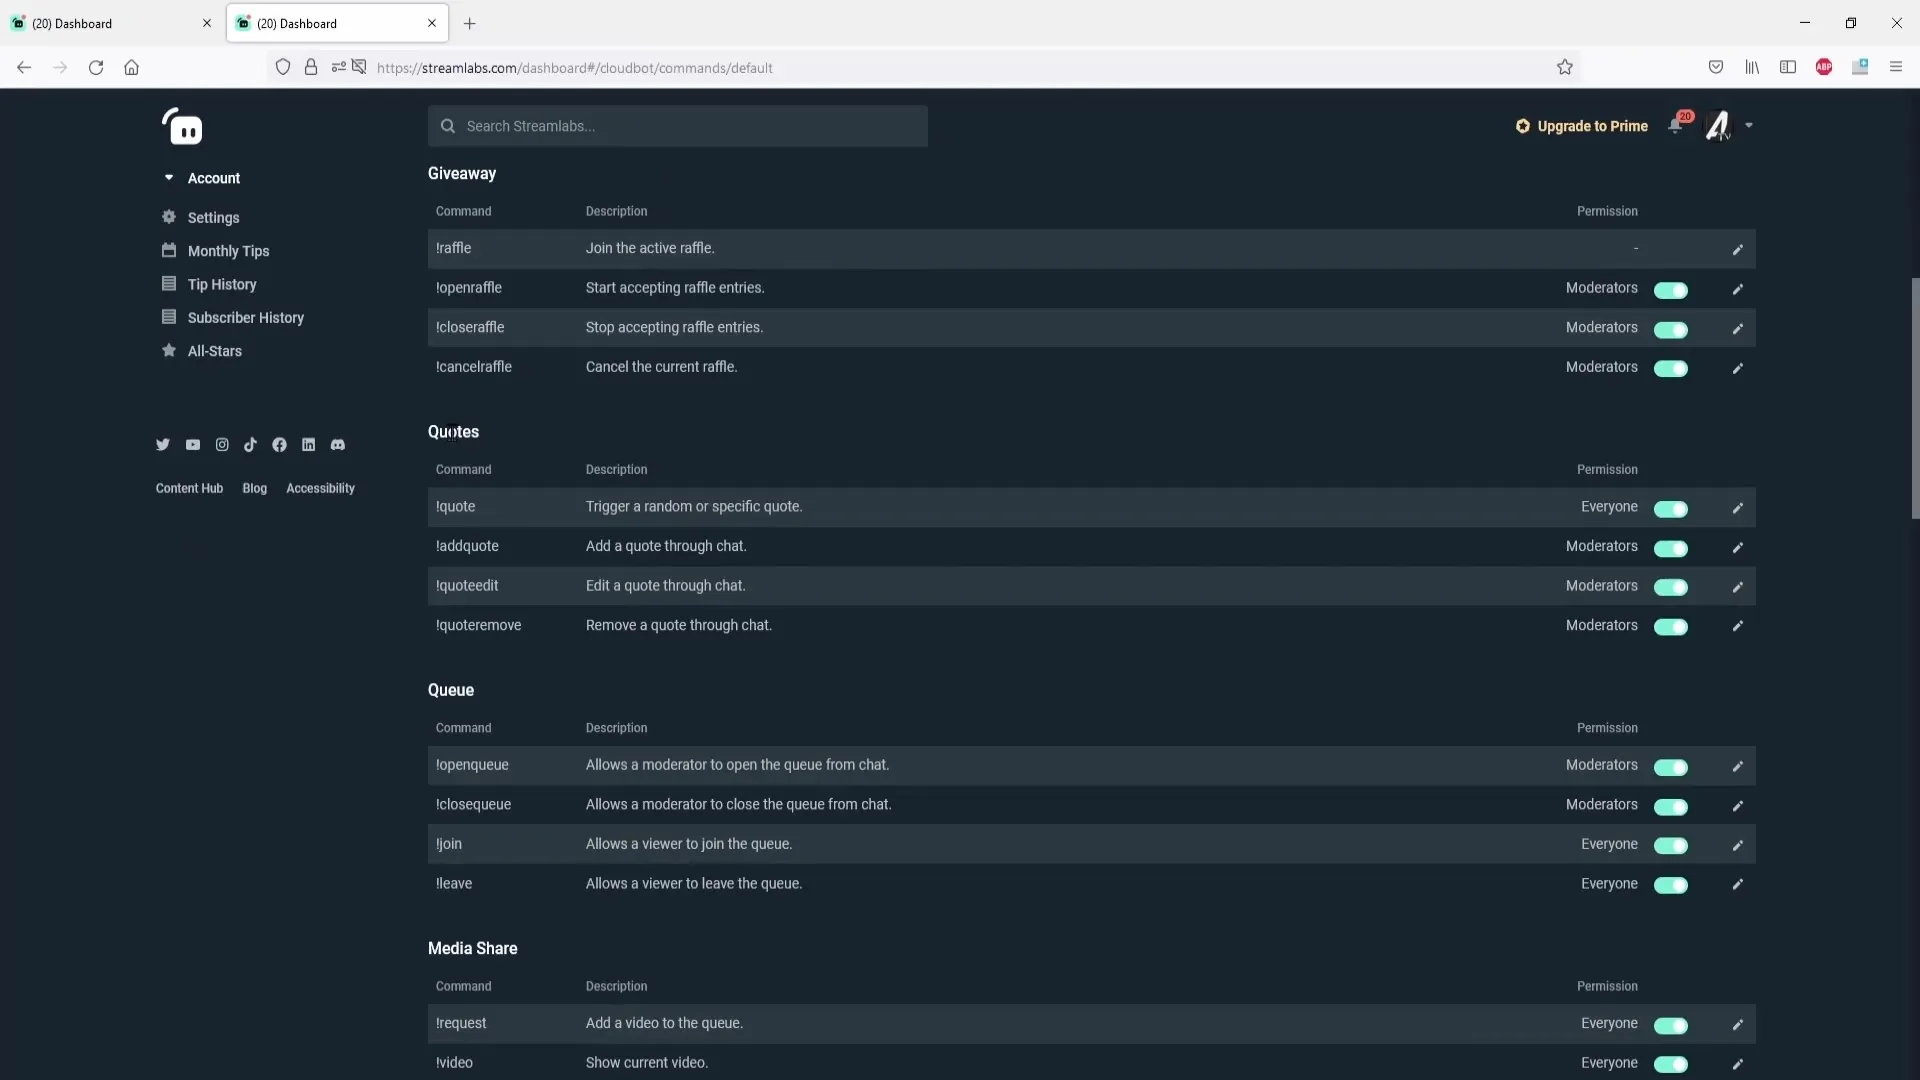
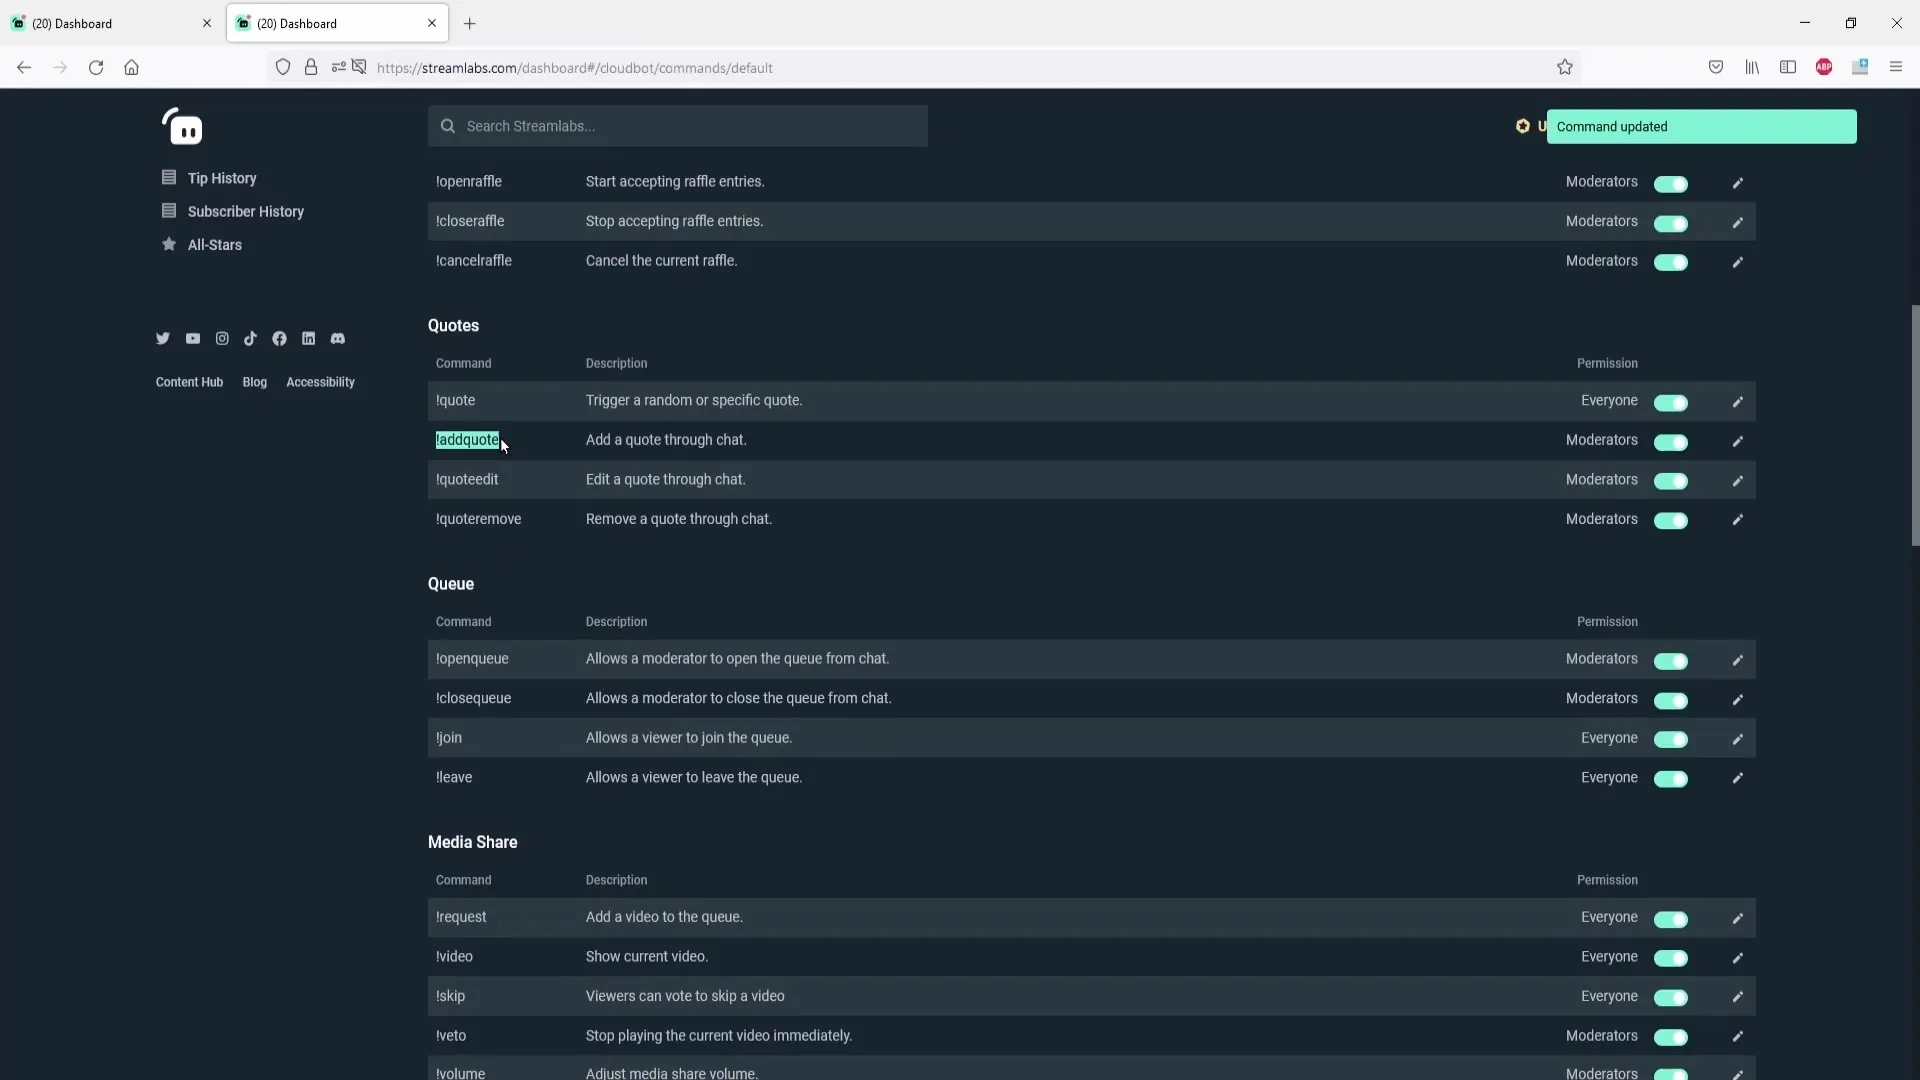
To allow viewers to retrieve quotes in the chat, you need to enable the corresponding commands. Click on "Commands," then on "Default" to see the available commands. A common command is "!quote," which displays a random quote in the chat. Make sure this command is enabled.
7. Make Command Adjustments
You can also make adjustments to the command settings, such as changing the command name or adjusting the display options (e.g., to output the command in the chat). Additionally, you can set permissions for who can trigger quotes.
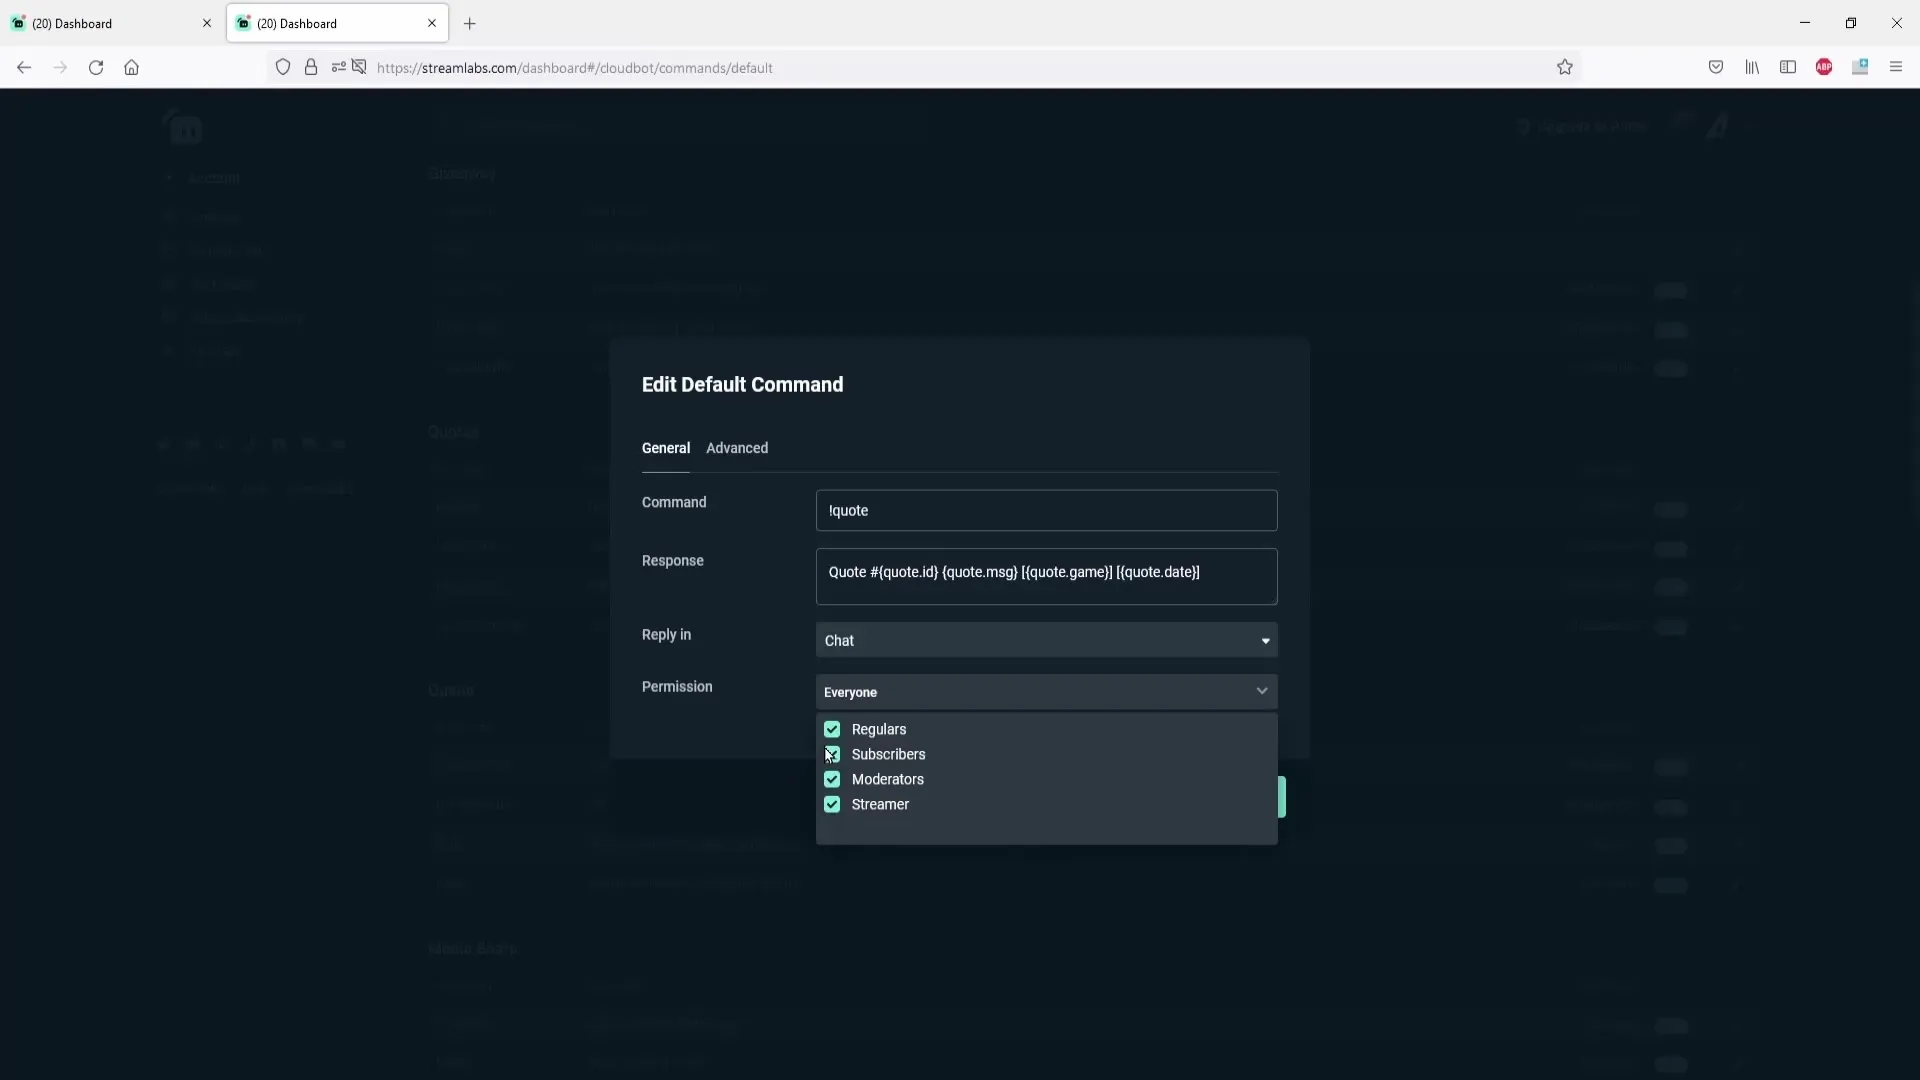
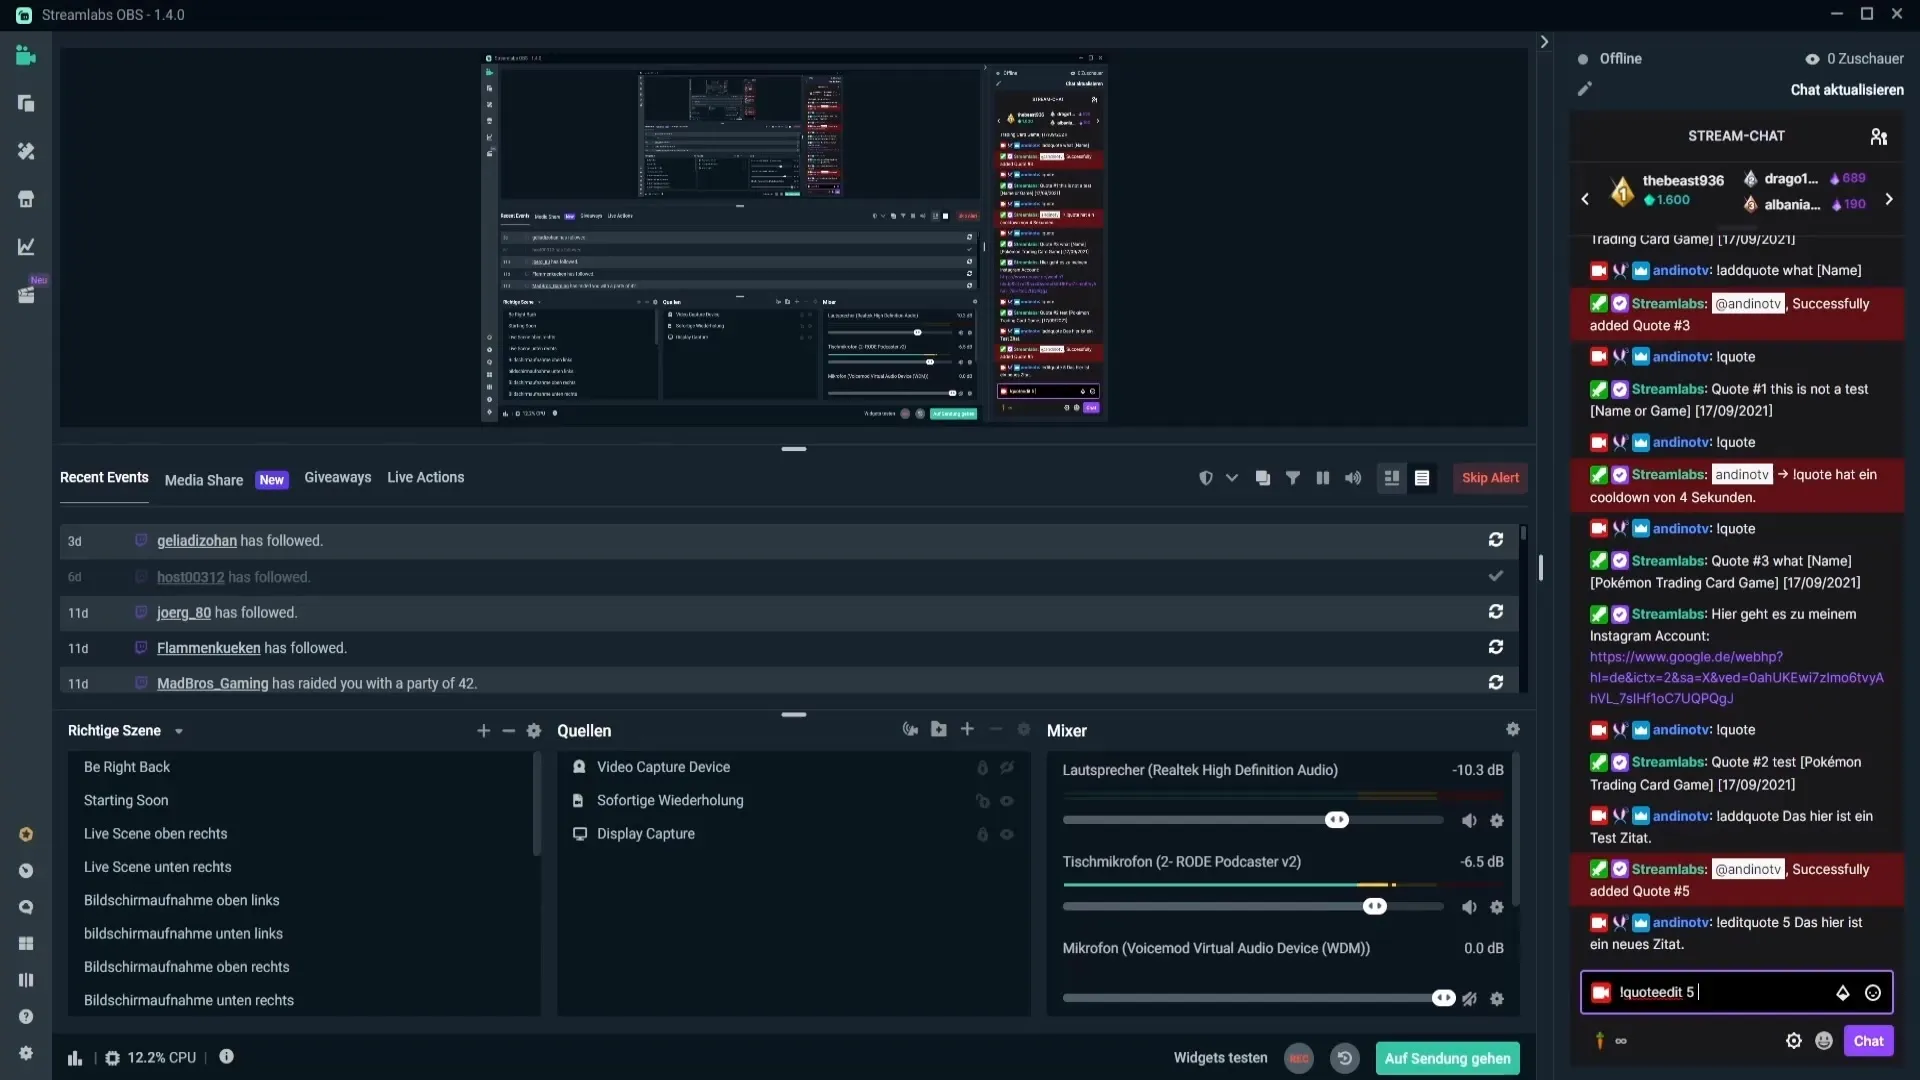
8. Edit and Delete Quotes
To edit a quote, use the command "!quote edit" followed by the quote number. To remove a quote, use the command "!quote remove" followed by the respective quote number. These commands allow you flexible management of the quotes.
9. Confirm Changes
After making any changes to a quote or the commands, you need to confirm the changes to ensure they take effect. Simply go to "Confirm" after making all adjustments.
10. Use Quotes in Chat
The final step is to practically apply the quotes in the chat. To display a quote, simply type "!quote" in the chat. The bot will then output a random quote that is registered in the list.
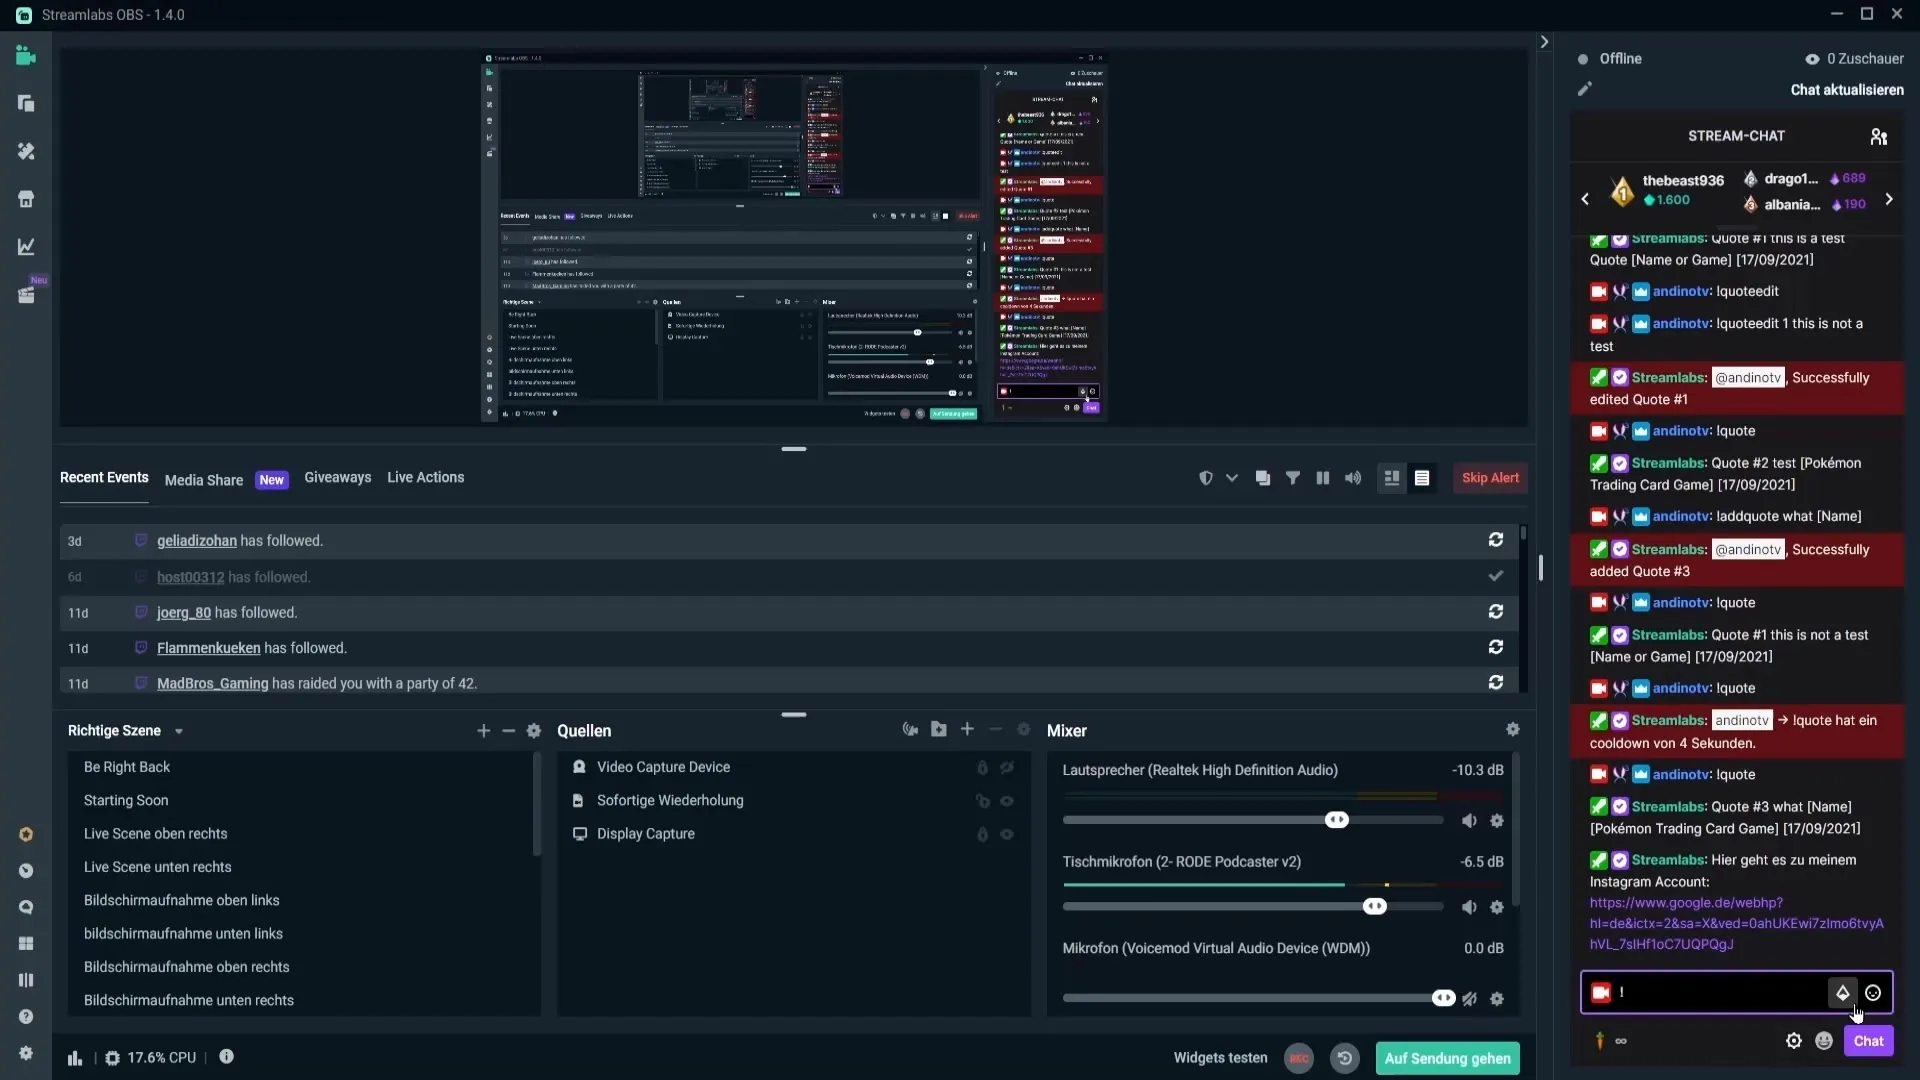
Summary – Creating Quotes in Streamlabs OBS
This guide has shown you how to effectively create, edit, and manage quotes in Streamlabs OBS. With these tools, you can create interactive experiences for your viewers and enhance the entertainment in your stream.
Frequently Asked Questions
What is Cloudbot?Cloudbot is a tool that helps you automate various functions in Streamlabs OBS, including quote management.
How can I display quotes in the chat?Use the command "!quote" in the chat to display a random quote.
Can I edit a quote?Yes, you can edit a quote using the command "!quote edit" followed by the quote number.
How do I delete a quote?Use the command "!quote remove" followed by the quote number to delete a quote.
What do I do if Cloudbot isn't working?Make sure Cloudbot is enabled and that you have entered the correct command in the chat.
