

A report in Access often contains all the necessary data, but still looks untidy when fields are scattered and the spacing is uneven. In this tutorial, I guide you through the final design steps. You realign fields, change labels, adjust the page format for printing, and save the finished report so that it looks clear and presentable.
The video is only loaded from YouTube when you play it – data (including your IP address) is then transmitted to YouTube/Google. More in the privacy policy
Key Takeaways
- By holding down the Shift key, you select multiple fields and move them together.
- Label fields are pure captions, while text fields display values from the table.
- In the property sheet, you set captions, fonts, borders, and widths.
- In Layout View, you adjust the page format, for example portrait for A4.
- Reports are regenerated with the current data each time they are opened.
Step-by-Step Guide
Step 1: Recognizing the Starting Point in the Report
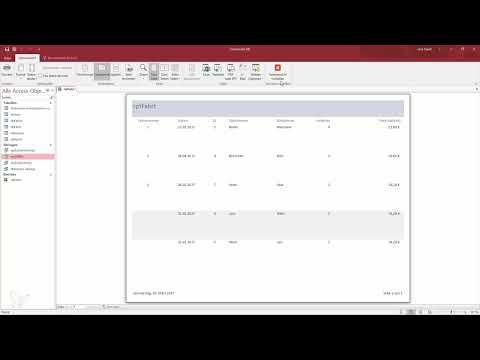
Open the report in Report View and get an overview. You see the trip number, date, start and destination address, seats, price, and ID. Often the start address takes up far too much space, while the destination address is far away. The ID is also frequently poorly placed. Make a note of which fields you want to move or shrink before you get started.

Step 2: Selecting and Shrinking the Trip Number
Click the trip number field to select it. You can then move it with the mouse or resize it at the corners. Since the trip number has only a few digits, a much smaller width is enough. The date field, on the other hand, needs more space so that the date remains fully legible. When shrinking, make sure nothing gets cut off.

Step 3: Moving the Start and Destination Addresses Closer Together
The Shift key helps you here. Hold down Shift, select the start and destination addresses together, and drag them into the desired shape. This keeps both fields at the same height, and unnecessary empty space disappears. Shrink the start address, because it needs less space than allotted. The rulers at the top edge help you maintain even spacing.
Step 4: Placing the Destination Address Closer to the Start Address
Once the start address is more compact, you pull the destination address closer. Select both fields again with Shift and move them together to the left until the spacing looks right. Make sure the fields do not overlap. A small, even gap later ensures a clear picture in the page preview.

Step 5: Placing the Price at the End of the Row
The price including VAT belongs at the end of the record. So drag it to the back, to the right of the other fields. Prices for limousine rides are normally not in the four-digit range, so you can make the field correspondingly narrower. Leave some space between the fields so that the row does not look cramped.
Step 6: Placing the ID After the Date
In terms of content, the ID belongs directly with the date. So move it forward, directly behind the date field. You can also select it together with other fields via Shift and move them together. This makes the row easier to read because related information stands side by side.
Step 7: Selecting Multiple Fields at Once with the Mouse
Instead of clicking each field individually, you can click an empty area in the report and drag the mouse across several fields. All affected fields are selected in the process. This way you can, for example, move the seats and the labels in one go. Afterwards, you enlarge the seats so that they have enough space in the view.
Step 8: Checking Spacing in the Page Preview
Switch to the page preview using the view switcher. Here you see what the report will actually look like later. Trip number, date, ID, addresses, and seats should be clearly arranged side by side. If the gaps between the records are too large, reduce the height of the rows. Then check whether all records are evenly arranged one below the other.
Step 9: Distinguishing Between Label Fields and Text Fields
Not every element in the report behaves the same way. Label fields are pure captions that remain unchanged in the layout. Text fields, often called text boxes in technical jargon, on the other hand display a value from the table. A color marking helps you distinguish between the two types. If, for example, the booked seats are not displayed completely, this is often due to a text field whose width is too small.

Step 10: Adjust labels via the property sheet
Double-clicking a field opens the property sheet. There, in the "Format" tab, you will find the caption. Replace the text with a clear, understandable label, such as "Seats" or "Price", and confirm with Enter. You can make the same change for all other fields that should receive their own label. In the page view, the new names then appear immediately.

Step 11: Name and format the report title
Give the report a meaningful title, for example "Trip Report". To do this, open the property sheet of the label and enter the text. In the format section, you set the width, height, font, font size, and underlining. In addition, special border widths can be set, similar to what you know from Word, only with more options. Then move the title to the center and stretch it lengthwise if needed.
Step 12: Remove the date and page display
By default, the report shows the current date and the page indication "Page 1 of 1". If you do not want these elements, switch to design view via "View". There you can simply select and remove the fields for the date and the page display. Afterwards, both details are missing from the report, while the records remain unchanged.
Step 13: Switch to layout view and set portrait orientation
For a clean print result, layout view is worthwhile. There you see the colored areas that mark the header, detail, and footer. Under "Page Setup" you choose portrait or landscape orientation and, if necessary, columns. When the orientation changes, the arrangement adapts immediately. For printing on A4, portrait orientation is the right choice in most cases.

Step 14: Move fields in layout view
In portrait orientation the width is limited, so you have to rearrange the fields. Click on several fields while holding down the Shift key so that they stay selected together. Then drag the group to the desired position. The destination address and the other entries can be conveniently readjusted this way until every row fits completely on the sheet again.
Step 15: Create space for price and seats
After switching to portrait orientation, price and seats extend beyond the A4 sheet. Therefore, shrink the ID and date fields, which need less space, and move the address fields accordingly. Select the seats with Shift and place them in a position where they are completely visible. The date field may be somewhat wider for this so that it remains easy to read. Finally, adjust the height so that no rows collide.
Step 16: Check page count and page format
After the adjustments, check whether the report now fits on one page and the second page has disappeared. In the "Format" menu, A4 should be selected automatically in the page setup. Then switch between report view and page view via the "Home" tab to assess the result. This way you see immediately whether all details are displayed completely and neatly.
Step 17: Save the report and find it again
New reports in Access are not saved permanently automatically, but must be saved explicitly. In this example, the wizard has already taken care of this. You will find the report in the navigation pane next to the tables and queries. If you close it, you can open it again at any time. It is then regenerated with the current data, so you can print it directly.

Summary – Designing an Access report: Aligning fields and setting up portrait orientation
Step by step, you have turned a cluttered Access report into a print-ready document. First, you rearranged trip number, date, addresses, price, and ID and reduced the spacing. Then you adjusted labels via the property sheet and formatted the title. In the last section, you switched the page format to portrait orientation and adapted the fields to the A4 sheet. If you master these steps, you will design future reports faster and with a clean result.
FAQ
How do I select several fields at the same time?Hold down the Shift key and click the desired fields one after another, or drag the mouse over an empty area to select several fields.
What is the difference between label fields and text boxes?Label fields are pure captions, whereas text boxes display a value from the table.
How do I change a label in the report?Double-clicking the field opens the property sheet; there you enter the new caption in the Format tab and confirm with Enter.
How do I remove the current date from the report?Switch to design view, select the date field, and remove it.
Why do seats and price extend beyond the sheet?This is usually because portrait orientation has a smaller width than the original layout. Shrink fields with little content and move the remaining fields accordingly.
Is my report saved automatically?No, new reports must be saved. Afterwards you will find them in the navigation pane and can open them again at any time.

