

Imagine the price of a trip changes, and the VAT automatically adjusts itself right away. That is exactly what calculated fields in Microsoft Access make possible. You no longer have to calculate the VAT manually or store it in an additional field. Access does the math for you.
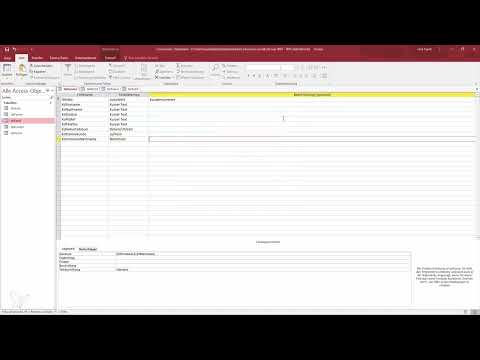
The video is only loaded from YouTube when you play it – data (including your IP address) is then transmitted to YouTube/Google. More in the privacy policy
In this tutorial, using a trip management system as an example, you will learn how to create drivers, trips, and customers, calculate the gross price with a simple formula, and combine text fields such as first and last name or postal code and city. All you need is an existing database with a few tables and a little patience while experimenting.
Key Takeaways
A calculated field does not store its own value in the database. Access recalculates the result each time a source value changes. The formula itself is stored in the field, not the result.
For calculations such as VAT, you work with factors: 1.19 corresponds to a 19% surcharge, 1.07 corresponds to 7%.
With the ampersand (&) you concatenate text fields. A space between quotation marks provides the necessary spacing.
A lookup field with multiple columns shows you more in the selection list than just the stored value, and you can hide invisible columns via the column width.
Step 1: Create Drivers
Start with the table for the drivers. Create a record with first name, last name, and street. For the postal code, you should use a lookup field that refers to the postal code table. This way you draw on verified address data and avoid typing errors. Then add a phone number. You point the lookup function to the same postal code table so that all address fields are structured consistently.

Step 2: Create a Trip with Lookup Fields
Now create a new trip with a trip number, for example 98765. For the driver's personnel number, you create a lookup field that refers to the Drivers table. This way you can conveniently select the driver from a list in the future, and the trip shows the name instead of a bare number.
Step 3: Enter Trip Data and Convert Duration
Enter the date, the start address Berlin, the destination address Hannover, and the price of 10 euros. The duration is the crucial point: A trip of 3 hours and 30 minutes cannot be stored directly as a number if the field only expects minutes. Therefore, convert it into minutes. 3 hours and 30 minutes become 210 minutes. You can process this field further later with a formula.
Step 4: Store Car and License Plate
You should also integrate the car via its own table and a lookup field. To do this, create a license plate such as GU with a sequence of numbers and enter the number of seats, in the example four. Then you link the car to the trip. You can rebuild this step yourself as an exercise and compare it with the finished example files.
Step 5: Create a Calculated Field for the Gross Price
Open the Trip table in Design View. The Price field is so far a number with the data type Long Integer. Change the data type to Calculated by adding a new field in the list view and selecting the type Calculated. Choose Currency as the result type.
In the Expression Builder, you now enter the formula. To get the gross price, you multiply the net price by 1.19. This corresponds to 19% VAT. Confirm with OK. The field now displays the price including VAT.
If you need different tax rates, for example for trips abroad, create a separate field with the VAT rate in percent. The formula can then use this value instead of entering 1.19 as a fixed number.

Step 6: Test the Calculation
As a test, change the price to 20 euros. You will see that the calculated field immediately displays the new gross price without you having to save anything. This is because the field exists only virtually. It retrieves the formula and the source value anew each time it is displayed. You therefore do not need an additional field that stores values and could become outdated.
Step 7: Concatenate First and Last Name
Next, you combine text fields. Open the customer table and create a new calculated field, for example with the name Customer. In the Expression Builder, you select the First Name field and connect it with the Last Name field using the ampersand. The expression therefore reads roughly First Name & Last Name.
Save the field and switch to the list view. The name appears, but without a space between the first and last name. The reason: Access joins the values together exactly as they are stored. If a value changes, for example when you add a middle name, Access automatically updates the calculated field.

Step 8: Insert a space between first and last name
Open the Expression Builder again. Insert another ampersand between the two fields, followed by a space in quotation marks. The expression then reads Vorname & " " & Nachname. Incidentally, you can enter any text between the quotation marks, such as a hyphen or a comma.
Save the change and return to the list view. Now the name is displayed correctly, with a space between the first and last name.
Step 9: Combine postal code and city in one field
The same principle works with postal code and city. Open the Postleitzahl-Ort table and create a calculated field. Use the postal code, a space in quotation marks, and the city as the expression. Name the field in camel case style, for example PLZOrt. This keeps it clear and easy to read in your queries.
Step 10: Design a lookup field with multiple columns
Now comes the trick for the customer table. Open the lookup field for the postal code in design view. Increase the number of columns to three. So that you only see the new field with postal code and city in the selection list, set the width of the first two columns to 0 cm. The last column gets the full width of 10 cm.
Save and switch to the list view. There, the selection now displays something like "10 Wien". In the background, however, only the postal code is stored as the value. The display fetches the reference from the postal code table.

Step 11: Add additional information in the expression
If you want to add something extra to the city in the display, such as a suffix like "Inn", you change the expression of the calculated field. When opening it, Access notifies you that the object is already open. Therefore, close the customer table before switching to design view. Then you edit the expression, save the change, and check the result in datasheet view.
If necessary, drag the column wider so that the entire text is readable. The change automatically also affects the customer database.
Step 12: Check the result
At the end, check all the fields: the gross price, the customer name with a space, and the combination of postal code and city. If everything is correct, you have a solid grasp of the basics of calculated fields.
Summary – Access Calculated Fields: Calculating VAT and Concatenating Texts
Calculated fields are a powerful tool in Access. They automatically calculate values such as the gross price, but do not store anything themselves. With the ampersand you concatenate texts, and with spaces in quotation marks you ensure readable results. Lookup fields with multiple columns additionally show you helpful information without changing the stored data. Practice the steps with your own tables, and the process will quickly become second nature.
FAQ
Do I have to store the value-added tax in a separate field?No, a calculated field computes the gross price directly from the net price and the factor 1.19 for 19%.
Is the result of a calculated field stored permanently?No, the calculated field exists only virtually and is recalculated each time it is displayed.
How do I connect first name and last name with a space?You use the expression Vorname & " " & Nachname in the Expression Builder.
Why is the space between first name and last name missing?Access joins the values together without a gap as long as you don't insert a space in quotation marks.
How can I display postal code and city in one field?Create a calculated field that connects the postal code, a space in quotation marks, and the city with the ampersand.
What is the benefit of a lookup field with multiple columns?You see more information in the selection list, while in the background only the actual key value continues to be stored.
Why can't I open the table in design view?The table is still open, so you should close it first before making changes to the design.

