

A database is only as good as its tables. This is exactly where this guide comes in. In Microsoft Access, you create your own employee or contact list, assign suitable field names, and choose the right data type for each field. The example works just as well for a student list or a phone list. In the end, you will have a clean table that you can later populate, sort, and filter.
The video is only loaded from YouTube when you play it – data (including your IP address) is then transmitted to YouTube/Google. More in the privacy policy
Key Takeaways
- Reserved words such as "Name" cause problems. Use "First name" and "Last name" instead.
- Each data type comes with its own field properties, such as a maximum field size or a format.
- With the "Yes/No" data type, you can clearly record states such as "Company: yes or no".
- You should always set the currency to euro so that the values are displayed the same on every computer.
- Data is only saved in Datasheet view. A primary key is not strictly necessary, but useful.
Step-by-Step Guide
Step 1: Prepare an empty database
Open your new, still empty database. If necessary, it already contains a sample table and a form from earlier exercises. You don't need these now. In the Navigation Pane, right-click the form and select "Delete". Then remove the table in the same way and confirm each time with "Yes". This way you start with a clean slate.

Step 2: Open Table Design
In the ribbon, switch to the "Create" tab. There you will find the "Table Design" button. Clicking it creates a new, empty table and opens it directly in Design view. Here you define the structure, that is, fields, data types, and properties. You enter the actual data later.

Step 3: Define field names and avoid reserved words
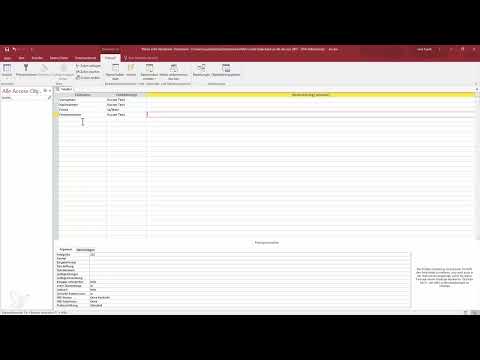
In the design you see three columns: Field Name, Data Type, and Description. The field name is also the column heading in Datasheet view. Sensible names include First name, Last name, Company, Company name, Phone, Date of birth, Street, Postal code, Country, Website, and Salary.
Watch out for reserved words. "Name" has a special meaning in Access for programming and queries. If you use it as a field name, confusion and errors can occur with macros or queries. Therefore, it is better to create two fields: First name and Last name. This has another advantage: later you can specifically sort or search by last name.

Step 4: Optionally use the field description
The "Description" column is optional. It serves only as an explanation for you or other people who work with the database. If you get into the habit of using abbreviations such as "vname", you can note here what they mean, for example "vname equals first name". If you work alone with the database, it is often enough to do without the description.

Step 5: Create text fields with the Short Text data type
Enter the name in the First name field and confirm with Enter. Access automatically sets the data type to "Short Text". If you then click in the row of the field, you will see other data types in the drop-down menu. Each data type has its own field properties. For Short Text, the field size is limited to a maximum of 255 characters. For first names, last names, and company names, this is usually more than enough. If you ever need more space, for example for long notes, choose the "Long Text" data type.
Now also create the fields Last name, Company name, Street, Country, and Website as Short Text. Alternatively, you can define the website as a hyperlink so that you can click on it directly in Datasheet view.
Step 6: Set up a Yes/No field for the "Company" flag
For the "Company" field, you only need a single decision: Is the contact a company or not? The "Yes/No" data type is suitable for this. Select it from the drop-down menu. In the field properties area, you can leave the format as "Yes/No" and enter a caption. This caption is later carried over into new forms. In programming, this data type corresponds to a Boolean value with true or false.
Step 7: Entering the phone number as a number
The "Telefon" field can be created using the "Number" data type. By default, Access then selects the field size "Long Integer", that is, a long whole number. This is suitable for pure sequences of digits.
An important tip from practice: phone numbers with a leading zero or a plus sign, such as +49, lose these characters when stored as a number. It is therefore better to store phone numbers as Short Text. The same applies to the postal code, because otherwise leading zeros are dropped.
Step 8: Understanding the default value for numbers
For number fields, the default value plays an important role. If you enter a 0 there, Access automatically stores a 0 for entries left empty. If you leave the field empty instead, the value remains "Null", that is, nothing. This is often decisive for evaluations: with a query for "Is Null" you find all records without a phone number, whereas a 0 would blur this distinction. Therefore, leave the default value empty if a missing entry is actually meant to mean "nothing".
Step 9: Creating the date of birth as Date and Time
For the date of birth, you select the data type "Date/Time" in the pulldown menu. Access thus offers you a dedicated format that sorts date values correctly and enables calculations such as age queries. When entering data, pay attention to the format shown in the field properties, because it determines how the date appears later.
Step 10: Adding address fields for street, postal code and country
Create the Straße field as Short Text. Special characters such as hyphens or slashes are not a problem either. For very long street names with around 100 characters, Short Text is also sufficient. As described in Step 7, you can store the postal code as Short Text in order to retain leading zeros. The Land field is also Short Text.
Step 11: Defining the website as a hyperlink
For web addresses, Access offers the data type "Hyperlink". In the German-language interface, you will find it under the name "Link". This makes addresses clickable in Datasheet view. This is handy if you frequently visit company websites.
Step 12: Setting the currency field to euro
If you work with monetary amounts, for example for a salary, you select the data type "Currency". In the Format field, you should set "Euro" and, under Decimal Places, specify whether you want one, two, or the automatic display.
The reason for this setting is crucial: without a fixed currency, the display depends on the regional settings of the Windows system. If someone with American settings opens the database, they will see dollar amounts. With the fixed currency "Euro", the display remains the same everywhere.
Step 13: Saving the table and checking the primary key
Switch to Datasheet view by clicking the icon at the top left or by selecting "View" in the menu. When saving, Access asks for a name for the table. Enter "Mitarbeiter", for example, and confirm with "OK".
Access then reports that no primary key is defined. This is not strictly necessary, but a primary key uniquely identifies each record. For this example, you can choose "No" for now. You will explore the basics of the primary key in more depth in a later lesson.

Step 14: Checking the result in Datasheet view
In Datasheet view, you now see your columns side by side: first name, last name, company, company name and phone, as well as the other fields. You can move columns and adjust their width, just as you know from Excel. Further actions are available via the pulldown menu on the column headers.
A small asterisk to the left of the record shows you which row you are currently working in. Data entry itself, that is, filling in the records and the particularities involved, is covered in the next lesson.

Summary – Creating an Access table: employee list step by step
You have created an employee or contact list in Access. You prepared the database, used the table design, and selected a suitable data type for each field. In doing so, you avoided reserved words such as "Name", stored phone numbers and postal codes properly as text, and set the currency to euro. With this structure, the table is ready for data entry.
FAQ
Why shouldn't I name the field "Name"?Access uses "Name" as a reserved word, and this can lead to errors and mix-ups in queries, forms, or macros. Use first name and last name instead.
Do I have to define a primary key?A primary key is not strictly required to save a table. However, it is highly recommended for unique records and should be set up in a later lesson.
Why is the phone number better as Short Text than as a number?With numbers, leading zeros and characters such as the plus sign are lost. Short Text preserves the number exactly as you entered it.
What does the default value Null mean for number fields?If you leave the default value empty, a missing entry is preserved as Null, and you can filter for it specifically. If you enter 0 instead, an empty field is automatically filled with the value 0.
Why should the currency be set to euro?Without a fixed setting, the display depends on the computer's regional settings. With the Euro setting, amounts are displayed uniformly for all users.
Can I change a data type afterwards?Yes, this is possible at any time in the table design. However, be aware that existing data may be altered or truncated as a result.

