In this tutorial, I will show you step by step how to create your first window with JavaFX. This practical part of the course will help you gain a basic understanding of the essential components of GUI-development. We will focus on the three central concepts: Stage, Scene, and Node. Let's jump right in!
Main findings
- The Stage is the main window of your application.
- The Scene contains the visual elements (Nodes) that you want to display in your window.
- Nodes are the individual elements like buttons, text fields, etc., that you place on the Scene.
Step 1: Create a new JavaFX project
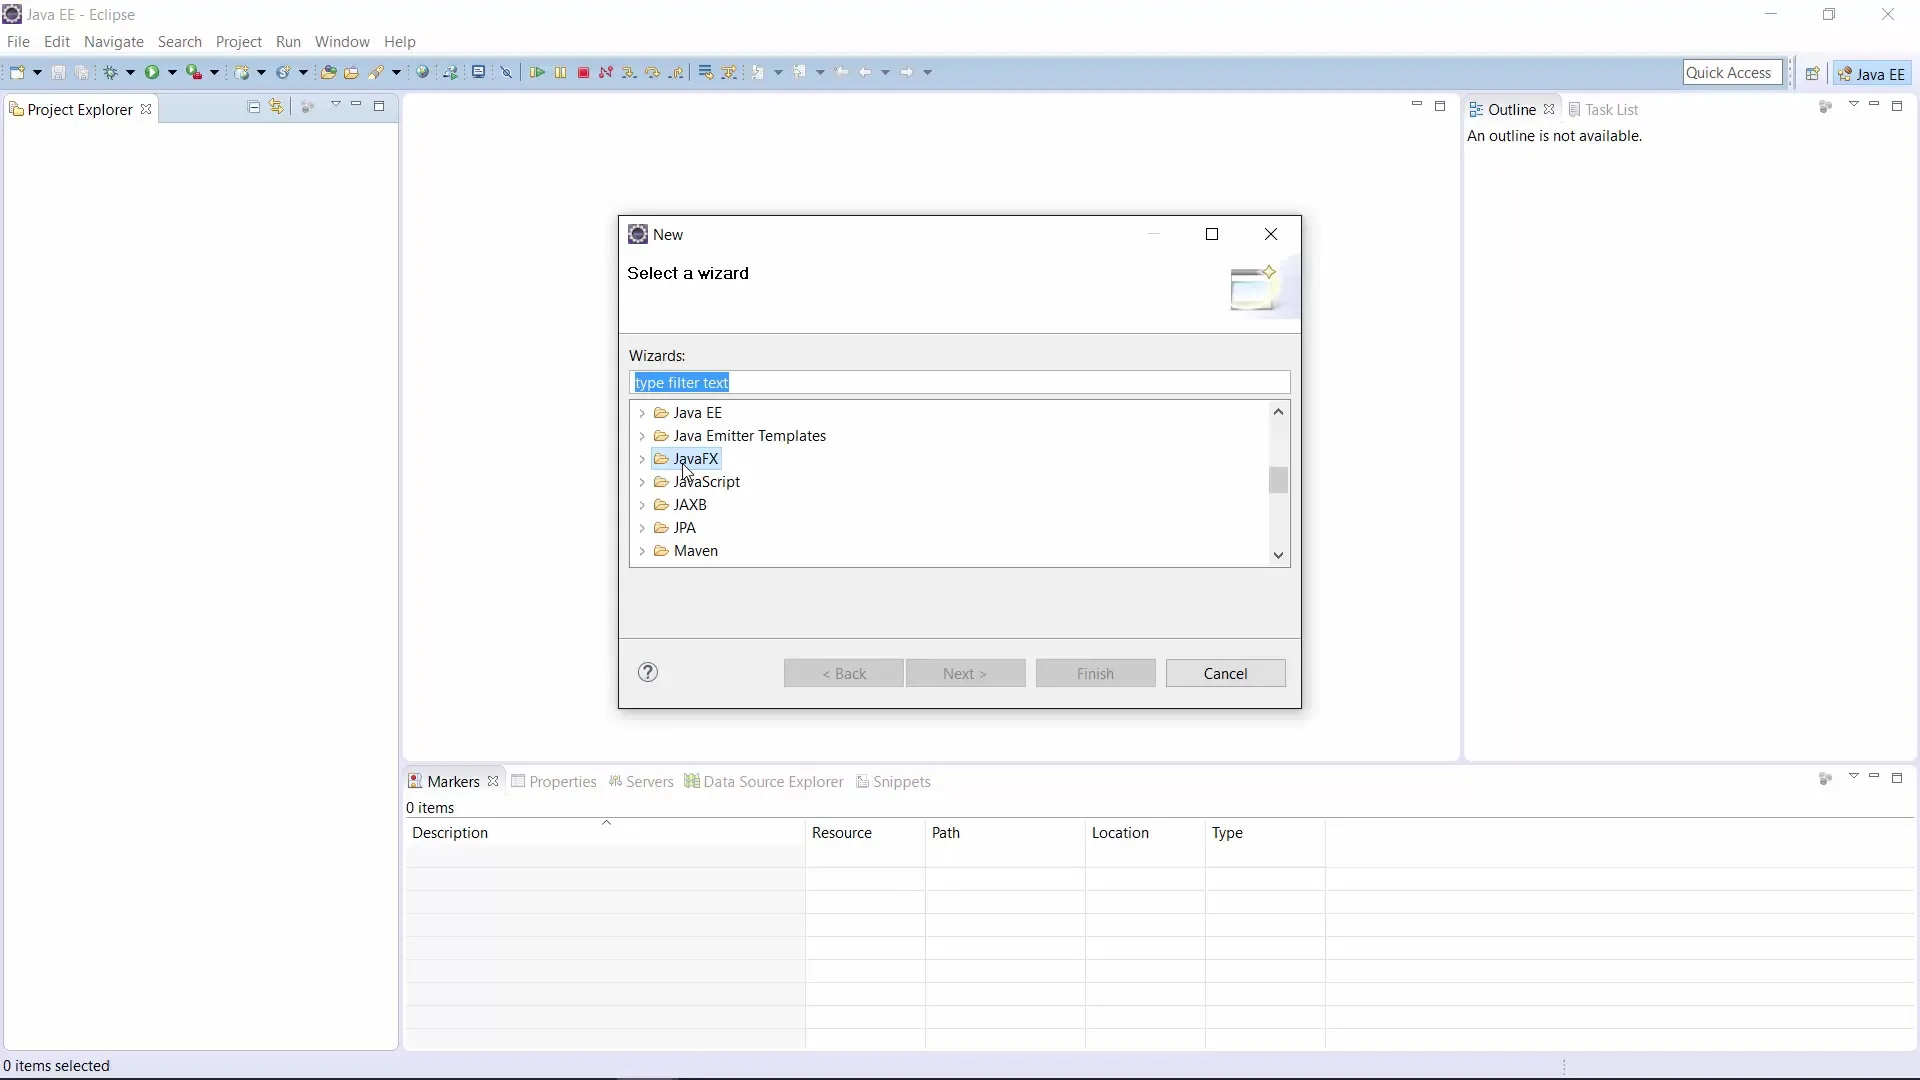
First, you need to create a new project in your development environment. Go to "New Project" and select "JavaFX Project." Click "Next" and give your project a name, such as "stageSceneNode." Be sure to leave the Java version (for example, Java SE 1.8) before clicking "Finish."
Step 2: Understand the project structure
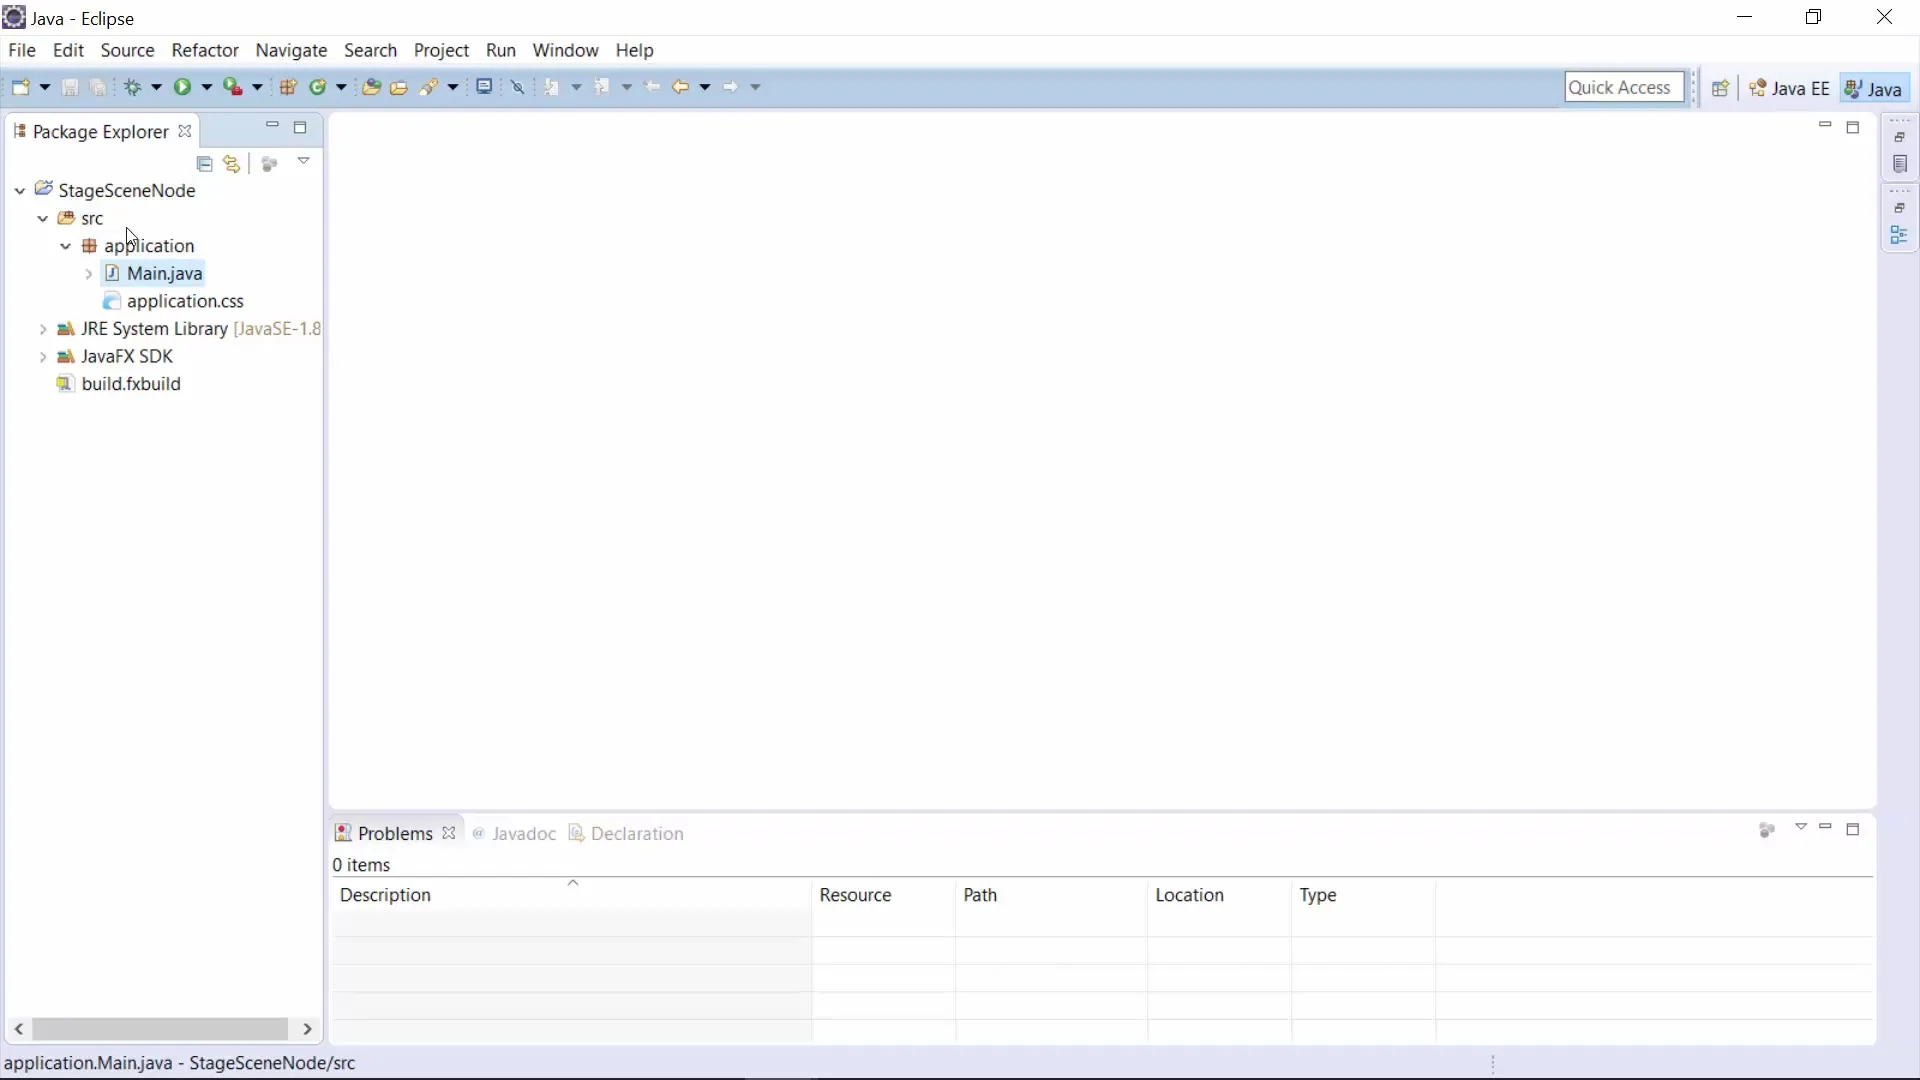
Now you should take a look at the structure of the newly created project. Here you will find a source folder that contains your package with the default name "application." Inside this package is the Main class, which represents the entry point of your application.
Step 3: Modify the Main class
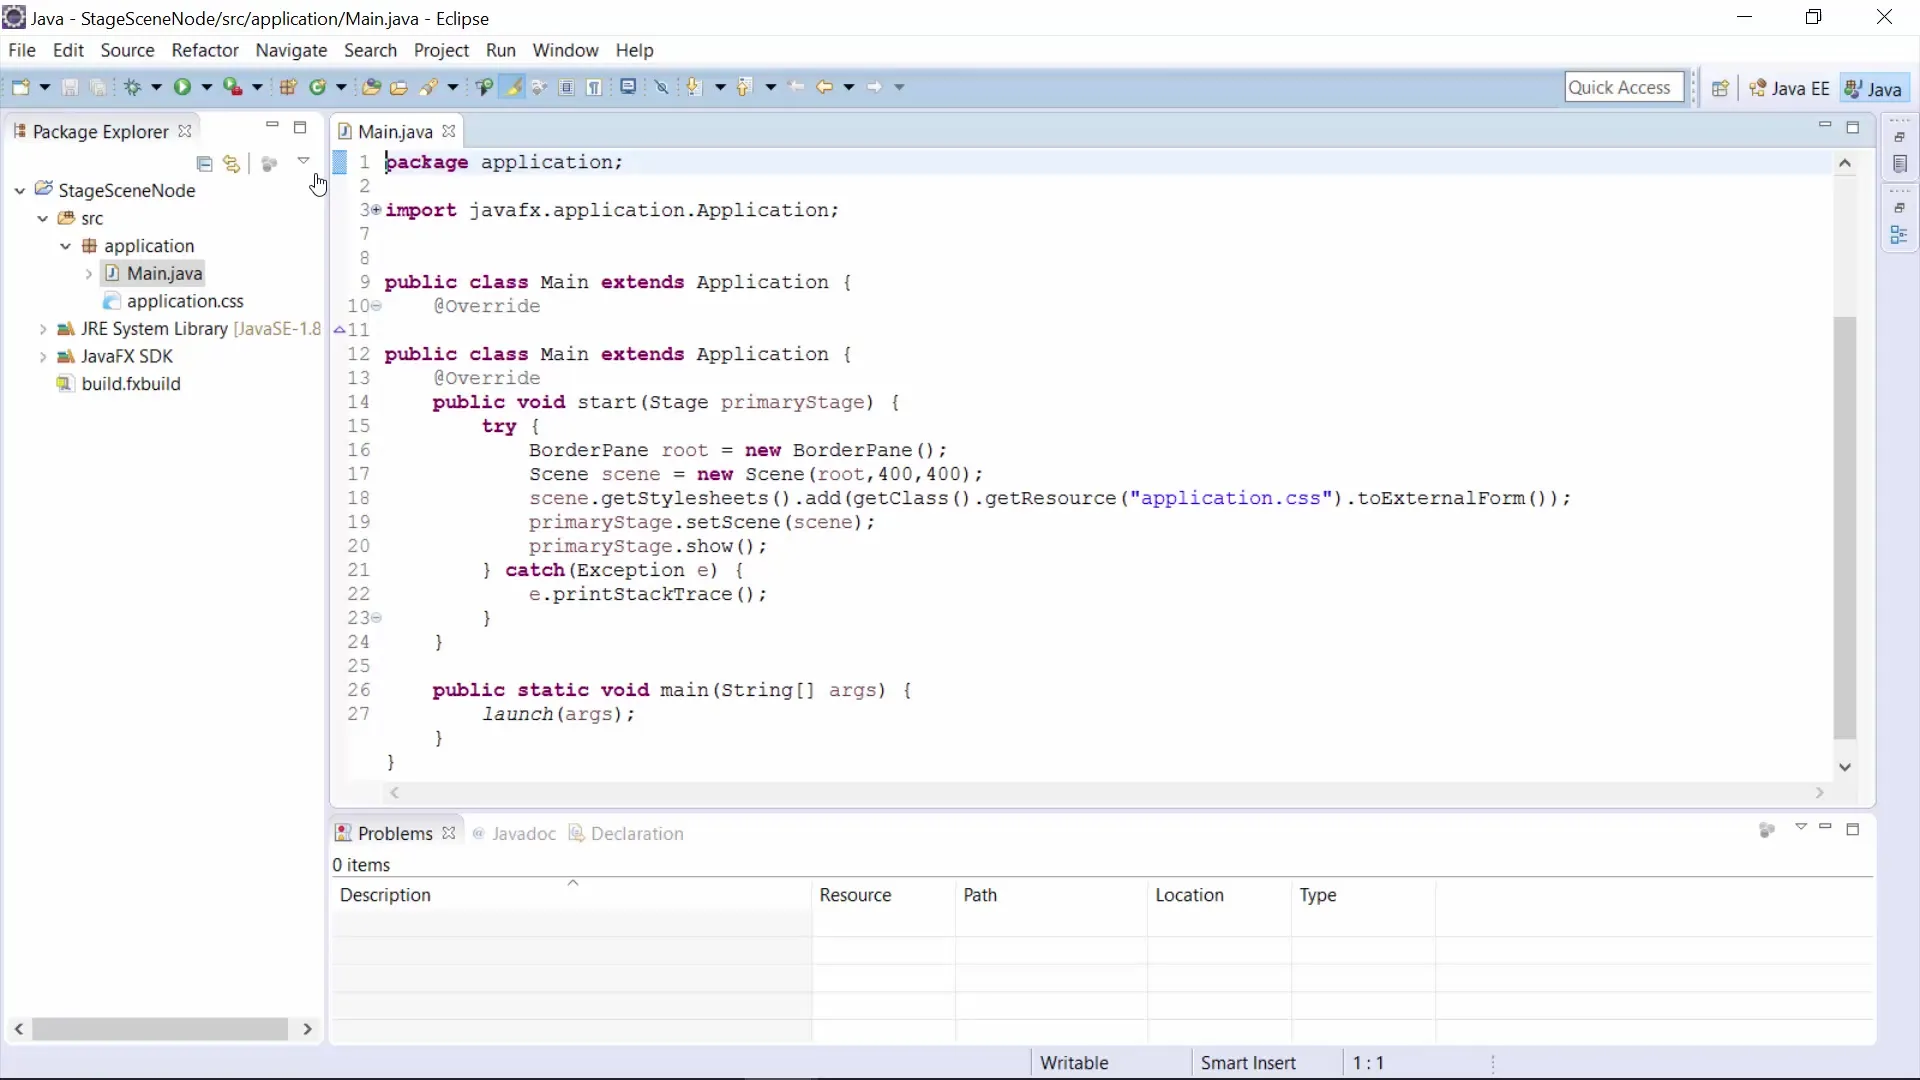
Open the Main Java file and get accustomed to the basic imports that allow you to work with JavaFX. These imports include application.Application, Stage, Scene, and BorderPane.
Step 4: Set up the window and the scene
Now you can start your program to see an empty window that is 400 x 400 pixels. To create the Scene, you will need a layout. In this example, we will use BorderPane, a layout that allows you to divide elements into different areas (top, bottom, left, right, center).
Step 5: Add a button
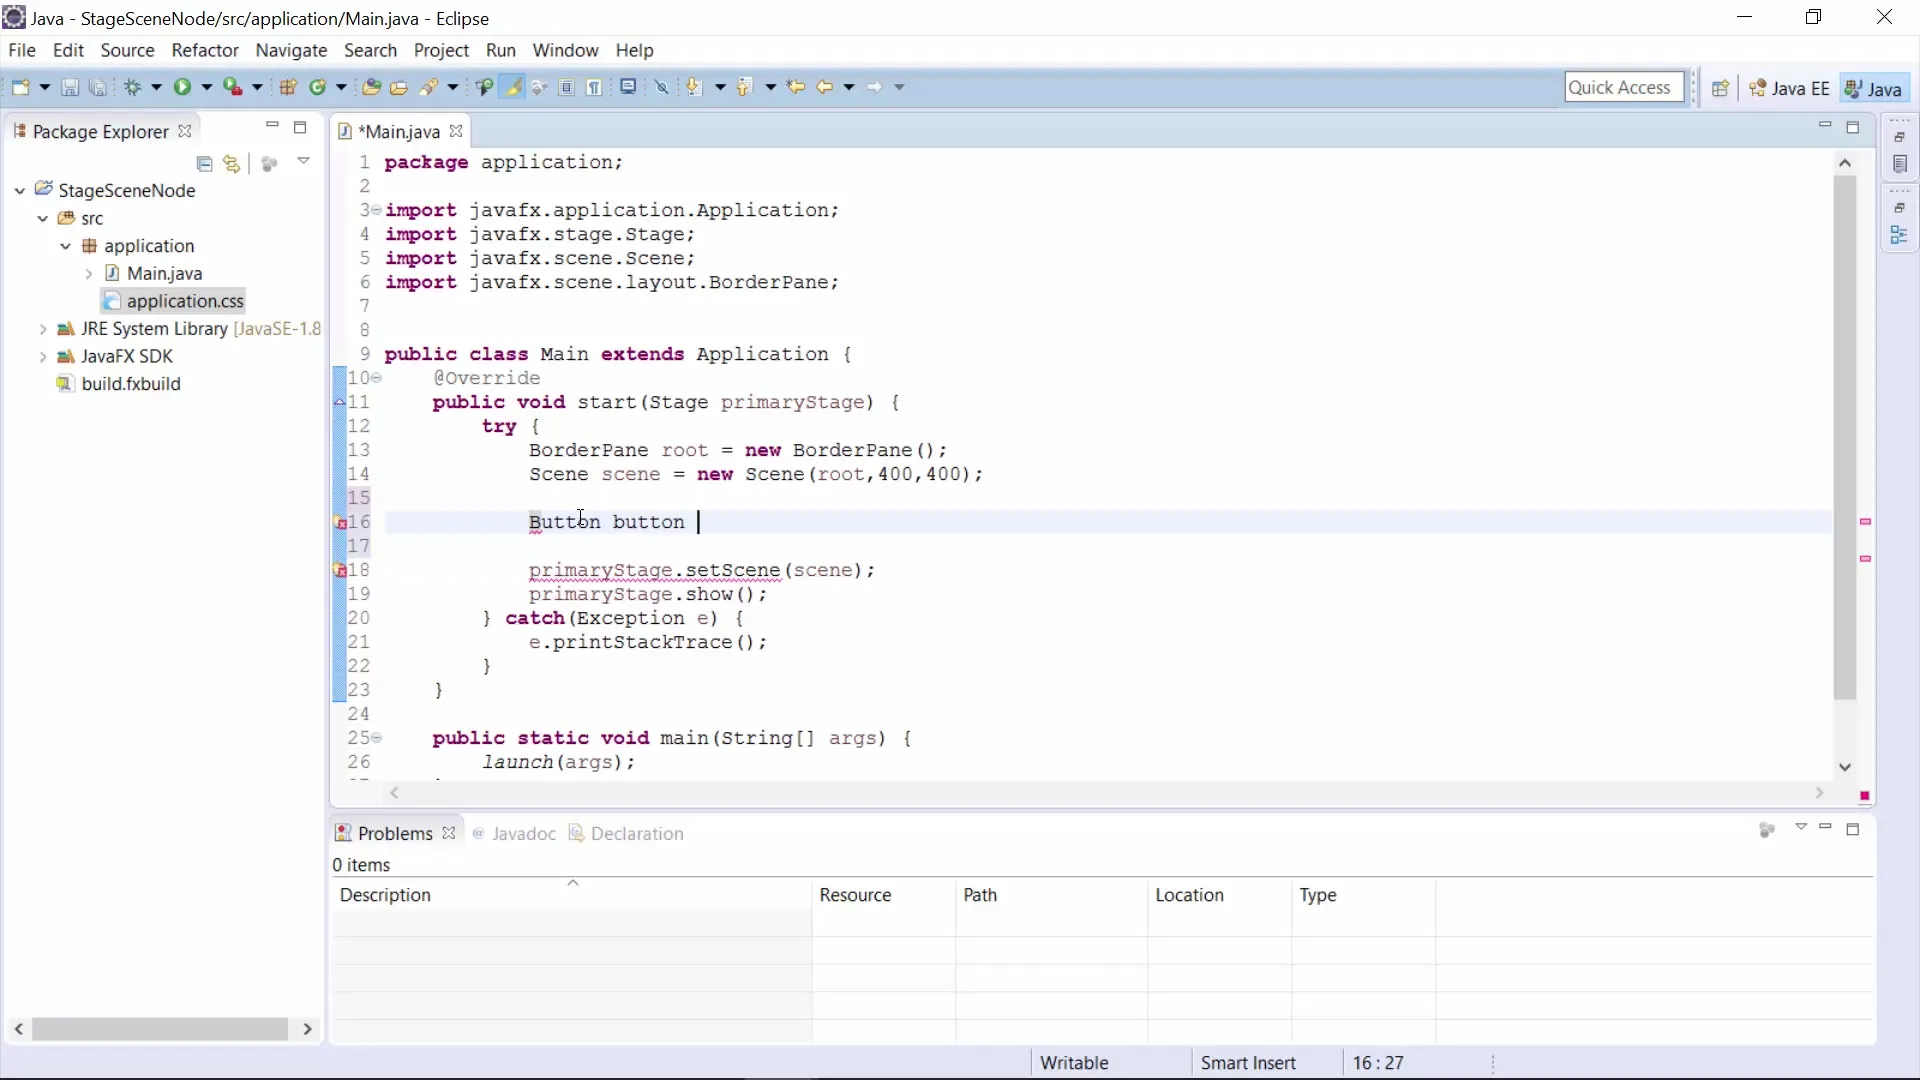
In this step, you will add a button to your Scene. Create a new Button object and set its text to "Click me." To ensure that the button works correctly, you need to make sure that you import the required classes. Often you can do this quickly by pressing Ctrl + Shift + O.
Step 6: Add the button to the scene
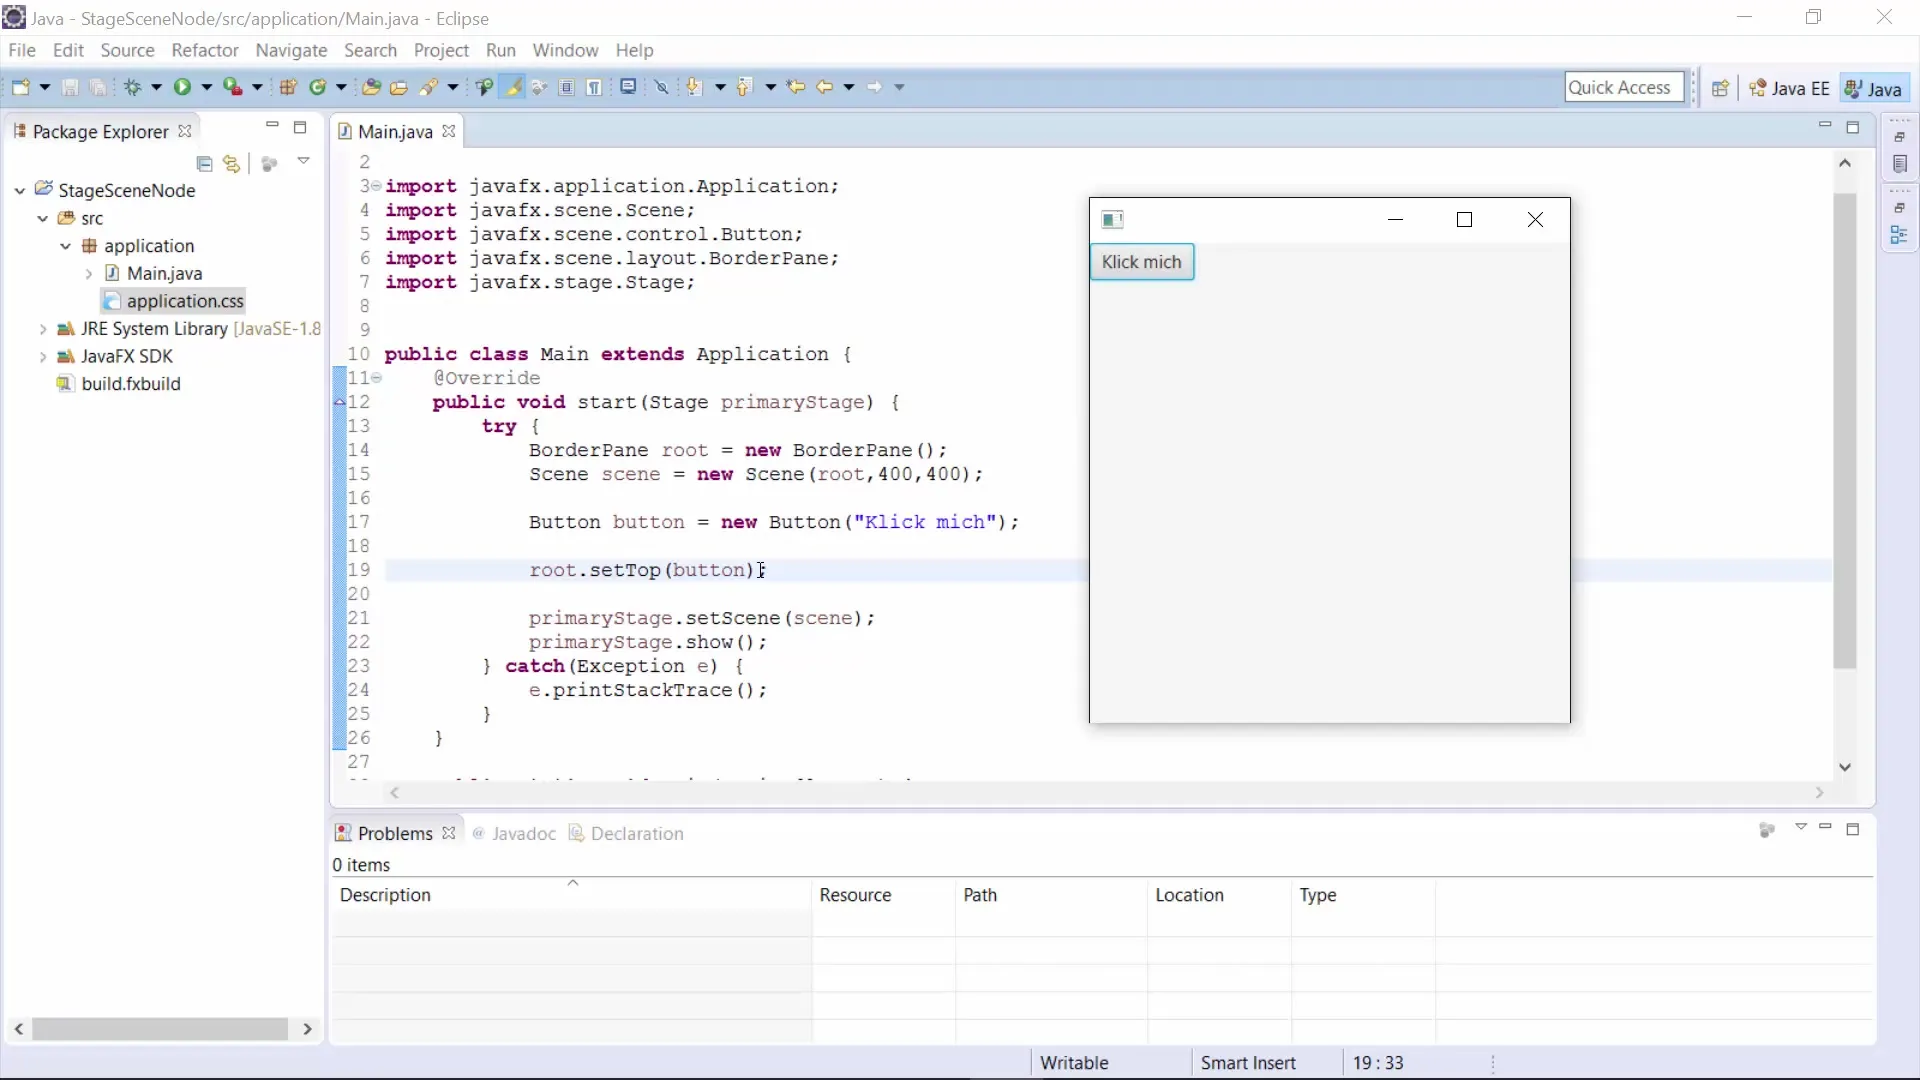
Now that your button is created, you need to add it to the BorderPane layout. Specify where the button should be displayed, e.g., at the top or bottom. Use BorderPane's methods like setTop() or setBottom() to place the button accordingly.
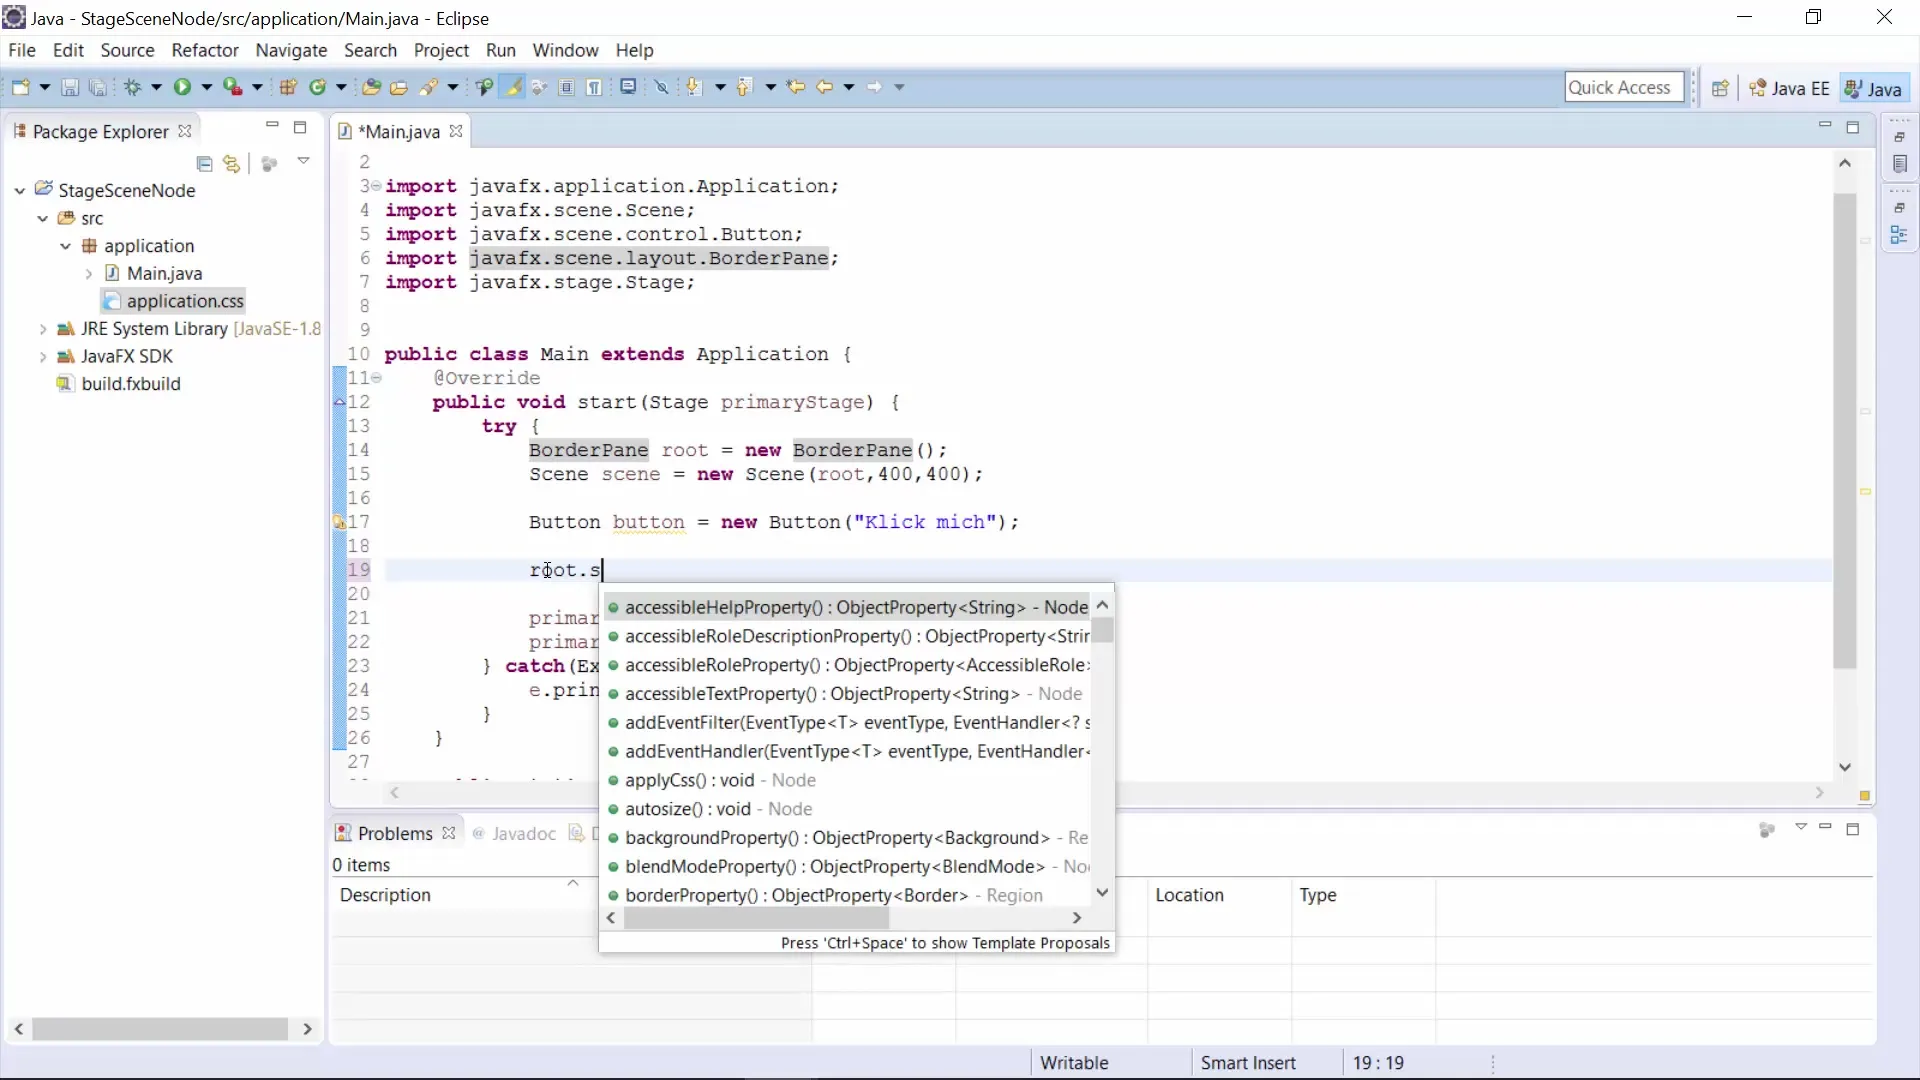
Step 7: Run the program
Run your program again to make your button visible. You should now see a button located at the position you set. If you switch the position from "setTop" to "setLeft," you will see how the button moves accordingly in the window.
Step 8: Further adjustments and versioning
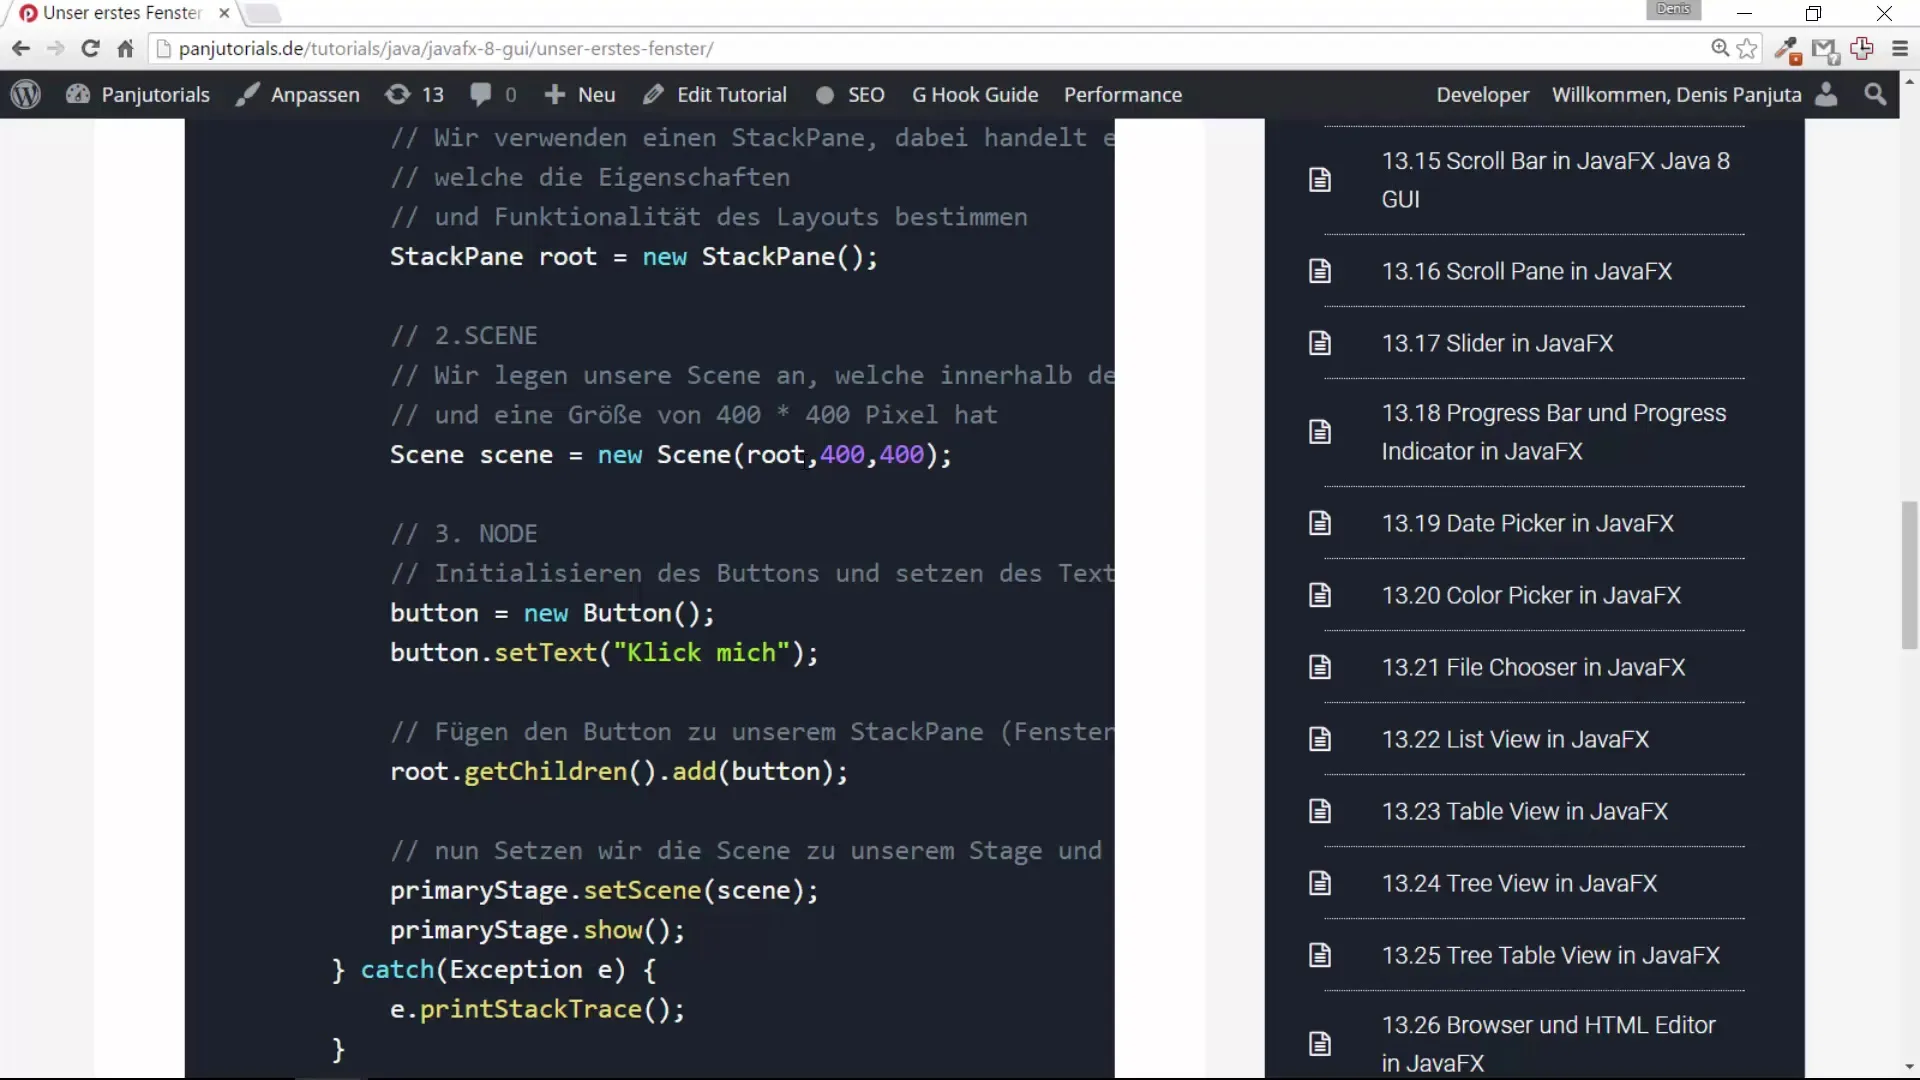
After placing your button, you can make further adjustments in the GUI. Be aware if you encounter different results – the method you input will help you learn the structure of the code and the behavior of the elements.
Summary – Your first step in JavaFX GUI development: Stage, Scene, and Node
In this tutorial, you learned how to create a JavaFX project, understand the structure of the application, and start designing your first window. You have internalized important fundamentals on working with Stage, Scene, and Nodes.
Frequently Asked Questions
How do I create a new JavaFX project?Go to "New Project," select "JavaFX Project," and enter a project name.
What are Stage, Scene, and Node?The Stage is the main window, Scene contains the Nodes like buttons and text fields.
How can I add a button to the window?Create a Button object, set the text, and add it to the Scene using BorderPane.
Why do I need to import specific classes?Imports are necessary to use the required functions and classes in your project.


