
Imagine a customer goes through five steps in your online shop until the order is placed and doesn't know how far they still have to go. This is exactly where a progress bar comes in. In this tutorial, you will learn how to integrate a progressbar with jQuery UI, control it with values, have it fill automatically, and equip it with a percentage display and a completion event.
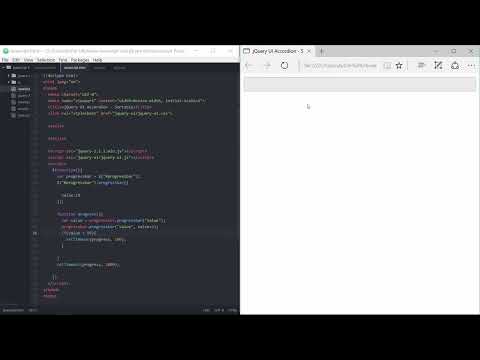
The video is only loaded from YouTube when you play it – data (including your IP address) is then transmitted to YouTube/Google. More in the privacy policy
Key Takeaways
- A progressbar shows the user how far a process has advanced, for example during downloads, purchase processes, or surveys.
- The progressbar is controlled via a
value, which by default has a maximum of 100. The maximum value can be adjusted via themaxoption. - With a timer and a repeatedly called function, you increase the value step by step.
- Via the
changeevent, you can, for example, update a text display, and via thecompleteevent, trigger an action when the maximum value is reached.
Step-by-Step Guide
Step 1: Understanding the Purpose of a Progressbar
Before you write code, you should know what a progressbar is meant for. It is a bar that shows the user how far along they are in a certain process. Typical areas of use are loading processes, such as downloading a file, or multi-step processes such as an order process. A course on a learning platform, where you want to show that 40 or 50 percent has already been completed, can also be displayed this way.

Step 2: Trying Out the Different Variants
In the jQuery UI example, you see several displays. One shows an animation that hints at an ongoing loading process. In addition, you can use buttons to set the color of the bar randomly. In the background, the function generates a color value with Math.random() and thereby overwrites the background of the element. It would be simpler to set the background color directly via CSS.
Step 3: Using the Documentation and the Options
A look at the official documentation shows you the most important options. These include disabled, to deactivate the bar, and max, to set the maximum value. By default, max is set to 100. If you want to represent a process with three steps, you simply set max to 3. The bar is then full as soon as the value reaches 3.

Step 4: Creating the HTML Container and Initializing the Progressbar
Create a div with the ID progressbar in the body. The name is no coincidence, because "progress" means advancement. In JavaScript, you then address this element via its selector construct and call the progressbar() method on it. This assigns the behavior of a progressbar to the element. It is important that this call is in the document-ready section so that the element already exists when it is executed.

Step 5: Setting the Start Value
Via the value option, you determine where the bar starts. If you set value to 10, the bar starts at ten percent. You pass the options within curly braces, that is, as an object. This notation applies not only to the progressbar but to all jQuery UI widgets. Incidentally, the text you wrote inside the div is not displayed as part of the bar. Therefore, delete it again before you continue.
Step 6: Setting Up a Timer and a Variable
Now the bar should fill itself. To do this, you store the progressbar in a variable within the function so that you can conveniently access it later. Then you create a function called progress that reads the current value via progressBar.progressbar("value"). This function forms the core of your timer.

Step 7: Increasing the Value and Controlling the Repetition
Within the function, you increase the value by one with progressBar.progressbar("value", value + 1). So that the function keeps calling itself again and again, you use setTimeout. As long as the value is less than 99, the function is executed again every 100 milliseconds. This creates a kind of loop that only ends when the bar is almost completely filled. Stopping at 99 has the advantage that you can still cleanly finish at 100 percent in the last step.
Step 8: Start the process with a delay
So that the loading process doesn't start immediately when the page loads, you call the function progress only after two seconds. For this, you use setTimeout again and pass the delay of 2000 milliseconds. While testing, you may have noticed a typo where W was written instead of value. Therefore, make sure to write the option names exactly, otherwise the display won't work.
Step 9: Display the percentage value as text
To make the current status visible, you add another div inside the progress bar with the ID progress-text. You access it with a variable and adjust the text as soon as the value changes. This happens via the event change, which you can find in the documentation. Within this event, you get the current value of the progress bar and append a percent sign. This gives you a display like "37 %", which updates with every step.

Step 10: Style the percentage display
By default, the text appears above the bar. With CSS, you move it to the center. For the element with the ID progress-text, set the position to absolute and the left offset to 50 percent. This centers the text. With a top offset of about 15 pixels, it also sits neatly on the bar. Afterwards, you can make further adjustments such as colors or font sizes.
Step 11: Trigger an action on completion
When the bar is completely filled, something should happen. For this, you use the event complete. It is called as soon as the maximum value is reached. Within this event, you can, for example, output an alert with the message "The process is complete". When inserting it, make sure not to forget the comma between the options, otherwise the JavaScript will break.

Summary – Creating a jQuery UI Progressbar: Progress Display Step by Step
You have seen how to create a progress bar with jQuery UI, set its start value and maximum value, and fill it automatically using a timer. With the event change, you update a percentage display, and with complete, you react to the goal being reached. This basic principle can be applied to many uses, such as quizzes with a time limit, where the user gets a sense of how much time they have left. The next video continues with the effects of jQuery UI.
FAQ
What is a progress bar?A progress bar is a bar that shows the progress of a process in percent or steps.
What is the default value of the max option?The default value of max is 100. You can set it to 3, for example, if a process has three steps.
How do you set the start value of the progress bar?You set the start value via the value option, for example value: 10 for a start at ten percent.
Why should options be placed in curly braces?With jQuery UI widgets, options are passed as an object. Curly braces are required for this.
How can the progress bar be filled automatically?With a function that reads the current value, increases it by one, and calls itself again via setTimeout until the value reaches almost 100.
Which event is triggered when the value changes?The change event is triggered every time the value of the progress bar changes.
Which event indicates that the progress bar is finished?The complete event is triggered as soon as the maximum value is reached.


