
Imagine a form field that adapts exactly to the amount of text the user enters. Or an area on your page that the visitor can drag with the mouse to the size they want. With the Resizable widget from jQuery UI, you can implement exactly that in just a few lines.
The video is only loaded from YouTube when you play it – data (including your IP address) is then transmitted to YouTube/Google. More in the privacy policy
In this tutorial, you will learn not only how to make elements resizable. You will also learn how to react to every size change with events. You will save values, check thresholds, and change the appearance depending on the size. The foundation is callbacks: functions that are executed automatically as soon as a certain action is completed.
Key Takeaways
- An element becomes resizable with
.resizable(). The user recognizes this by the small triangle at the bottom right. - With options such as
stop,resize, andcreate, you attach your own functions to specific events. - Callback functions receive information about the event (
event) and the modified element (ui). - Curly braces and commas within the options object are mandatory. If they are missing, the code will not work.
- With
.width()and.height(), you read the current dimensions and can process them further.
Step-by-Step Guide
Step 1: Adopt the example code from the documentation
Before you write your own code, it is worth taking a look at the official documentation. There you will find numerous examples for the Resizable widget, including complete source code. Copy the basic example code with HTML, CSS, and JavaScript into your file. Be careful not to overwrite links to libraries that are already included twice, otherwise you will load jQuery or jQuery UI twice.

Step 2: Check the resizable element in the browser
Reload the page and check whether the element appears with the small triangle in the lower right corner. Only when this works is it worth continuing. The element is addressed with an ID such as resizable, and that is exactly how you will control it later in JavaScript.

Step 3: Insert a textarea and make it resizable too
Now add a textarea to your HTML code and give it a unique ID, for example resizable2. In the JavaScript, you then add another call:
You see: An element becomes resizable as soon as you give it an ID or class and apply .resizable() to it. The look is not yet pretty, but the function is in place.
Step 4: Link the stop event to an alert
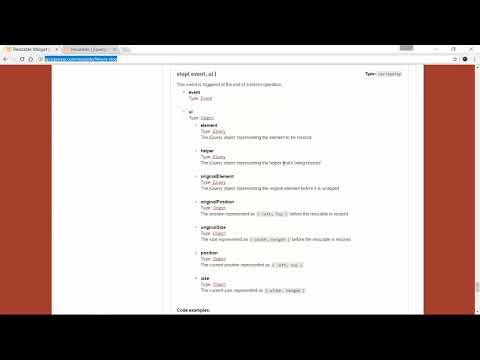
Now the events come into play. An event should be triggered when the user has finished dragging. For this, you use the stop option. The documentation shows you that there are four events: start, resize, stop, and create. Pass an object with a function to the widget:
The stop function is now called every time the dragging ends. Note that the parameters event and ui are provided by jQuery UI. ui contains the element that has just been modified.

Step 5: Place braces and commas correctly
When you test the code, nothing happens at first. The reason is almost always a syntax error. The options object must be enclosed in curly braces, and a comma is needed between multiple options. Without these characters, the resizable() function does not receive information in the right format. So check whether you have placed all opening and closing braces, and add the missing comma. After that, the alert works as expected.

Step 6: Read and output width and height
Now you save the new size. To do this, create two variables and fill them with the current values inside the stop function:
Note the concatenation with the plus sign. A number is automatically converted to text, so that both values appear neatly in one sentence. Test the result by enlarging or shrinking the textarea again.
Step 7: Saving the Values
Displaying the output via alert is only a placeholder. In practice, you send the values to a server or save them in a database, for example for the respective user. Therefore, replace the alert with a call to your saving logic. The structure stays the same: You read the values as soon as the event is triggered and pass them on.
Step 8: Reacting While Resizing
The resize event does not fire only at the end, but throughout the entire movement. This allows you to check conditions while the user is still dragging. In the example, the background color turns red as soon as the width exceeds a value of 250 pixels:
This pattern is well suited for notifications to the user, for example when a text field reaches a maximum size.
Step 9: Reacting Differently Depending on the Height
A condition can also be combined with an else branch. In the example, you set the color to red for heights above 250 pixels and to blue below that. While dragging, you immediately see the difference. In this way, you can adapt behavior and appearance individually to the size.

Step 10: Using the Create Event
The create event is triggered as soon as the Resizable widget is created. This is handy when an element appears only later, for example after clicking a button. With it, you can run initialization code as soon as the element actually exists.

Step 11: Summary and Outlook
You have now seen how callbacks and events work in jQuery UI. Use events deliberately when you want to react to a specific interaction, and avoid unnecessary calculations. In the next step, you will turn to the Draggable widget, which makes elements freely movable.
Summary – jQuery UI Resizable: Using Events for Start, Stop and Resize
With .resizable(), you make any element resizable. The events start, resize, stop and create give you control over when and how your code reacts. You can read out values, save them, check conditions and adjust the appearance. Pay attention to clean brackets and commas, because that is exactly where the most common errors occur.
FAQ
What exactly is a callback in jQuery UI?A callback is a function that is called automatically after a certain action or event has been completed.
Which events does the Resizable widget offer?The widget offers the events start, resize, stop and create.
When is the stop event triggered?The stop event is triggered as soon as the user finishes dragging and releases the mouse button.
What is the difference between resize and stop?The resize event fires throughout the entire resizing. The stop event fires only once at the end.
How do I read the current width of an element?You use the .width() call on the respective jQuery element, for example $("#resizable2").width().
Why does nothing happen after inserting my code?Often curly brackets or a comma between the options are missing. Check your syntax line by line.
Can I use several events at the same time?Yes, you can specify as many events as you like in the options object, each separated by commas.


