
Your quiz already looks appealing in the browser, but it doesn't respond to any input yet. In the last part of this series, you'll add the logic: the program checks whether all questions have been answered, compares the answers with the solution, counts the points, and displays the result along with the participant's name. HTML, CSS, and JavaScript work together to make this happen, and you'll learn how to read form values, use loops and conditions, and write results back into the page.
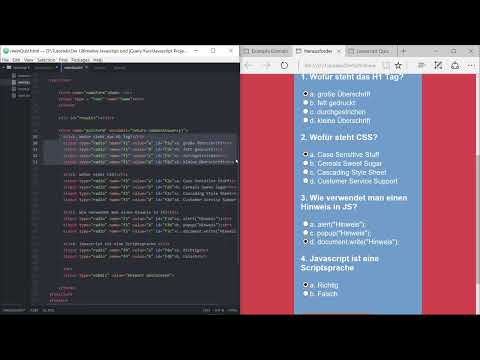
The video is only loaded from YouTube when you play it – data (including your IP address) is then transmitted to YouTube/Google. More in the privacy policy
The guide follows the video step by step. You should already be familiar with the first three parts of the quiz, that is, the HTML structure with the form, radio buttons, and input field.
Key Takeaways
CSS and JavaScript belong in their own files, which are included via a link or script tag respectively. This keeps the HTML clear and organized.
You store the correct answers in an array, and arrays start at position 0.
A loop checks all questions one after another, instead of writing each condition individually.
With return false, you end the function as soon as a condition is not met, and avoid unnecessary evaluations.
You write the result into a div element using innerHTML, so that the name and score appear directly on the page.
Step-by-Step Guide
Step 1: Move CSS into its own file
Start by removing all of your styling from the HTML document. To do so, create a new file in the project folder and name it style.css. Copy the complete CSS code into this file and save it. In the HTML document, you replace the style block with a link element that points to this file. Make sure the attribute for the source is called href and not src, because a link element works with href. In addition, you specify with rel="stylesheet" that it is a stylesheet.

If you reload the page now, your design should appear as usual. This way you have cleanly separated the structure, and the HTML contains only structure.

Step 2: Include JavaScript
You proceed in the same way for the JavaScript. In the document, at the end of the body area, you place a script tag with the src attribute pointing to script.js. Then create the file script.js in the same folder. It stays empty for now, until you enter your code there.

The advantage is obvious: you work in a clear file in the editor at the top, instead of hiding the code below the form. Therefore, delete the existing script section in the HTML so that no code appears twice.

Step 3: Create the submitAnswers function
The Submit Answer button has the type submit. A click on it should pass the answers on to your script. To do this, you create a function named submitAnswers in the file script.js. The keyword function introduces the function, followed by the name and the round brackets. Everything inside the curly brackets is executed as soon as the function is called.

The function is empty at first, but it forms the framework for all the remaining code. You write all the following steps between these curly brackets.

Step 4: Store the correct answers in an array
Next, you define the correct solutions. For this, you use an array, which you create with square brackets. You separate the values with commas. The correct answer to the first question, what the H1 tag stands for, is A, since H1 stands for the large heading. For the remaining questions, you enter the solutions C, A, and A, so that the array contains the values A, C, A, and A.

Note that arrays start counting at zero. The entry at position 0 therefore corresponds to the answer to the first question, position 1 to the second, and so on. You will need this knowledge later when comparing.
Step 5: Create variables for questions, points and name
Now you need a few variables. The variable numQuestions stores the number of questions, which in the example is four. The variable score counts the points achieved and starts with the value 0. So that the result matches a participant, you also need a variable called name, which stores the entered name.
You get the name from the input field with document.querySelector. You select the field via its name Name and read the entered text with .value. As soon as someone clicks the button, the value is available in the variable name.

The variable is therefore called, for example, name in your code, and it contains exactly the text the user wrote in the field.
Step 6: Read out the users' answers
With the radio buttons, the approach is slightly different. All answer options of a question share the same name, for example F1. This makes them a group in which only one button can be selected at a time. With a selector you can specifically target the activated button of the group F1 and read out its value.

You repeat this process for F2, F3 and F4. This way you get the value of the clicked answer for each question. If nothing was selected for a question, the value remains empty, and this is exactly the case you check in the next step.
Step 7: Check whether all questions have been answered
Before the quiz is evaluated, the program should make sure that no question was forgotten. For this you use a for loop that starts at i = 1, runs as long as i is less than or equal to numQuestions, and increases i by one after each pass. Inside the loop you use eval to check which value is behind F1, F2 and so on. The eval function converts the text expression into code, so that the variable name F1 is created from F and the number i.

The condition checks whether the value is empty or contains an empty string. You connect the two cases with the operator || for "or", because both situations mean that no answer was selected. If the condition is met, you use a notice to show the user which answer is missing.
With return false you leave the function immediately. There is no need to perform further comparisons if a question is already missing. The user has to go back and complete the answers.
Practical tip: With four questions, eval is a good learning aid, but it should be avoided in real projects because it poses security risks and makes the code hard to read. With many questions, an array containing all the answers would be the better choice.
Step 8: Evaluate answers and count points
When all questions have been answered, the actual evaluation begins. Here too you use a loop that goes through each question. Inside the loop you compare the clicked answer with the matching entry in the array. Since the array starts at 0, you need the expression i - 1 to hit the right index.
If both values match, you increase the score by one. At its core, this line reads score = score + 1, or alternatively score++. Wrong answers earn no point, so that after the loop has run, the correct score is in the variable score.
Step 9: Write the result into the page
To make the result visible, you need the div element in which it should appear. With document.getElementById and the ID results you select it and store it in a variable called results. Then you overwrite its content with innerHTML.
When assembling the HTML code, you must note that HTML and variables are joined with a plus sign. You begin with an h3 tag in which you output the name. This is followed by the score in a span element and then the total number of questions, also in a span. Finally, you close the h3 tag again.
In this quiz, the total number of questions is at the same time the maximum score, because each correct answer earns exactly one point.
Step 10: The Final Feedback with Alert
Finally, you give the user feedback in an alert window. For this, you use a branch with if, else if, and else. If the user has answered all questions correctly, meaning score equals numQuestions, a message appears saying that everything was correct. If they have answered at least one question correctly, a message appears with the name, score, and total number. If there are no correct answers, a message appears saying that everything was wrong.


Finally, you end the function with return false. This ensures that nothing else happens after the evaluation. With that, your quiz is fully functional.

Summary ??? Programming a JavaScript Quiz: Calculating and Displaying Points
In the video, you saw how to move CSS and JavaScript out of the HTML and include them in separate files. You created the function submitAnswers and stored the correct solutions in an array. You learned how to read input fields and radio buttons, check all questions with loops, and count the score. At the end, you wrote the result into the page via innerHTML and gave feedback with an alert. With these building blocks, you can extend the quiz with more questions without having to fundamentally rewrite the code.
FAQ
Why do I use i - 1 when comparing with the array?Arrays start at position 0, but the loop counts from 1. With i - 1, you therefore access the correct position.
What happens if I omit return false?The function continues running and executes code that is no longer needed at that point. This can lead to incorrect messages.
Why do I need the same name for all answer options in the radio buttons?Identical names form a group in which only one button can be selected at a time. Only this way can the selected answer to a question be read unambiguously.
Why should I avoid eval?eval executes text as code, which poses security risks and makes the code hard to follow. With many questions, arrays or objects are clearer.
Why is innerHTML used and not just plain text output?With innerHTML, you can write HTML elements such as h3 and span directly into the div and insert variables at the appropriate places.


