
A button that changes smoothly when clicked and returns to its original state after a few seconds: Small animations like this feel lively to visitors and make your page significantly more appealing. That's exactly what you'll build in this tutorial. You'll get to know the effects of the jQuery UI library, add an extra class to an element with addClass() and remove it again with removeClass(). Finally, you'll control the sequence with a duration, a callback and setTimeout().
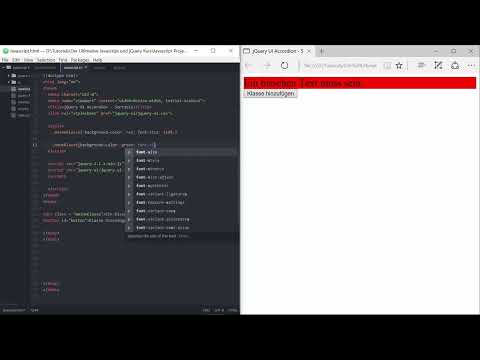
The video is only loaded from YouTube when you play it – data (including your IP address) is then transmitted to YouTube/Google. More in the privacy policy
For the implementation, you need a basic HTML structure, some CSS and jQuery with the jQuery UI library included. The code from the previous section is not needed; you start with an empty page.
Key Takeaways
- jQuery UI comes with a collection of effects, for example blind, clip, explode or the easing variants swing and linear.
- With
addClass()you add a class to an element, and withremoveClass()you remove it again. - Specifying the duration in milliseconds ensures that the change is animated instead of abrupt.
- A callback is executed as soon as the animation is complete.
- With
setTimeout()you can delay the removal of the class.
Step-by-Step Guide
Step 1: Discovering the Effects in the Demo
Before you start coding, it's worth taking a look at the jQuery UI effects demo. There you can see all available effects in action. The blind effect makes an element disappear upwards, clip collapses it into itself, and explode breaks the element into nine blocks that disappear piece by piece. Try out these effects directly before using them in code, because that way you quickly see which effect suits your project.

Step 2: Understanding the Source Code and the Selection
In the demo's source code you'll find a dropdown box through which you select the desired effect. The script reads the value of this selection and then uses it further. You don't have to follow this example in every detail. But if you understand the basic structure, namely that the selected effect is addressed by its name, you've already made important progress.

Step 3: Building the Basic HTML Structure
First, create a div with a unique ID that you want to access later. Inside it, place a button with the ID button. The structure is deliberately kept simple so that you can concentrate fully on the effects:

Step 4: Filling the Button with Text
Inside the button is a short text. Any sentence will do for this example, such as a tongue twister. The only important thing is that the text gets a class that you'll style in the CSS in a moment. To do this, give the text inside the button the class meineKlasse:
Step 5: Styling the Starting Class in CSS
Now you define the appearance that the text should have in its initial state. The class meineKlasse gets a red background color in the CSS. When you refresh the page, you'll see a rather ugly red background, but it makes your starting class clearly visible. You also increase the font size to 150 percent so that the difference is easy to see later:
Step 6: Defining the Second Class
The actual animation is created by a second class, which you call neueKlasse. It describes the target state. The background changes to green, the font size is reduced to 130 percent, and the letter spacing increases to 0.5 em. This class is initially only defined; it is only activated by the JavaScript:
Step 7: Set up the click handler with addClass()
Now comes the programmable part. You link the click on the button to a function. As soon as the button is clicked, you select the text with the class meineKlasse and add the new class with addClass(). Unlike with the simple jQuery command, with jQuery UI you can also specify how long the transition should take. In the example it is 2000 milliseconds, so two seconds:
Step 8: Prepare the callback and the removal of the class
The parameter after the duration can be a callback function. It is called as soon as the animation has completely finished. Create it separately outside the click handler and name it callback. Its task is to remove the class again so that the initial state returns. For this you use removeClass():
Then you add this callback as the third parameter to the addClass() call. When you refresh the page and click the button, you will see that the text briefly shrinks and immediately takes on its original form again. However, the change happens very quickly, so you should slow it down in the next step.
Step 9: Delay the sequence with setTimeout()
So that the reset does not happen immediately, you use the function setTimeout(). It executes a block of code after a specified waiting time in milliseconds. In the example, the function waits one second, that is 1000 milliseconds, before it removes the class neueKlasse with its own duration of one second. The sequence then looks like this: The click starts the animation, after one second the return begins, and after another second the initial state is reached again.
Step 10: Test further effects and options
With this example you have learned the basics of jQuery UI. The duration and the easing setting can be varied as you like. The easing named swing first accelerates and then slows down again, while linear runs the animation evenly. Feel free to experiment with different values to get a feel for the effect. A look at the official documentation is also worthwhile. There you will find further interactions and widgets that you can use with the same principles.

Summary – jQuery UI Effects: Animate classes on click and remove them again
You have learned how to bring effects into your page with jQuery UI. A button adds a new class via addClass(), whose transition you control with a duration. Via a callback you then remove the class again with removeClass(). With setTimeout() you determine when this switch back begins. With this knowledge you can make buttons, texts and other elements of your page more lively and surprise visitors in a targeted way.
FAQ
Do I need jQuery UI to use the effects?Yes. The effects and the option to specify a duration for addClass() and removeClass() come from jQuery UI. With plain jQuery these options are not available.
What happens if I leave out the duration?The class is then added or removed immediately, without any animation taking place.
What is the callback for?The callback is executed as soon as the animation has completely finished. This way you can tie subsequent actions specifically to the end of an effect.
Why do I use setTimeout()?With setTimeout() you specify that a block of code starts only after a certain waiting time. In the example, the function ensures that the class is only reset after one second.
How do I find other suitable effects?The effect demo on the jQuery UI website shows all available effects in action. There you can also try out different easing options such as swing or linear.


