
A menu bar with entries such as File and Edit is standard in many desktop applications. You probably know it from every word processing program. In JavaFX, you build such a bar from a few components that are quick to understand. That is exactly what this tutorial is about: You will learn how to create a MenuBar, fill it with Menu objects, design submenus with MenuItem, CheckMenuItem and SeparatorMenuItem, and assign actions to the items. At the end, you add the bar to your window and can test it.
The video is only loaded from YouTube when you play it – data (including your IP address) is then transmitted to YouTube/Google. More in the privacy policy
Key Takeaways
A JavaFX menu bar consists of three levels: the MenuBar as the bar, the Menu objects as the main items, and the MenuItems as the entries beneath them.
The MenuBar is added to the top area of a BorderPane with setTop().
It is best to move actions into their own MenuItem objects and attach the code to be executed via setOnAction().
A submenu is created by inserting a Menu object as an entry into the getItems() list of another menu.
Step-by-Step Guide
Understanding the Structure of the Menu Bar
Before you write code, you should know the hierarchy. The MenuBar is the entire bar at the top edge of the window. It contains the menus, that is, the visible main items such as File or Edit. Each menu in turn contains menu items that are executed when clicked. You can imagine this structure as a tree that you build from top to bottom.

Creating the First Menu
First, create a Menu object and give it a name. The text you pass is the name that will later be displayed in the bar. In the example, you use the text "Datei", since the English "File" has exactly this meaning in German. If your program is supposed to run in English, you would choose "File" accordingly. Then import the class javafx.scene.control.Menu so that your code compiles.

Adding Menu Items to a Menu
You get the entries of a menu with getItems(). You extend this list with add() to include new objects of type MenuItem. An entry such as "Neues Projekt" is created by generating a new MenuItem with the desired text and adding it to the list. Here, too, you need the appropriate import for javafx.scene.control.MenuItem. Repeat the process for further entries such as "Öffnen" and "Exit". Make sure you place Exit as the last item, since it is usually at the bottom in classic programs.


Creating the Menu Bar and Assigning Menus
Once all the entries are in the menu, you need a MenuBar. Create it with new MenuBar(). Then you add your File menu via getMenus().addAll(...). The principle is the same as with the menu items, except that now the bar manages the menus. You can also pass several menus in one step by separating them with commas.
Integrating the Menu Bar into the Window
For the bar to become visible, you must insert it into your layout. In the example, you work with a BorderPane, which is divided into five areas: top, left, center, right, and bottom. The menu bar belongs in the top area, so you use setTop() and pass it your MenuBar. We will look at exactly how the BorderPane works in detail later. For this project, it is enough to know that the top area is intended for the bar.

Testing the Result
Start the program to check whether everything works. You should now see the menu bar at the top with the File menu and its entries. The entries can be clicked, but nothing happens yet, because the logic is still missing.

Creating Your Own Menu as an Exercise
A good way to reinforce what you have learned is to create your own extension. Next to the File menu, add an Edit menu with two or three submenu items. All you need to do is repeat the steps from the previous sections. Examples of entries are "Undo", "Redo" and "Paste". So create the menu with new Menu("Bearbeiten"), fill it via getItems() and add it to the MenuBar as an entry.

Assigning an Action to the Exit Entry
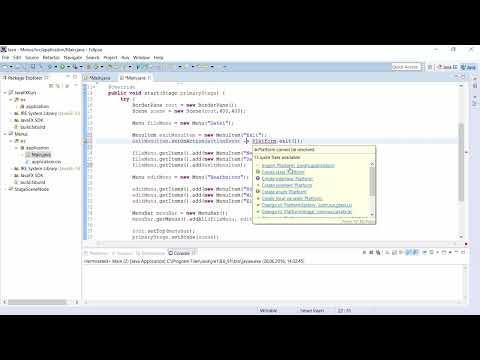
If a menu item is supposed to trigger a function, it is worth creating it as its own object. The "Exit" item thus gets the variable exitItem, which you then pass to the File menu. With setOnAction() you then store the code that is executed on click. To close the application you use Platform.exit(). Note that the method is written without a space between Platform and the dot and that you must import the class javafx.application.Platform. If you start the program and click Exit, the window closes.

Implementing a Console Output for "New Project"
With the same pattern, every menu item can be given its own behavior. For the "New Project" entry, you create your own MenuItem, store an action event with setOnAction() and output, for example, System.out.println("Neues Projekt wird erstellt"); inside it. Then you pass the object to the menu. If you now click the entry, the message appears in the console. This way you can later capture real actions such as opening a dialog or saving a file.

Creating a Submenu with Selection Options
Sometimes a simple entry is not enough, for example when a user is supposed to choose between different file formats. For this you create a menu called "Speichern als" ("Save as"). In it you do not use normal MenuItems, but CheckMenuItem objects, which can be checked and unchecked like checkboxes. For example, create entries for "txt", "Word" and "PDF" and add them to the menu via getItems(). Don't forget to import CheckMenuItem.

Adding the Submenu to the File Menu
You can now attach the finished menu to another menu. To do so, you pass the "Speichern als" object to the getItems() list of the File menu. As a result, it appears as a submenu with its own arrow. Start the program and check whether the submenu opens and displays the options.

Adding Separator Lines with SeparatorMenuItem
Finally, you can insert separator lines, such as the one seen above the Exit entry. For this you use a SeparatorMenuItem, which you add like any other entry via getItems().add(). You must also import this class. After starting, the line appears exactly where you placed it.

Summary – Creating and Managing JavaFX Menus
You have now seen how a menu bar is built in JavaFX: A MenuBar contains menus, menus contain MenuItems, and these can be given actions or submenus. You embed the bar into a BorderPane via setTop(). With setOnAction() you link entries with your own code, for example Platform.exit() to quit. With CheckMenuItems and SeparatorMenuItems you additionally design selection options and separator lines. With these basics you can design your own menus for your applications.
FAQ
Why is my menu not displayed?Check whether you have added the MenuBar to the BorderPane with setTop(). Without this step, the bar remains invisible.
Do I have to use BorderPane?No, the menu bar can also be used in other layouts. However, BorderPane is a good fit because it provides a fixed top area for the bar.
How do MenuItem and CheckMenuItem differ?A MenuItem is a normal entry with an action. A CheckMenuItem additionally shows whether it is selected, and is therefore suitable for options with an on or off state.
Why does nothing happen when I click an entry?The setOnAction() assignment is probably missing. Without it, the entry has no code that is executed on a click.
How do I add a submenu?Create a Menu object and pass it to the getItems() list of another menu. The inserted menu then appears as a submenu with an arrow.
What is Platform.exit() used for?With Platform.exit() you terminate the JavaFX application. The method is well suited for an Exit entry in the File menu.


