
A program that only knows a single view quickly becomes confusing as soon as the user is supposed to complete something step by step, such as with an installation wizard. JavaFX solves this problem with multiple scenes within a single window. In this tutorial, you build two scenes that you switch back and forth with a button. The starting point is an existing JavaFX application with one stage and one scene.
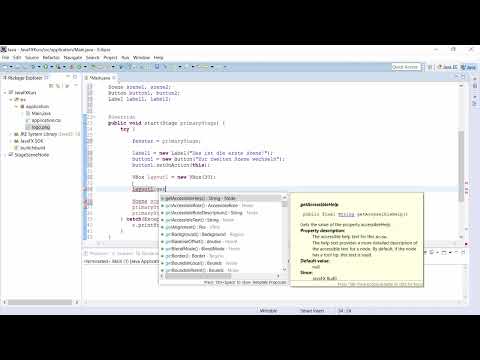
The video is only loaded from YouTube when you play it – data (including your IP address) is then transmitted to YouTube/Google. More in the privacy policy
Key Takeaways
- A Stage is the window, a Scene is the content displayed in it. At any given time, the user sees only one Scene.
- You store the Stage in a global variable so that all methods can access it.
- Each Scene gets its own layout, in this case a VBox, which arranges its elements one below the other.
- With
setScene()you swap the visible scene, withshow()you update the display of the window. - The event handler uses
event.getSource()to decide which button was clicked, and thereby triggers the appropriate scene change.
Step-by-Step Guide
Creating Global Variables
Start by declaring the variables for all building blocks above the start() method. You need one Stage for the window, two Scenes, two Buttons, and two Labels. It is best to name the Stage fenster and the Scenes szene1 and szene2. These variables are then available throughout the entire class.

Importing Required Classes
To be able to use Button and Label, you need to import the corresponding classes. With the key combination Ctrl + Shift + O, the IDE adds the imports automatically. Make sure you use the classes from javafx.scene.control and the VBox from javafx.scene.layout.

Transferring the Primary Stage to the Global Variable
The start() method receives the Primary Stage as a parameter, that is, the main window of your application. You assign this value to the global variable fenster. From now on, you can access the window anywhere in the class without having to pass the parameter along.

Creating the Label and Button for the First Scene
Now you create the label for the first scene with the text "Das ist die erste Szene". Then you create a button labeled "Zur zweiten Szene wechseln". The button has to be in the layout of the first scene, so at this point it is still a standalone object that you will add later.
Setting Up the Action Event and Event Handler
For the button to trigger something on click, you need the setOnAction() method. It expects an event handler as an argument. In the example, you implement the interface EventHandler<ActionEvent> directly in your main class. The IDE offers a quick fix for this that automatically generates the handle() method. Then you pass this to the button.

Creating a Layout with a VBox
A layout determines how elements are arranged in a Scene. A VBox arranges its children vertically one below the other. The number in the constructor sets the spacing between the elements in pixels. So with new VBox(30) you get 30 pixels of spacing. The principle is comparable to the BorderPane from an earlier tutorial: you choose a layout and fill it with elements.
Adding elements to the layout
You get the children of a layout via getChildren(). With add() you add a single element, with addAll() several at once. This saves typing, because you can pass the label and the button in a single line.

Initializing and displaying the first scene
Now you connect the layout to the scene. At the same time you set the size, in this case 250 by 250 pixels. Then you set the scene in the window and call show(). You no longer need the old, empty scene that you created at the beginning. With this line, the window appears with the content of the first scene.

Building the second scene following the same pattern
The second scene is created following the same scheme. The easiest way is to copy the code of the first scene and replace all the names. label1 becomes label2, button1 becomes button2, layout1 becomes layout2 and szene1 becomes szene2. The label text is now "Das ist die zweite Szene", the button text "Zur ersten Szene wechseln". Note that you do not yet need to link the button of the second scene to an action, because you will add the logic in the event handler.

Programming the switch to the second scene
In the event handler, you use event.getSource() to check which button triggered the event. If it is button1, you set szene2 and display the window again. This lets you see the switch to the second scene. However, a test run shows that you cannot get back from there, because the second button does not have a function yet.

Adding the way back to the first scene
So that the second button leads back, you extend the event handler with a second condition. If the source of the event is button2, you set szene1 and call show() again. With else if you ensure that only the appropriate branch is executed. In addition, the second button must also know the handler, so don't forget button2.setOnAction(this);.

Adding console output for checking
So that you can follow during testing which scene is currently active, you output a message to the console in each branch. This is especially helpful when the interface behaves in a more complex way later on and you want to check the flow.
Testing the program
Start the application and click the button of the first scene. The console displays the message, and the window shows the second scene. With the button of the second scene, you return to the first. You will notice that it is the same window, but the contents are independent of each other. This is exactly the benefit of multiple scenes: each scene can have its own controls without the scenes influencing each other.

Summary – JavaFX: Setting up and switching multiple scenes
You have learned how to create multiple scenes in a single JavaFX window and switch between them. You store the stage in a global variable, each scene gets its own layout, and the event handler decides on the switch. The setup is rather laborious at first, because you have to attach the handler to each button and query every condition by hand. For larger applications there are better ways, which will be covered in the next step of your learning journey.
FAQ
Do I always have to store the Stage in a global variable?No, you can also pass the Stage as a parameter. However, a global variable is handy when multiple methods need to access it.
Why don't I see the new scene immediately after the click?Check whether you also call show() after setScene(). Without this call, the change is not reliably displayed.
Can I use a button without an event handler?Yes, a button without setOnAction() does nothing when clicked. It only becomes functional once an event handler is assigned.
Why do I use == instead of equals() in the condition?Here you are comparing object references, so you are checking whether it is exactly the same Button object. == is appropriate for that.
What is the benefit of the output with System.out.println?It helps you with testing, because you can immediately see in the console which branch was executed.


