
Have you already worked with GridPane and are wondering how to arrange elements in a simple row? Then you've come to the right place. In this tutorial you will get to know the HBox in JavaFX, a layout that places all child elements next to each other horizontally. You will see how to create an HBox, fill it with buttons, control spacing with Insets and Spacing, and observe the behavior with many elements. You follow the example step by step, and at the end you will have a working program.
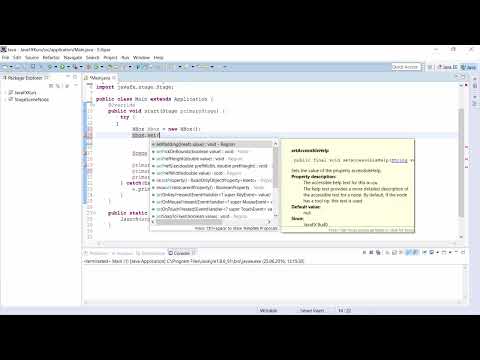
The video is only loaded from YouTube when you play it – data (including your IP address) is then transmitted to YouTube/Google. More in the privacy policy
Key Takeaways
- An HBox arranges its child elements in a horizontal line from left to right.
- With
setPaddingandInsetsyou define the inner spacing to the edge of the window. - With
setSpacingyou determine the constant spacing between the individual elements. - Via
setOnActionwith a lambda expression, buttons can be added dynamically to the box. - If too many elements are added, they move beyond the visible area without the spacing changing.
Step 1: Starting Point and Idea of the HBox
So far you have mainly worked with GridPane, which is well suited for structuring forms. The HBox is a different layout whose name is derived from the English "horizontal". Imagine you have an invisible box into which you place elements one after another from left to right. This is exactly the behavior shown in the example in the video: Each new button appears to the right of the previous one.

Step 2: Observing the Behavior of the HBox
Before you write code, you should understand the principle. In the video, a button is placed that inserts a new button to its right with each click. If you widen the window, more buttons fit in again. However, if the buttons are too wide for the window, they are not wrapped but run off to the right out of the visible area. This is an important difference from other layouts that you will get to know in the next videos.
Step 3: Simplifying the Code
For the HBox you no longer need the previous code with GridPane. Delete the parts that relate to the grid, as well as the previously used class with the ObservableList elements. What remains are the start function and the Scene. This lean basic structure is the foundation for everything else. Note, however, that the Scene is still designed for a grid layout and must therefore be adapted.

Step 4: Creating the HBox
Creating the HBox is very straightforward. You create a variable of type HBox and initialize it with new HBox(). Nothing more is needed for the mere creation. You can set the title of the window as usual via the Stage, for example with setTitle.
Step 5: Setting Padding with Insets
So that the elements don't stick directly to the edge, you set an inner spacing with setPadding. For this you need the class Insets from the package javafx.geometry. Don't forget the import; the fastest way is the key combination Shift+Ctrl+O, which adds imports automatically. With new Insets(10) you achieve a spacing of 10 pixels in every direction. But you can also design individual sides differently by specifying top, right, bottom, and left separately.
Step 6: Creating and Adding the First Button
Now you create the button that will later create all further buttons. In the example the variable is called addButton, and the text is "mehr". You assign the button with new Button("mehr"). Then you add it to the HBox via getChildren().add(addButton). Only then is the button actually displayed in the box.

Step 7: Passing the HBox to the Scene
The Scene expects a layout to work with. Therefore replace the previous grid with your HBox, so that the Scene uses it as the root element. A window size of 300 x 300 pixels is suitable at first. It doesn't need to be larger for you to be able to observe the behavior well.
Step 8: Looking at the First Result
Start the program to check that everything works. You will now see an HBox with a single button whose text reads "mehr". All elements of the box are arranged horizontally, and there is no wrapping onto the next line. You should definitely check this intermediate state before you continue.

Step 9: Give the button a function
To make the button do something, you use setOnAction. There you store a lambda expression that is executed on every click. Inside the expression, you create a new button with the text "Button" and then add it to the HBox via getChildren().add(...). Without this last step, the new button would be created but not displayed.
Step 10: Check the margins at the edge
Now you can observe how the padding takes effect. On the left, top, and right, a gap to the window edge appears that corresponds exactly to the values specified in the Insets object. In the example, these are 10 pixels each. If you change the values, the margin changes accordingly.

Step 11: Set the spacing between elements with Spacing
If you also want space between the individual buttons, you use setSpacing. With a value of 10, you get a gap of 10 pixels between the elements. This setting differs from padding, because it only acts between the child elements and not at the edge of the box.

Step 12: Test the behavior with many elements
Now click the button several times to create many elements. The spacing of 10 pixels remains constant. At some point, the buttons become so numerous that they leave the visible area. They are not squeezed together or wrapped, but simply pushed further out of the window. You should always keep this in mind when using the HBox.

Summary – JavaFX HBox: Arranging elements horizontally
The HBox arranges its child elements in a horizontal row from left to right. You have learned how to create it, how to design the margin with setPadding and Insets, and how to set the spacing between the elements with setSpacing. You have also seen how a button dynamically adds new elements via a lambda expression. Keep in mind that the HBox does not wrap. In the next video, you will get to know further layouts and their differences from the HBox.
FAQ
What is an HBox in JavaFX?An HBox is a layout that arranges all child elements in a horizontal row from left to right.
How do I create an HBox?You create it with HBox box = new HBox(); and then pass it to the Scene.
What is setPadding used for?With setPadding, you set the inner spacing between the edge of the HBox and the contained elements. For this, you use the Insets class.
What is the difference between padding and spacing?Padding determines the distance to the edge of the box, spacing the distance between the individual child elements.
How do I add elements to an HBox?You use the method getChildren().add(element) to add an element.
What happens if there are too many elements in the HBox?The elements are not wrapped, but extend beyond the visible area.


