
Imagine your users are supposed to select one or more options from several choices, such as the toppings for a pizza. This is exactly what the CheckBox in JavaFX is intended for. In this tutorial, you will build a small pizza interface in which each topping has a checkbox and an image. In the end, you will have a basic framework that you can extend with additional toppings at any time.
The video is only loaded from YouTube when you play it – data (including your IP address) is then transmitted to YouTube/Google. More in the privacy policy
Key Takeaways
A CheckBox is a clickable box that stores a state: selected or not selected. With the selectedProperty() property and a listener, you react directly to every change.
With arrays and a for loop, you create many elements at once. The number of toppings results automatically from the length of the names array. If you add a new name, the checkbox, image, and image view are created on their own.
The GridPane takes care of the layout. With GridPane.setConstraints, you determine the column and row of each element. The checkbox is in one row, the image directly below it.
Styling is done via setStyle(). With CSS-like properties such as -fx-border-color, -fx-border-radius, or -fx-font-size, you give the elements a suitable appearance.
Step-by-Step Guide
Prepare the project and create the question label
Start with a clean project. Delete all existing content except the GridPane so that you can start from scratch. Then create a Label with the question of what should go on the pizza. The user must immediately recognize which action is expected of them.

Store toppings in a String array
Instead of creating each topping individually, you store all names in an array of type String. In the example, these are Gouda, Mozzarella, Ham, and Mushrooms. If you want to add more toppings later, you simply extend this array. The rest of the code then adapts automatically.
Create arrays for images and image views
Next, you create an array for the Image objects. Its length corresponds to the length of the names array (names.length), because each topping needs exactly one image. This is followed by an array of ImageView objects, since the images only appear in the layout via an image view. Pay attention to the square brackets after the type, because a missing pair of brackets leads to a compiler error.

Create the array for the checkboxes
In the same way, you create an array of type CheckBox. Here too, the length is names.length. The result is a fully automated framework in which all parts have the same number of elements.
Build the for loop
Now comes the actual logic. You write a for loop that starts at i = 0 and runs until all entries in the names array have been processed. In each iteration, you do three things: you create the matching image, the image view, and the checkbox with the corresponding text. The loop ensures that you don't have to copy the same code for each topping.
Load images
Inside the loop, you load the image for the current topping. The file name results from the entry at position i in the names array, plus the extension .jpg. Load the images from the project via getClass().getResourceAsStream(...). You can download the images from the video project. Note that they are intended exclusively for learning purposes and may not be used commercially.
Create ImageView and CheckBox
After the image is loaded, you create a new ImageView and pass the image to it. Then you create the checkbox by using the entry from the names array as the label. Pay attention to the round brackets when creating with new CheckBox(...), because square brackets are wrong here.

Add a listener to the checkbox
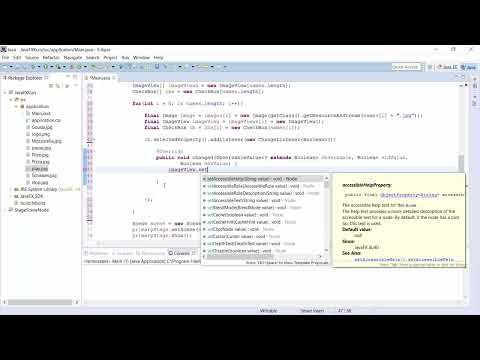
So that the image view responds to clicks, you attach a listener to the checkbox's selectedProperty(). For this you use a ChangeListener<Boolean>, which receives the three parameters observable, oldValue and newValue. You only need the newValue parameter. If it is true, the image is set; otherwise the image is removed. As a result, the ingredient is hidden again when it is deselected.

Positioning elements in the GridPane
Now you determine where each element appears. The checkbox should be in the first row, but in column i + 1. You position the image view in the row below, also in the same column. Use GridPane.setConstraints(...) for this and then add the elements to the grid with getChildren().add(...). If you add a new ingredient later, it automatically moves into the next column.

Adding a pizza image and heading
Besides the ingredients, you also need an image of the pizza and a text. Load the image pizza.jpg in the same way as the ingredients and create an ImageView from it. Make sure that the file is actually present in the project, otherwise you will get an error at runtime.

Placing the pizza elements in the grid
You place the pizza image and the label with the text in the first column. The image gets the position column 0, row 1, and the label gets the position column 0, row 0. So that the text has enough space, you let the label span several columns. For this you use GridPane.setColumnSpan(...). Then you start the program and check the result.
Adjusting the window size
Once all elements are arranged correctly, you can set the window size. A size of about 700 by 300 pixels works well in the example. You can also place the pizza above the ingredients; that is up to you. What matters is that the selection stays clear for the user.

Styling the checkboxes
To make the checkboxes look more appealing, you use setStyle(...). With -fx-border-color: blue; each box gets a blue border, and with -fx-font-size: 18; you increase the font size. The property -fx-border-style: solid; ensures a continuous border. Remember to end each line with a semicolon.

Rounding corners and setting padding
Finally, you give the border rounded corners. The property -fx-border-radius: 5; creates a radius of five pixels. With -fx-border-insets: -5; you can additionally adjust the distance between the border and the content. Start the program again to check the result.
Adding a new ingredient
One advantage of this setup becomes apparent when you add a new ingredient. You only have to do two things: add the name in the String array and place the matching image in the project. The loop does the rest. In the video, the ingredient "Pause" is added this way, and it works immediately like the other ingredients.

Summary ??? JavaFX CheckBox: Pizza topping selection step by step
You have built an interface in which users can select pizza ingredients via checkboxes. The ingredients are stored in arrays, and a for loop creates a checkbox, image and image view for each ingredient. A listener shows or hides the image when clicked, the GridPane takes care of the arrangement, and with CSS-like styles you give the whole thing the finishing touch. This basic framework can be transferred to any selection scenario.
FAQ
Why do you use a for loop instead of creating each checkbox individually?With a for loop, you create all elements in one pass. If you add a new ingredient, the code does not have to be changed, only the array.
What happens if the file name of an image is wrong?Then getResourceAsStream does not find the file and you get an error message at runtime. Make sure that the name and extension in the array exactly match the file names in the project.
Why do I have to write new CheckBox(...) with round brackets in the loop?An object in Java is created with the constructor, and constructors are called with round brackets. Square brackets are only correct for arrays.
What is the ChangeListener on the CheckBox for?The listener is called every time the state of the checkbox changes. In it, you can define what should happen on selection or deselection, such as showing or hiding an image.
How can I change the rounding of the borders?You change the value of -fx-border-radius. A larger value creates more strongly rounded corners, a smaller value more angular borders.


