You have already learned how to fill a ListBox with data from an SQLite database. In this lesson, we will expand our knowledge by linking a TextBox to this ListBox. This link allows you to modify, delete, or add new values. Additionally, we will show how to monitor the selection in the ListBox and display its value in the TextBox. This will make your application more interactive and user-friendly.
Key insights
- You link a TextBox to a ListBox to dynamically display the selection.
- By using an SQLite database, you can persistently store and retrieve your data.
- We implement measures to avoid errors to prevent unwanted exceptions.
Step-by-Step Guide
First, we will take a look at how we can establish the link between our TextBox and ListBox:
1. Query selection in the ListBox
To monitor the selection in the ListBox, we need to add code for the corresponding events. First, we need to know which item is currently selected in the ListBox.
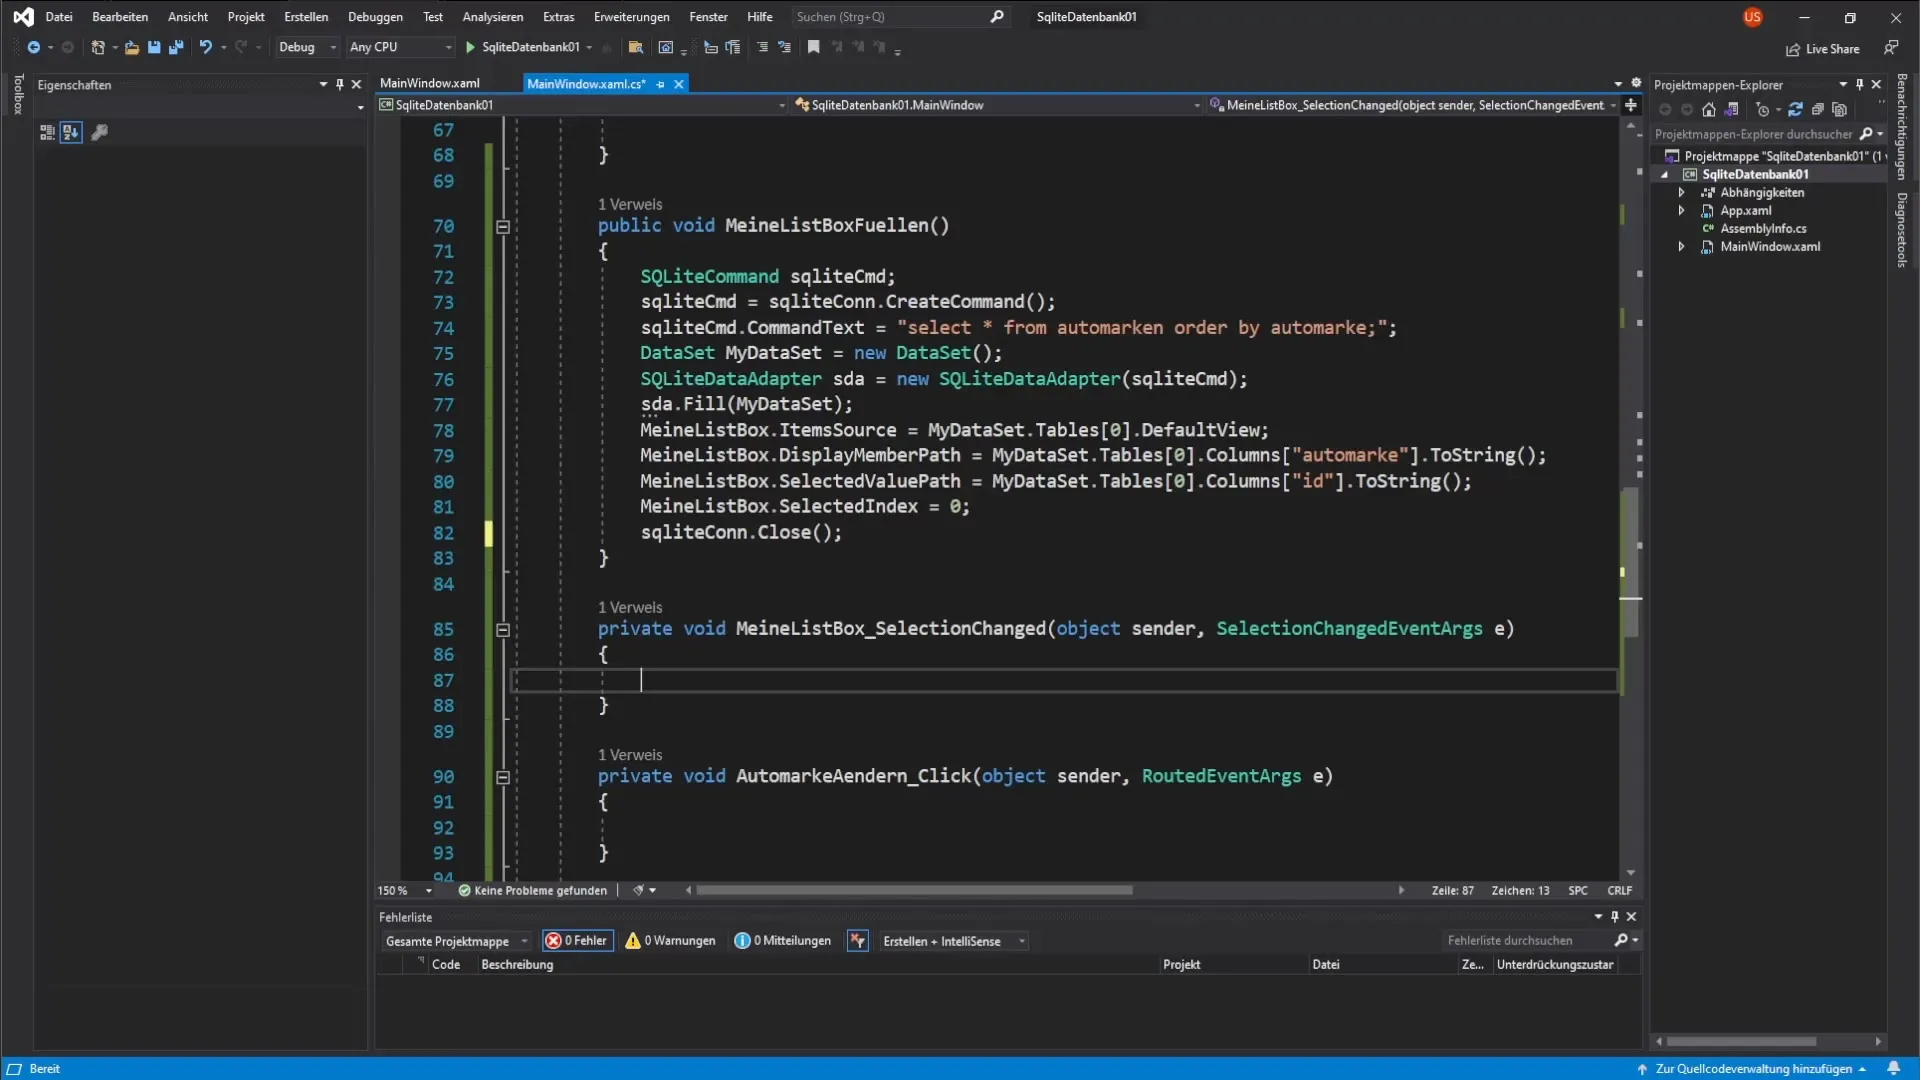
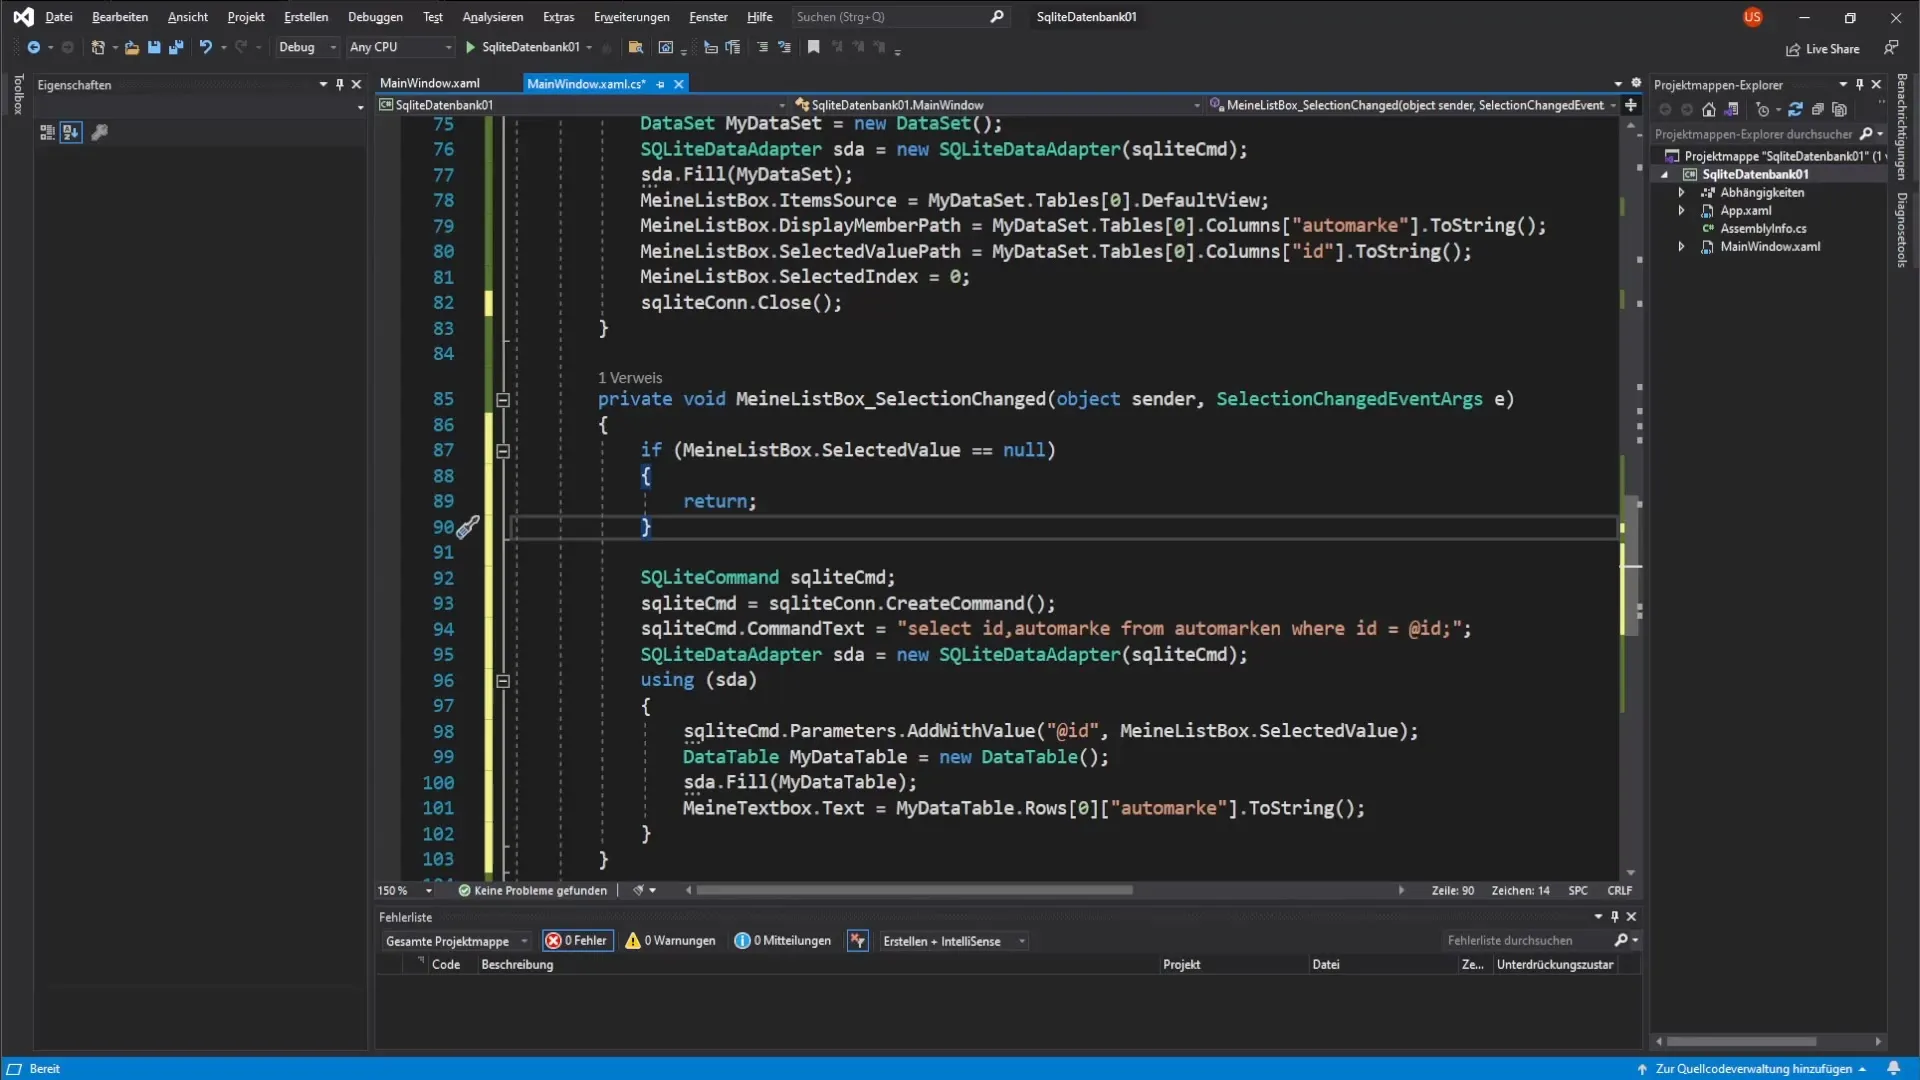
To do this, we copy the SQLiteCommand from the method with which we filled the ListBox. We insert this code at the appropriate place and supplement it with an SQL command that retrieves the selection from our database. The SQL command might look like this: SELECT ID, CarBrand FROM CarBrands WHERE ID = @ID, where @ID is a placeholder for our parameter.
2. Add parameter to SQL query
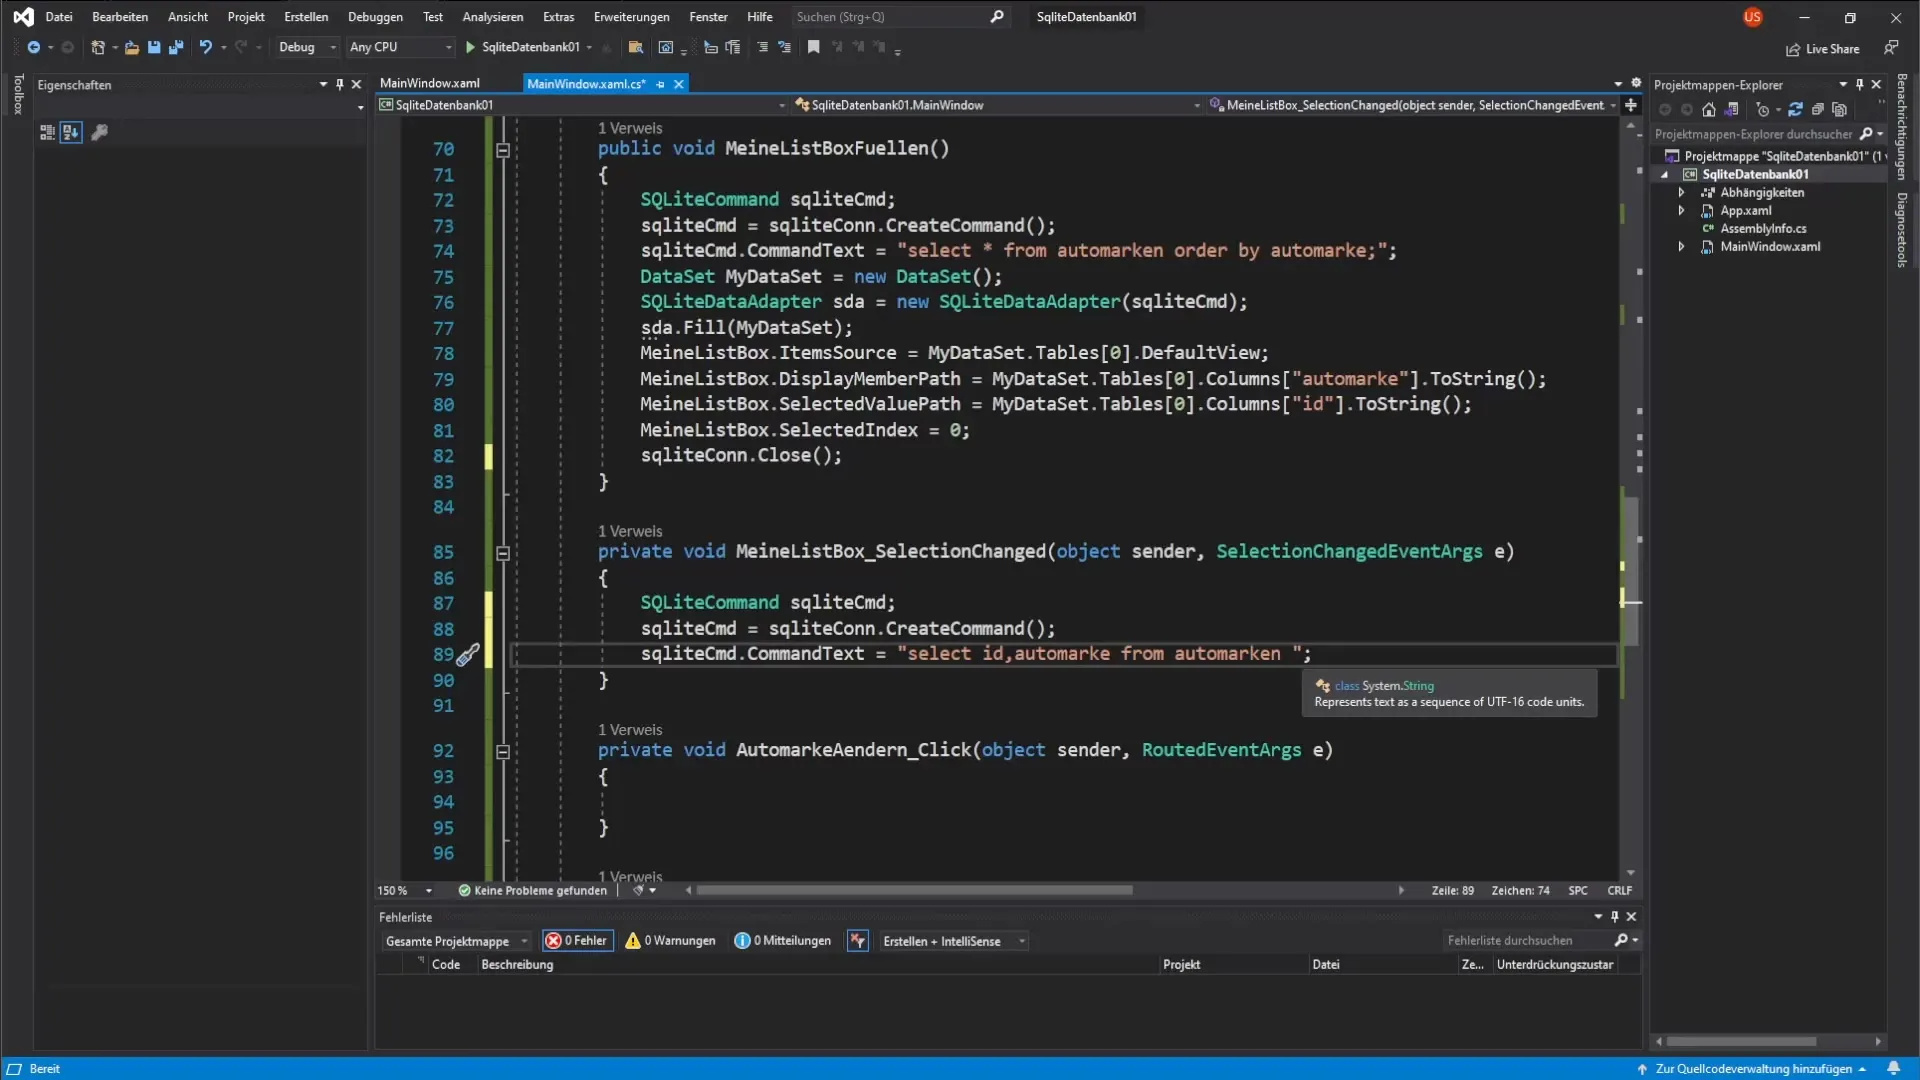
The next step is to set the parameter for the SQL query. Here, we use the primary key to select the correct car brand.
The command is then optimized by retrieving the ID of the selected car brand from the ListBox. This is done by calling listBox.SelectedValue. Now we add this parameter to the query.
3. Create and fill a DataTable
Now that we have the SQL command, we need to create a DataTable to process the queries. We will name this DataTable myDataTable and then add the SQLiteDataAdapter to initialize the results of our SQL query.
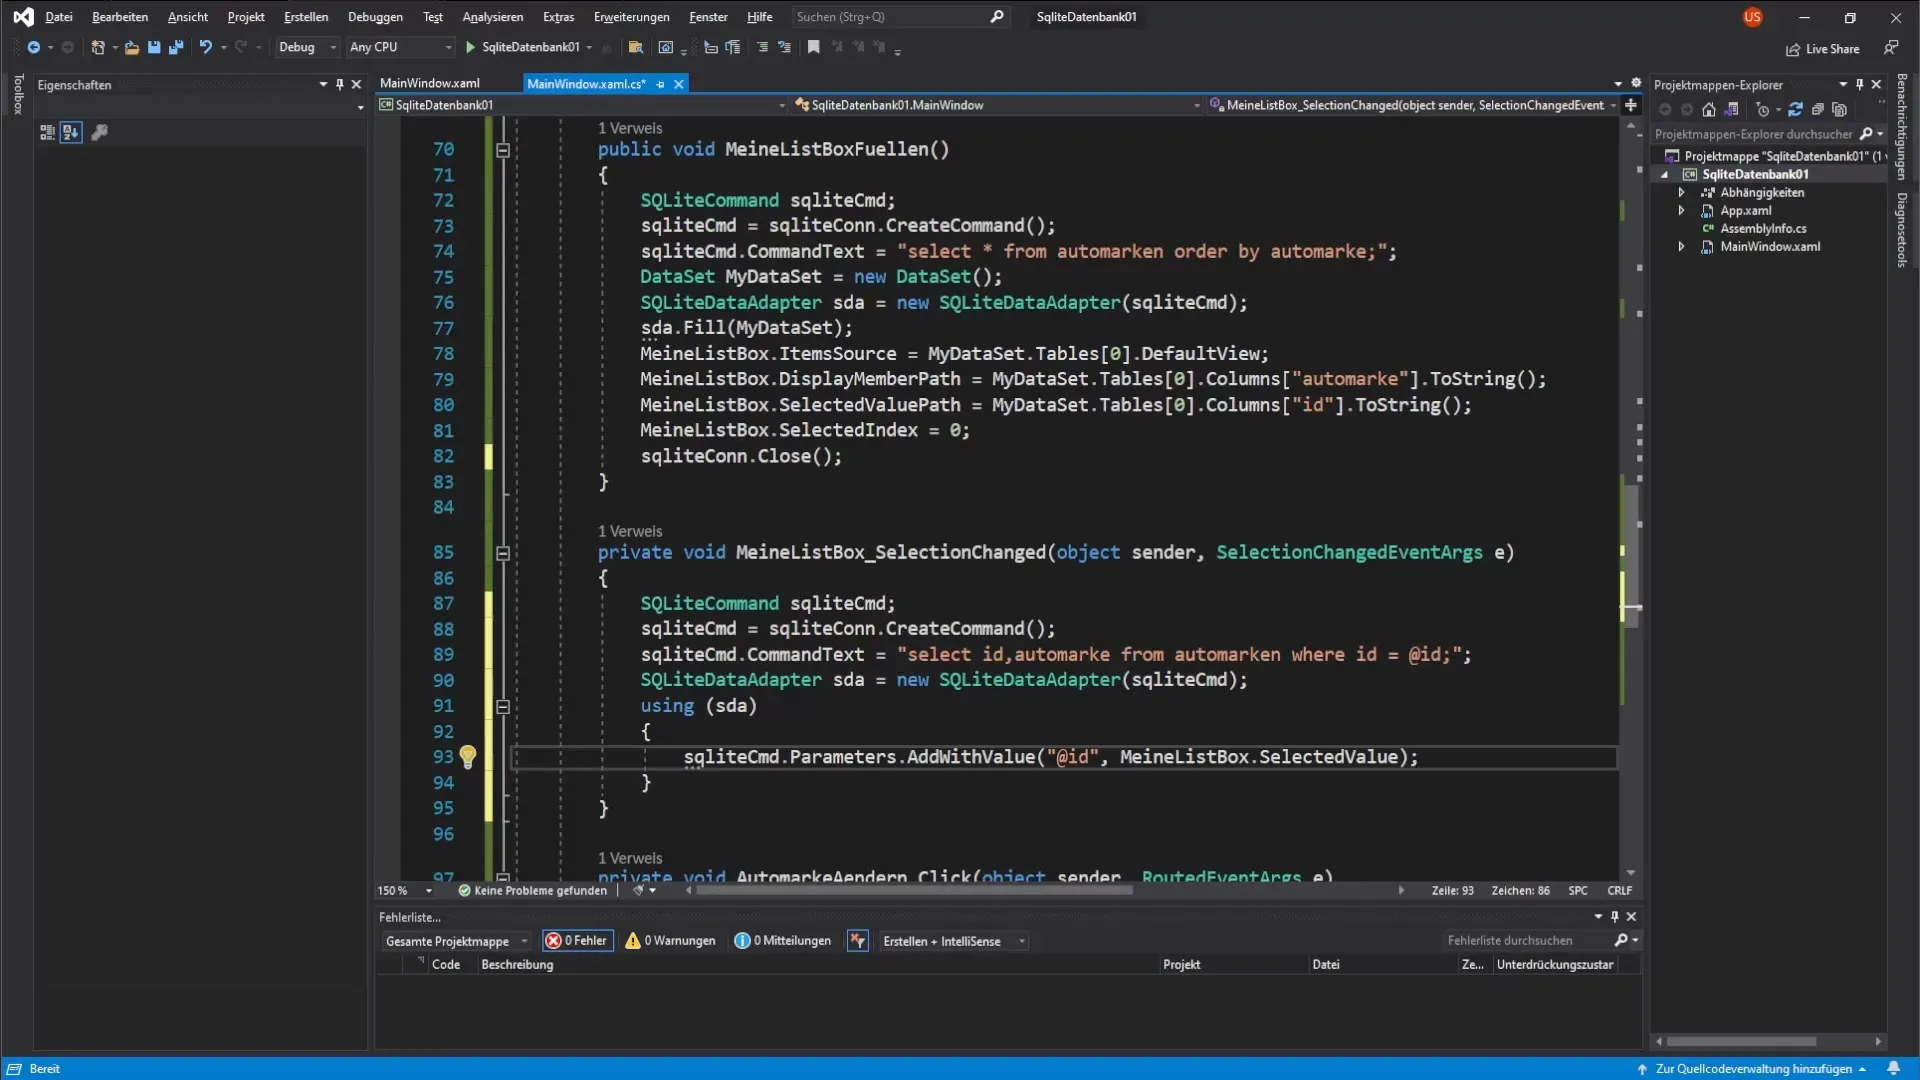
Once the DataTable is filled, we can populate the TextBox with the value of the selected car brand.
4. Display the selected car brand in the TextBox
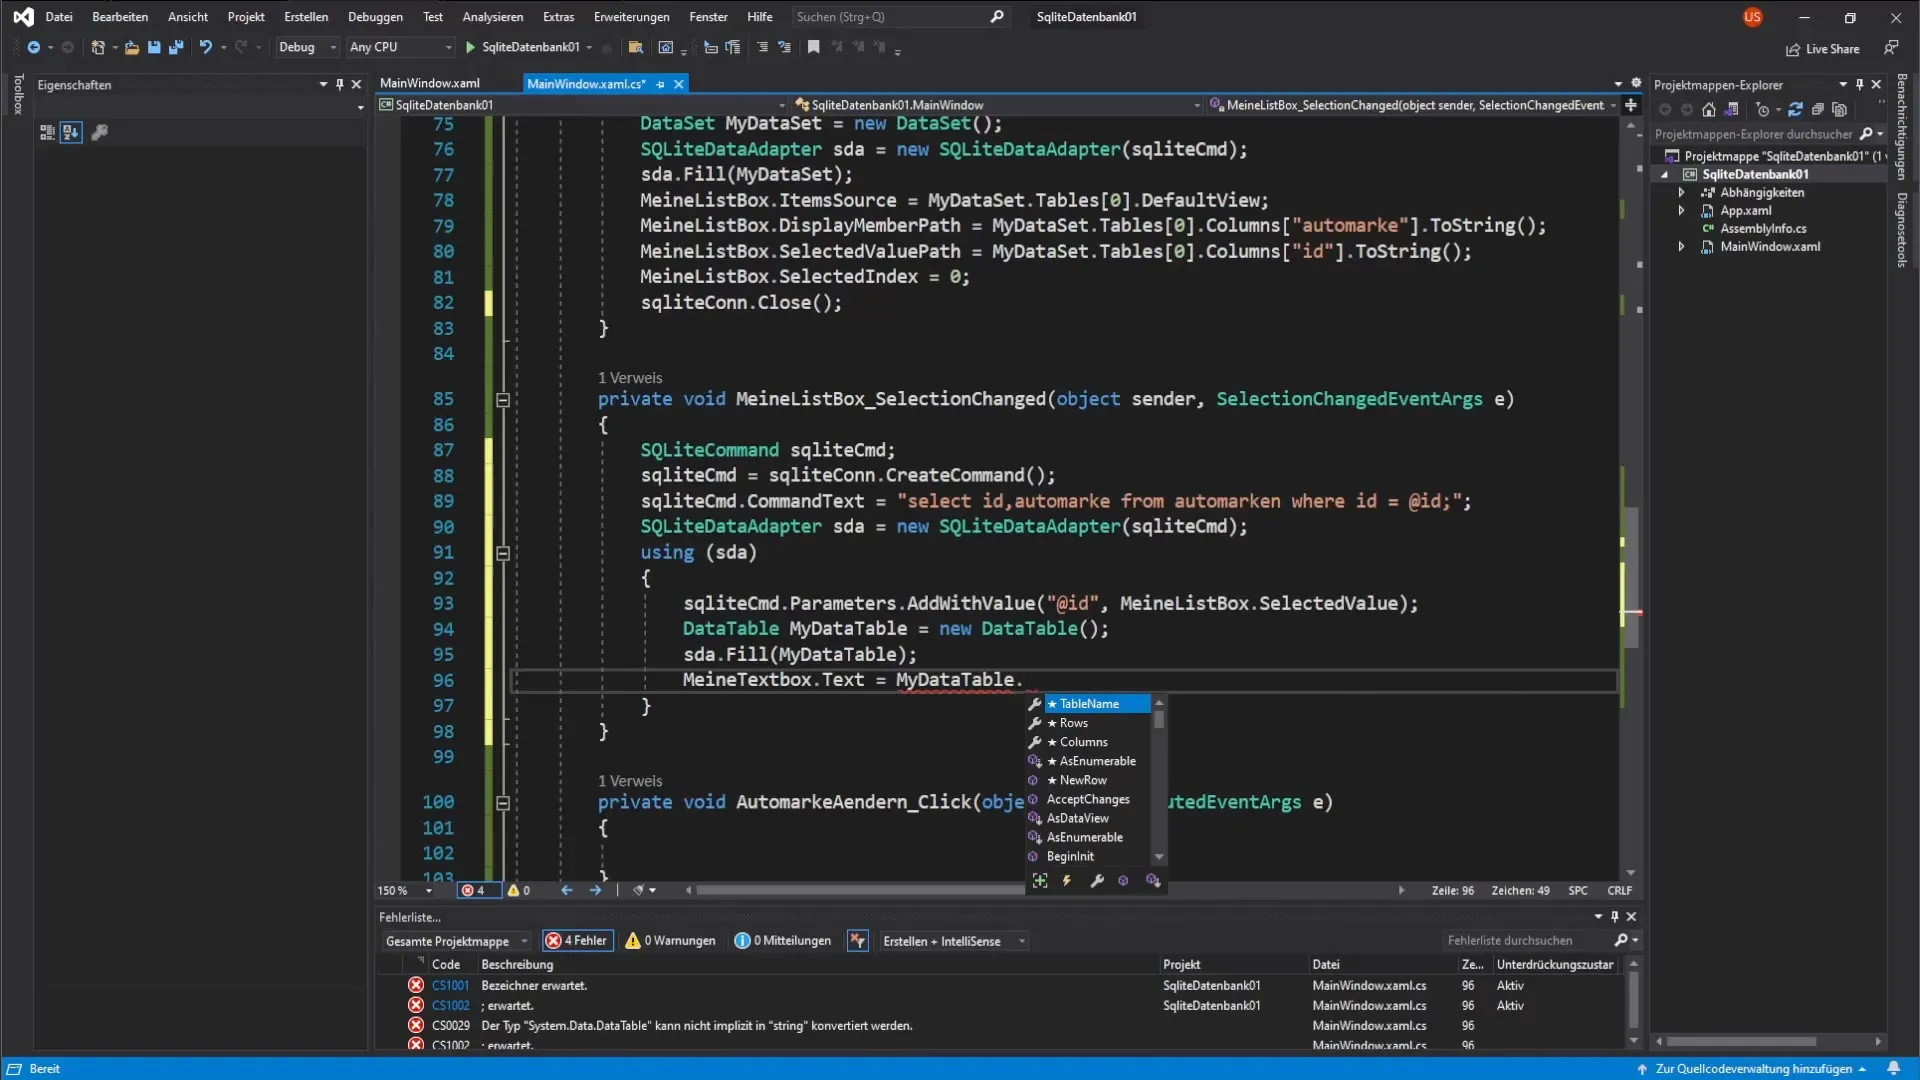
To set the value from the DataTable into the TextBox, we retrieve the first entry of the DataTable. We use myDataTable.Rows[0]["CarBrand"].ToString() and set the result in the TextBox.
5. Implement error handling
To ensure that no errors occur during the execution of the application, we must implement error handling. This involves checking whether an item has been selected in the ListBox before performing the query.
Here we use a simple condition: If myListBox.SelectedValue == null, we exit the method. This measure ensures that we do not receive null references and that the application remains stable.
6. Conduct function tests
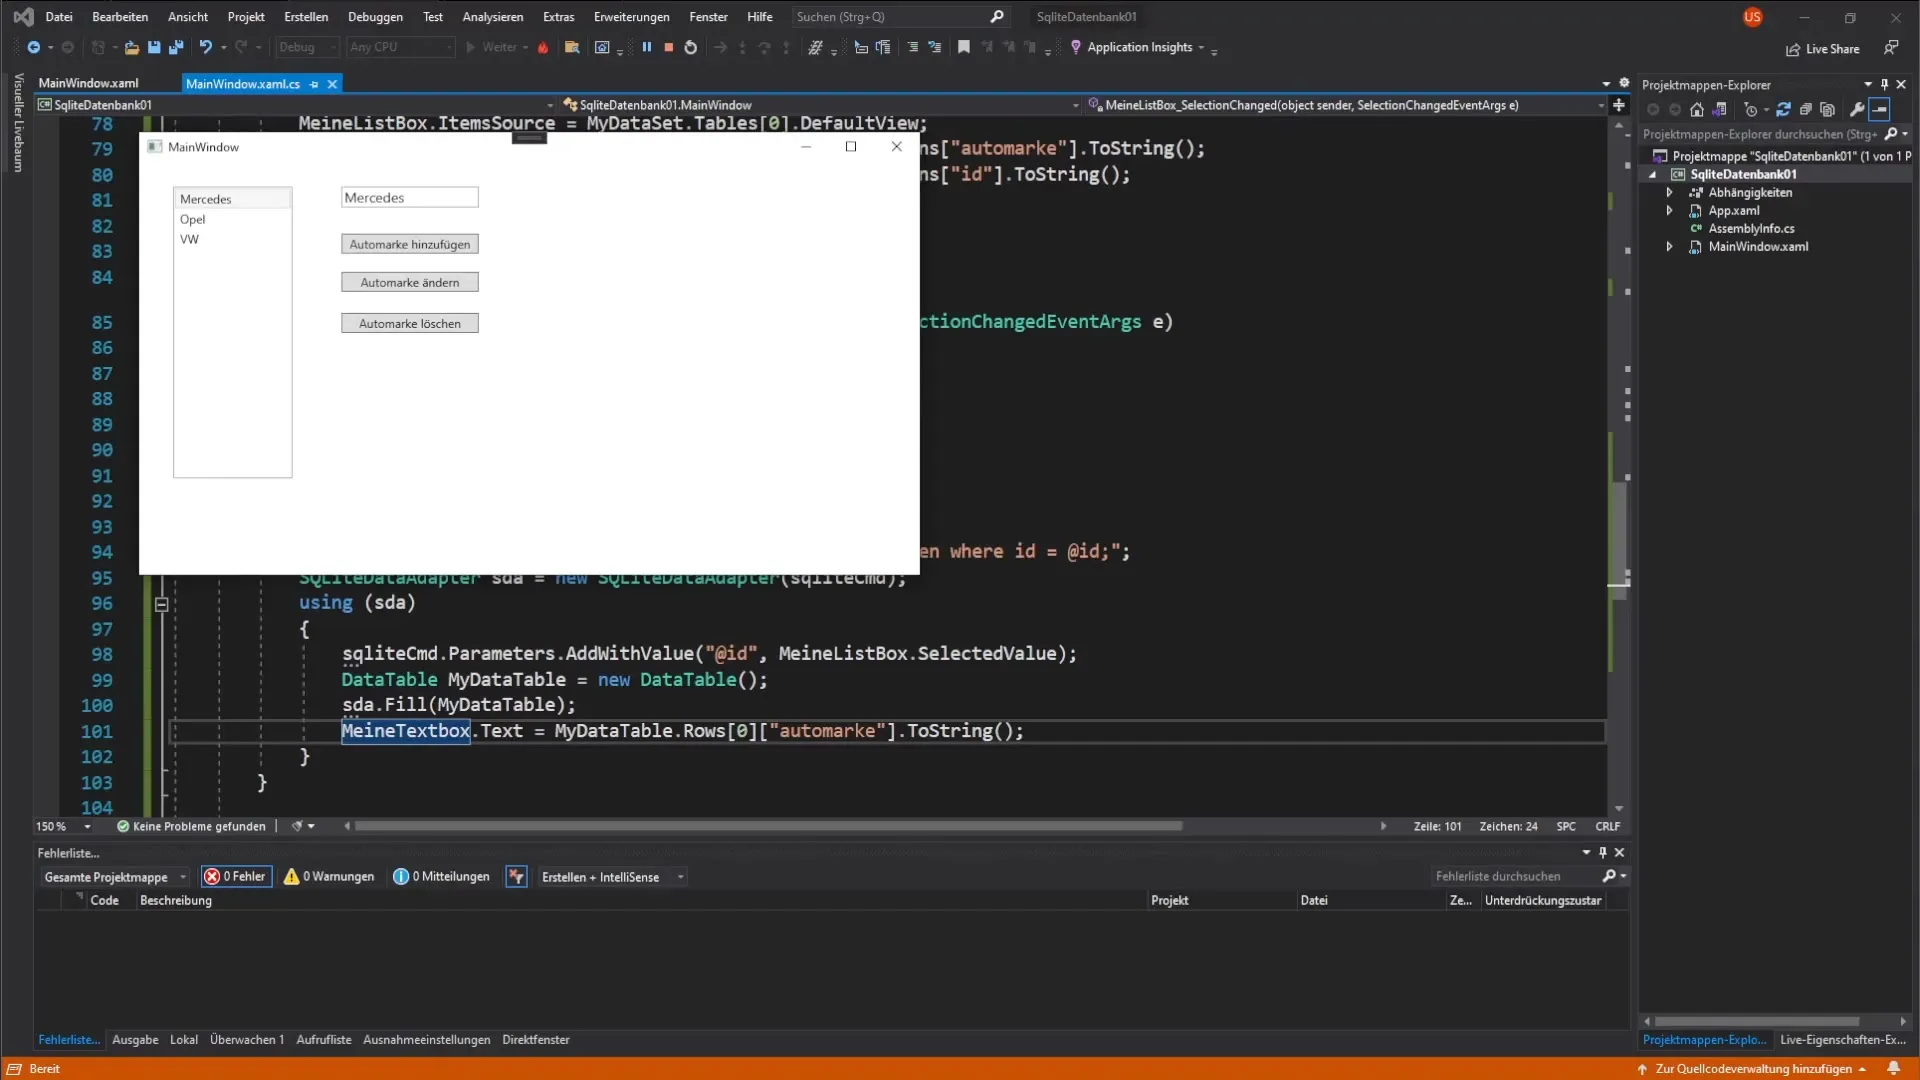
After implementing the above steps, it is important to test the application. Start the program and check whether the first entry in the ListBox is automatically displayed in the TextBox when it starts.
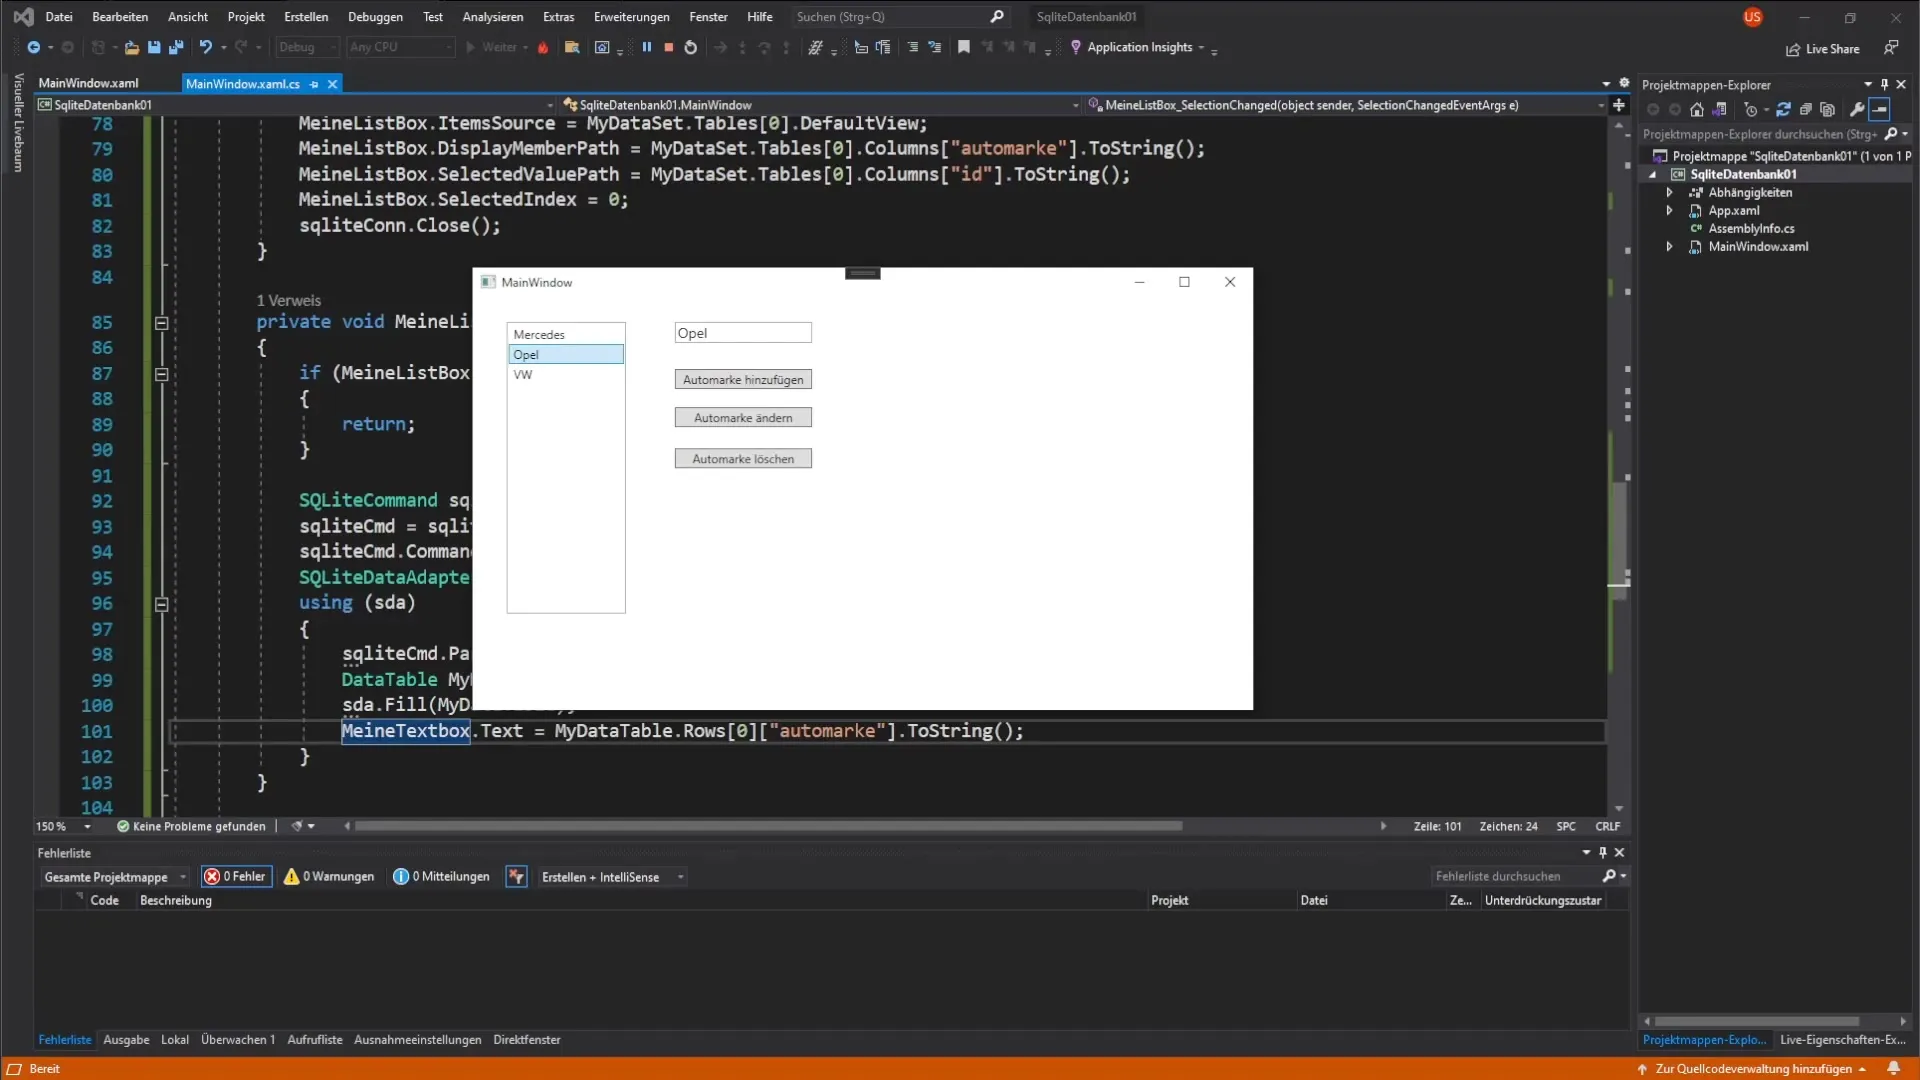
If you now switch between different car brands, you should see that the TextBox is dynamically updated to display the corresponding value.
Now that you understand the basics and the code for linking the TextBox and ListBox, you can further optimize your application. In the next step, we will learn how to insert new car brands into the database via a button.
Summary – Linking ListBox and TextBox in C#: Dynamically Linking Data
In this guide, you learned how to link a TextBox to a ListBox and realize its dynamically interactivity. This concept opens up new avenues for designing user applications that are both informative and user-friendly.
Frequently Asked Questions
What should I do if the TextBox is not updating?Check if the ListBox returns the correct value and whether the DataAdapter has been configured correctly.
How do I add a new car brand?We will cover that in the next video by inserting a button that allows you to append car brands to the database.
Why do we cast the outputs of the DataTable as a string?To ensure that the value is displayed correctly as text in the TextBox, we need to convert it to a string.


