Are you new to C# programming and want to get familiar with the User Interface of Visual Studio? In this tutorial, you will receive a comprehensive overview of the key components of this development environment. The user interface of Visual Studio is diverse and offers numerous tools that help you program efficiently. Let's take a look at the various elements and their functions together.
Key Insights
- The Solution Explorer is central to file management within a project.
- Properties of elements can easily be adjusted via the Properties panel.
- The source code editor is clear and allows for easy error detection.
- The Start and Compile functions are essential to test your project in real-time.
Step-by-Step Guide
Open Visual Studio
Start by opening Visual Studio on your computer. After launching the application, select the existing project you want to work with. This is the first step to getting familiar with the user interface.
Understand the Solution Explorer
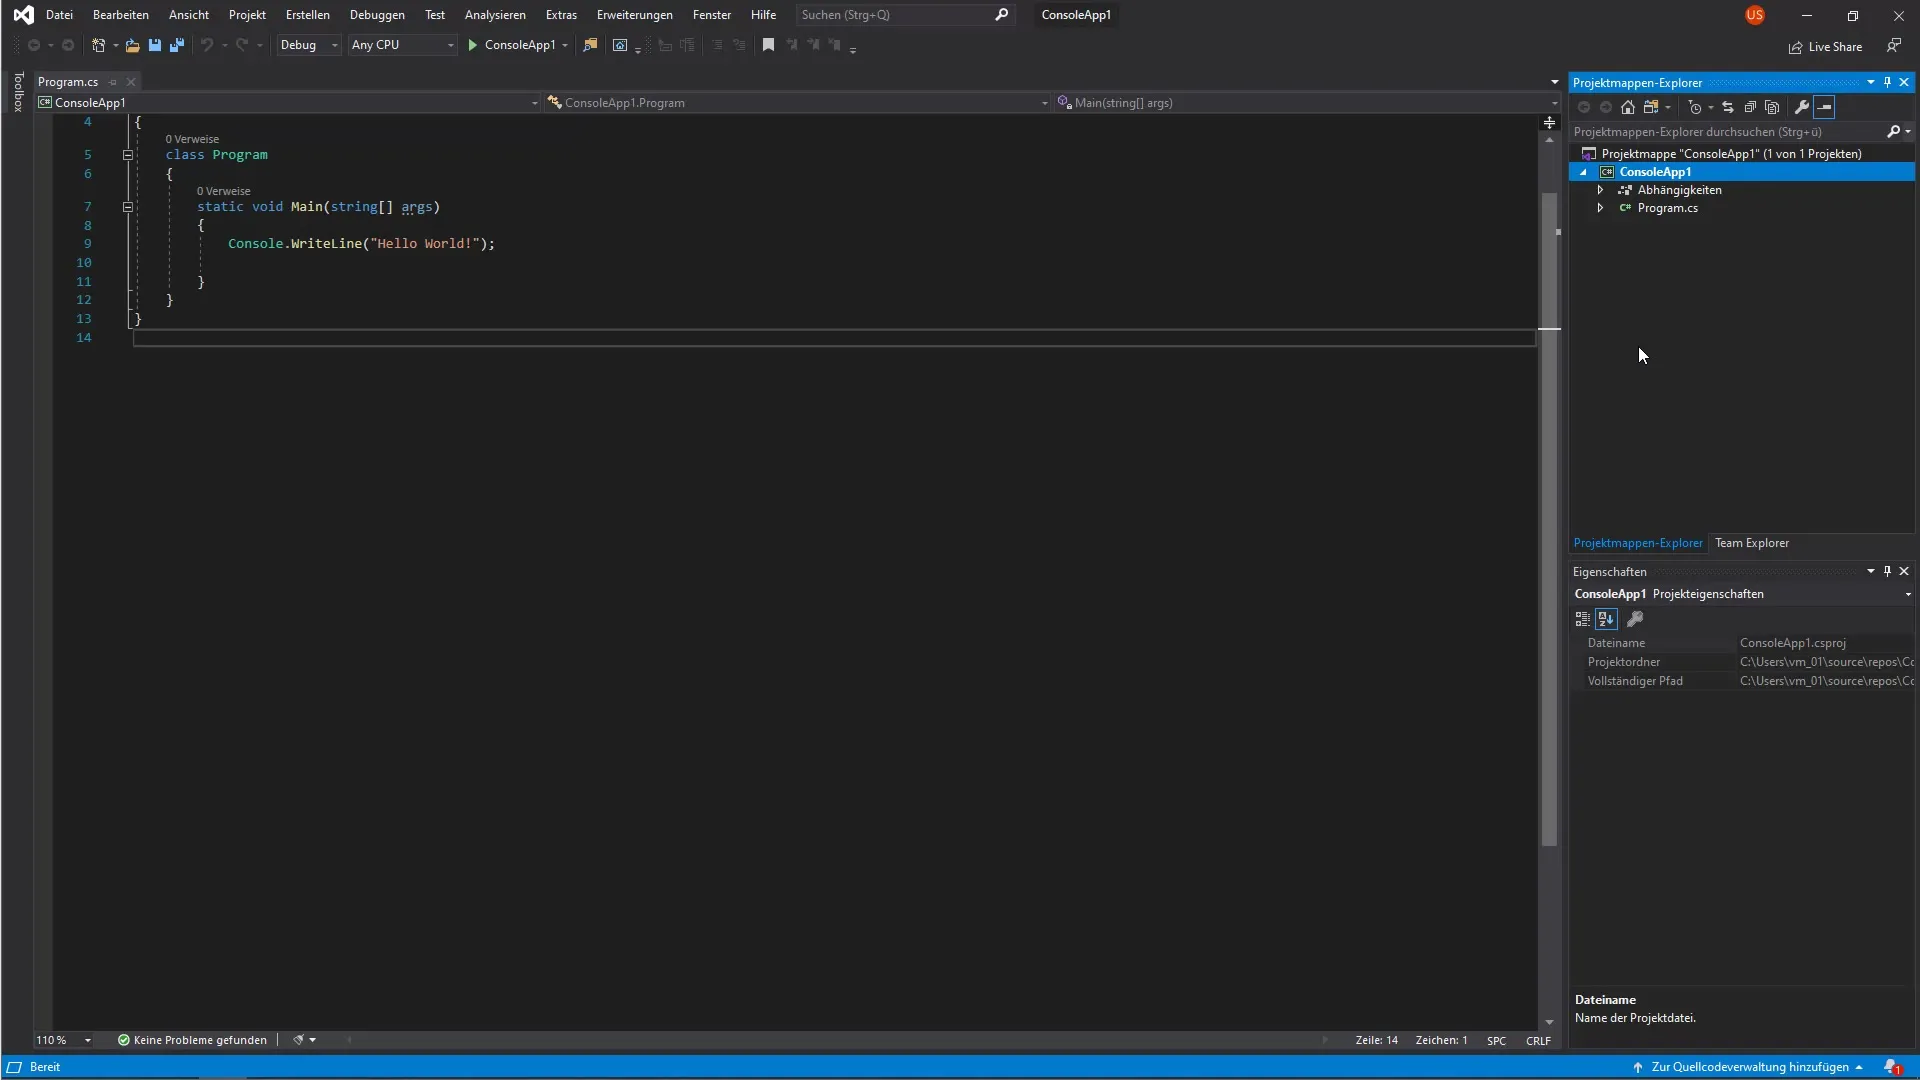
On the right side, you will find the Solution Explorer. Here, all files relevant to your current project are displayed. You can create new files or view existing ones. The Solution Explorer functions similarly to the Windows File Explorer but is focused on project-specific content.

Utilize the Properties Panel
At the bottom of the screen, you will find the Properties panel. When you select a file in the Solution Explorer, specific information and settings will appear here. For example, you can check and adjust the properties of programs or graphic elements. This is useful when you want to create a user interface later.
Understand Notifications in Visual Studio
A small bell icon on the right side signals notifications from Visual Studio. Often, these are updates or important information you should pay attention to in order to ensure that your development environment remains up to date. It is advisable to keep an eye on these notifications.
Set Up Source Control
To the left of the bell icon, you will find the source control area. Even if this may not be used at this stage, it is important to know that you can manage version control of your code with it. This is helpful for tracking changes and restoring older versions.
Get to Know the Source Code Editor
The central area in the middle of the interface is your source code editor. Here you write your code. You can adjust the font size to improve visibility by holding down the "Ctrl" key and scrolling with the mouse wheel. Take a look at how the editor visually processes your code.
Error Detection in the Editor
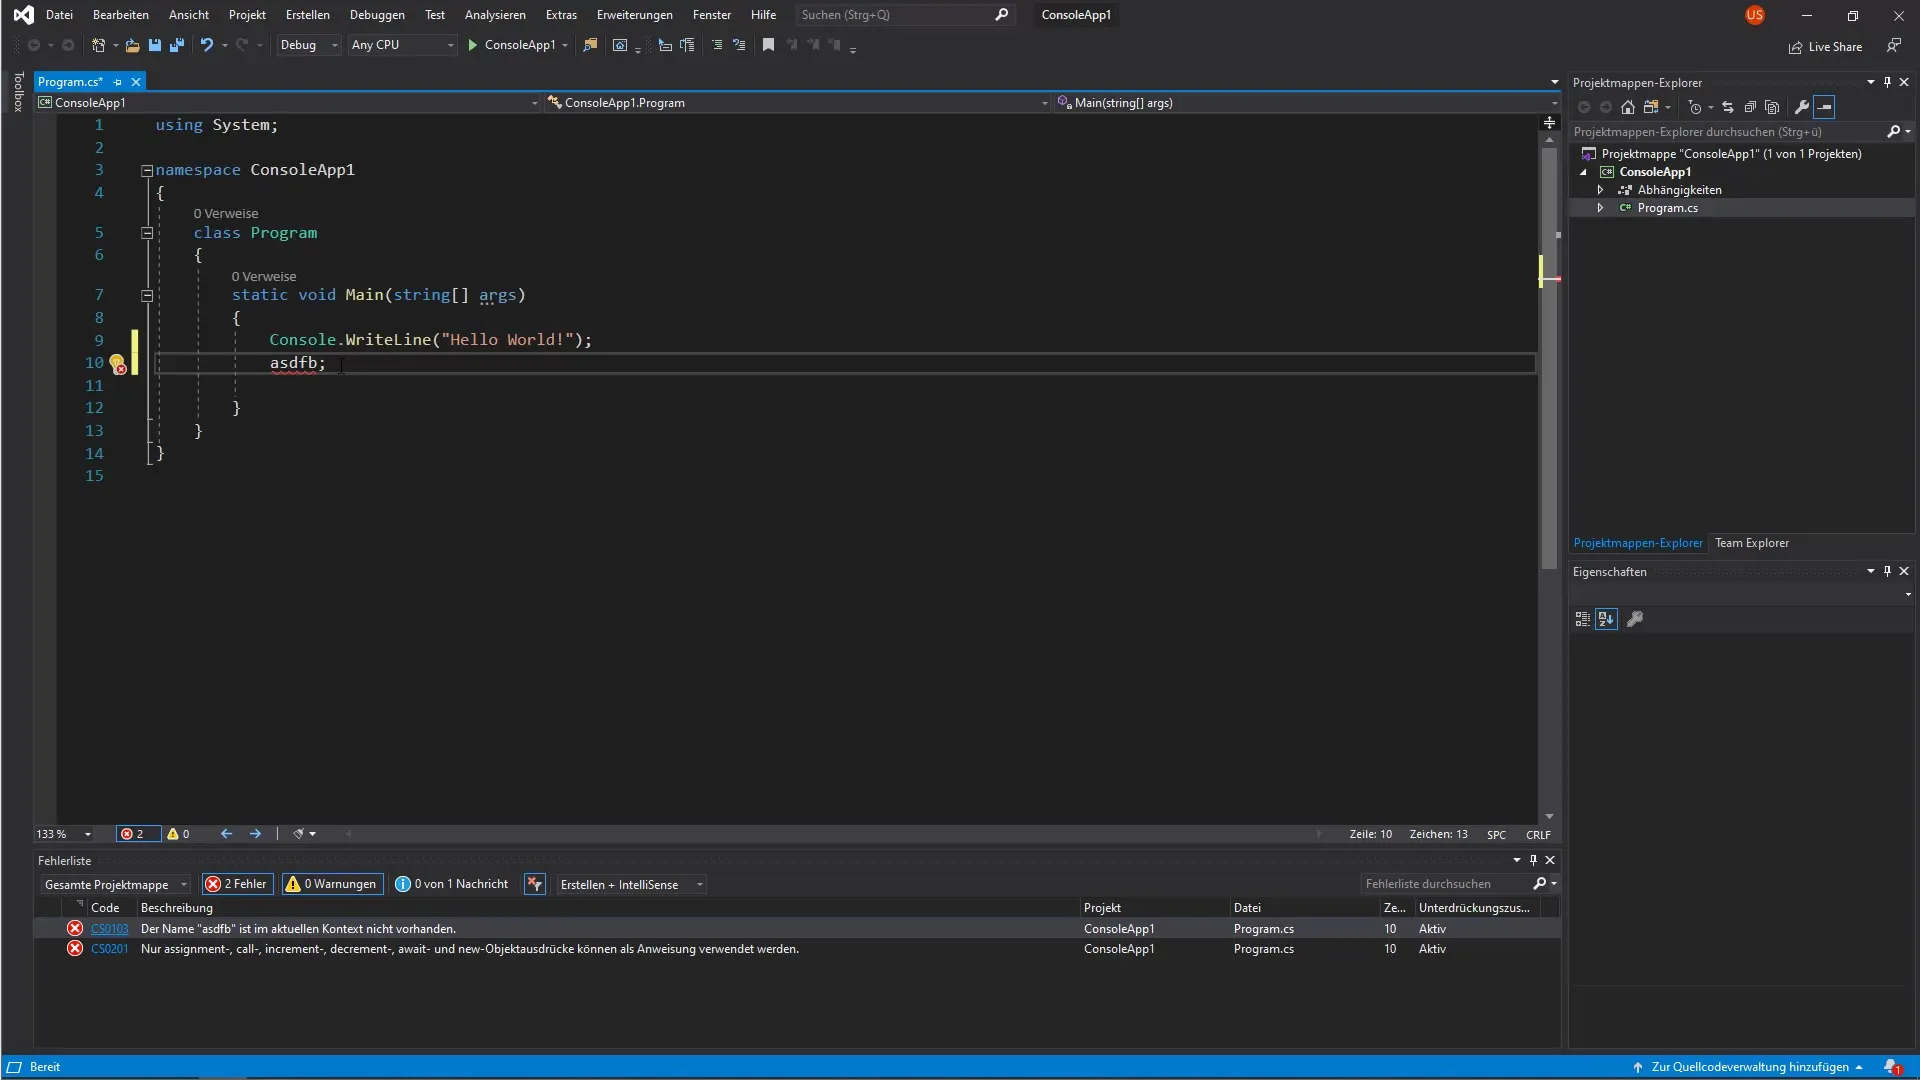
A useful feature of the editor is the automatic error detection. If you enter incorrect code, it will be underlined in red. Additionally, a red circle will appear in the lower corner indicating how many errors are present. Clicking on this area opens a list of the errors that you can edit.
Debugging Source Code
You can jump directly to the corresponding place in the code by double-clicking on an error. This makes it easier to locate and fix errors. Once you’ve fixed an error, you will be informed that everything is okay by a green check mark being displayed.

Start and Compile the Program
A small green arrow in the upper bar serves as the Start button for your project. Clicking it compiles your code in the background and starts your program. Immediately after compiling, a console window opens showing the result, such as "Hello World". This allows you to see that your program is functioning correctly.
Preview of the Next Video
Now that you have an overview of the user interface of Visual Studio, in the next video, you will learn how to execute and adjust the codes and their logic that have already been created. Stay tuned for the next lesson!
Summary – Effectively Explore the User Interface of Visual Studio
In this step-by-step guide, you have learned about the user interface of Visual Studio. You now know where important tools are located and how to use them for your programming. Understanding these elements lays the foundation for your C# project.
Frequently Asked Questions
How do I open Visual Studio?You open Visual Studio by launching it from the desktop icon or the start menu and selecting your project.
What is the Solution Explorer?The Solution Explorer displays all files associated with your current project.
How can I adjust the font size in the source code editor?Hold down the "Ctrl" key and scroll with the mouse wheel to change the font size.
How does error detection work?Errors in the code are indicated by red underlining, and the number of errors is shown in the status bar.
How do I start my program in Visual Studio?Click on the small green arrow in the upper bar to compile and run your project.


