
Tables are among the most common building blocks of a user interface whenever data needs to be presented clearly. In JavaFX, the class TableView handles this. It displays records row by row and divides them into columns, so that you can show, for example, first names, last names, and ages side by side.
The video is only loaded from YouTube when you play it – data (including your IP address) is then transmitted to YouTube/Google. More in the privacy policy
In this tutorial, you build a small person table from scratch. You create your own data class, build the table with its columns, fill it with objects, and finally adjust the column widths. The examples follow the program structure used in the video. So you should bring basic knowledge of Java and a working JavaFX environment.
Key Takeaways
- A
TableViewdisplays objects of a class, so you first need a suitable data class. - The properties of the data class are implemented as
SimpleStringPropertyorSimpleIntegerProperty. - Each
TableColumnneeds to know which field it should display, which you provide viasetCellValueFactoryandPropertyValueFactory. - The data is stored in an
ObservableList, which is passed to the table withsetItems. - With
setMinWidthandsetMaxWidth, you control how wide individual columns may become.
Step 1: Create the Person Data Class
Before you create the table, you need a model that describes the data. To do this, create a public static inner class named Person within your main class. The inner class is therefore located in the body of the main class, but outside the start method. The keyword static ensures that you can access the class without an instance of the outer class.

Step 2: Define Properties and Constructor
Within the Person class, you define three properties: vorname and nachname as SimpleStringProperty and alter as SimpleIntegerProperty. Pay particular attention to the age: do not use the String type, because age is a number. Import the required classes from the package javafx.beans.property.
Next, you write a constructor that accepts the three values and writes them into the properties. In doing so, you create a new property object each time, for example via new SimpleStringProperty(vorname). This way, each person object is fully initialized when it is created.

Step 3: Add Getter Methods
So that the table can read the values later, you need a getter method for each property. A getter for the first name looks something like this: public String getVorname() returns vorname.get(). You proceed in the same way for the last name. For the age, however, the return type is int, and you return alter.get().
The getter names are important because the PropertyValueFactory later searches for a matching method based on the field name. A name like "vorname" thus leads to getVorname().

Step 4: Create the TableView and Columns
Now you create the table in the start method. With TableView<Person> table = new TableView<>(); you create a table that is to contain only Person objects. The generic <Person> ensures that the compiler protects you from type errors.
After that, you create the individual columns. Each column is a TableColumn<Person, ...>, where the second type parameter specifies the data type of the field. For the first name and last name, you therefore use String, and for the age Integer. You pass the text that appears as the column header to the constructor, for example new TableColumn<>("Vorname"). Also import the classes from javafx.scene.control.

Step 5: Add Columns to the Table
The columns must then be added to the table. For this, you use table.getColumns(), which returns a list of all columns. With addAll you add all three columns at once. The order in the method also determines the order of the columns in the display.
Step 6: Assign Value Factories
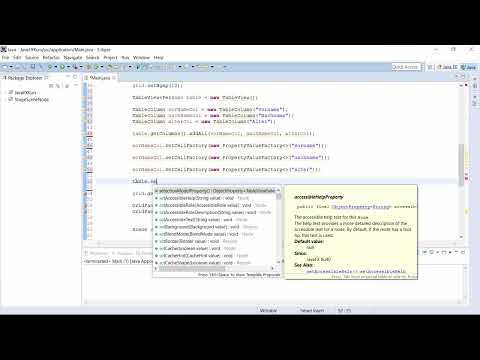
At this point, the table is still missing the connection between column and data field. Each column must know which field it should take its value from. For this you use setCellValueFactory. A mistake was corrected here in the video: the method is called setCellValueFactory and not setSellValueFactory. It works with a PropertyValueFactory, to which you pass the name of the field, for example new PropertyValueFactory<>("vorname").
Repeat this step for the last name and the age. Make sure that the names are written in lowercase and exactly identical to the field names or the getter names (without the prefix get).
Step 7: Fill an ObservableList with Persons
For the table to display any content at all, you need a data source. Create a list of type ObservableList<Person> for this. It is often declared as a field above the start method so that it is available everywhere. It is created with FXCollections.observableArrayList().
Then you add individual persons, for example Dennis Panuta (28), Hans Wurst (25) and Dieter Mieter (35). You separate the objects within the list with commas, not with semicolons. The advantage of an ObservableList is that the table is updated automatically as soon as the content changes.

Step 8: Pass the Data to the TableView and Test
Now you connect the list to the table. The call table.setItems(data) passes all persons to the TableView. For the table to become visible, you still have to add it to your layout, for example in a VBox or BorderPane container. Then start the program.
During the first tests, errors may become apparent, for example because getters are missing or properties are typed incorrectly. In that case, check especially whether the data types of the properties match the specifications in the TableColumns. In the video, exactly such errors were fixed before the table was displayed correctly.

Step 9: Set Column Widths
Finally, you can refine the appearance of the table. With setMinWidth you determine how narrow a column may be at minimum. In the example, all three columns receive a minimum width of 100 pixels. The columns can then be widened, but not reduced below this value.
With setMaxWidth you can additionally set an upper limit. If you set both values to 100 for the first name, the column stays exactly 100 pixels wide. So think carefully about whether you need a fixed width or just a lower limit, because both affect the behavior of the table when the window size changes.

Summary – Creating a JavaFX TableView: Filling Tables with Columns and Data
A JavaFX table consists of several building blocks that work together. First you define a data class with properties and getters. Then you create the TableView and its TableColumn objects, which you connect to the fields via setCellValueFactory. The actual records are stored in an ObservableList, which you transfer into the table with setItems. Finally, you control the width of the columns with setMinWidth and setMaxWidth. If you follow this order, the table can later be easily extended with additional columns or records.
FAQ
Why does the Person class have to be static?A static inner class can be used without an instance of the outer class. This allows it to be created directly in the start method without you having to create additional objects of the main class.
Which property type belongs to a numeric value like age?For integers you use SimpleIntegerProperty. SimpleStringProperty is intended exclusively for text and would lead to type errors for the age.
Why doesn't the PropertyValueFactory work without a getter?The PropertyValueFactory searches for a matching method in the data class based on the name passed. If the getter is missing, the table cannot read the value and displays the cell empty.
What happens if I don't pass any data to the table with setItems?The table is displayed with its column headers, but contains no rows. Only passing an ObservableList with person objects fills the table.
Can I add entries later without resetting the table?Yes, since the table uses an ObservableList, new entries are displayed automatically when you add them to the list. Calling setItems again is not necessary.
Why should I use both setMinWidth and setMaxWidth?With both methods you define a range within which the column width may vary. If you set both values equal, the column always stays exactly the same width.


