

Imagine your application starts and immediately displays all car brands from your database, sorted and ready for selection. That is exactly what you will build in this lesson. You will learn how to use an SQL query to fetch data from an SQLite database, cache it in a DataSet, and then bind it to a ListBox.
The video is only loaded from YouTube when you play it – data (including your IP address) is then transmitted to YouTube/Google. More in the privacy policy
This lesson builds on the SQLite database you created previously with the table "Automarken". If you haven't finished that yet, you should first fill the table with a few records.
Key Takeaways
- Controls such as the ListBox need a unique name so that you can access them in the code-behind.
- An SQL query is formulated using an SQLite command. The CommandText contains the actual SQL statement, which ends with a semicolon.
- The DataSet receives the results, and the SQLite DataAdapter establishes the connection to the database and fills the DataSet.
- With ItemsSource, DisplayMemberPath, and SelectedValuePath, you determine which data is displayed and which value is stored in the background.
Step 1: Prepare the User Interface
Before you can display data, you need the appropriate controls. In the designer, drag a ListBox, a TextBox, and three buttons onto your main window. The ListBox will later display the car brands, the TextBox is used for editing individual entries, and the buttons take over the functions Change, Add, and Delete.

Step 2: Give the ListBox a Name
In the Properties window, under the entry "Name", assign the ListBox a descriptive name, for example "meineListbox". Without this name, you cannot access the control in the code-behind. This also applies to the TextBox, which you should also give a name, such as "meineTextbox".
Step 3: Create the SelectionChanged Event
The ListBox should react as soon as the user selects a different entry. For this you need the SelectionChanged event. You can find it in the Properties window via the lightning bolt icon and generate the event handler by double-clicking. Alternatively, you can enter the name by hand. In both cases, a method is created in the code-behind that you will fill with content later.

Step 4: Label the Buttons and Create Click Events
Next, you label the three buttons clearly using their "Content" property: "Automarke ändern", "Automarke hinzufügen", and "Automarke löschen". For each button, you create a Click event by double-clicking. The methods are then automatically named, for example, "Automarke_ändern_Klick". The logic for changing, adding, and deleting will follow in later lessons; for now, this is only about the basic framework.

Step 5: Create the Method for Filling the ListBox
Now it's time for the code-behind of the main file, that is, the file with the .cs extension. There you create a new method that will later populate the ListBox. You can name it, for example, public void meineListboxFüllen(). You call this method at program start so that the data is displayed immediately.

Step 6: Create the SQLite Command with the Query
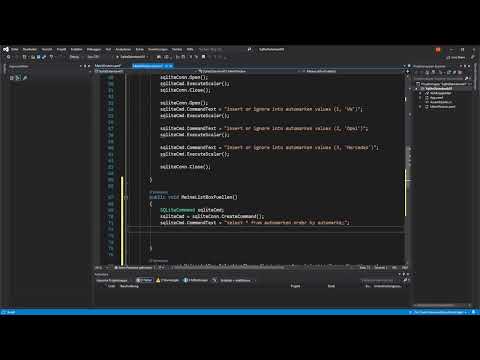
Inside the method, you first create an SQLite command. You can refer to the previous lessons, in which you already set up connections and commands. The crucial part is the CommandText, that is, the SQL statement itself. For our task, it reads:
The statement selects all columns from the table Automarken. With ORDER BY Automarke DESC, you sort the results in descending order by the column Automarke. The semicolon at the end of the SQL statement inside the string signals to SQLite that the statement has ended. The semicolon at the end of the C# line, on the other hand, is a normal line terminator in C#. Don't confuse the two.

Step 7: Prepare the DataSet
You store the results of the query in a DataSet. It can hold data in rows and columns, that is, in tabular form, and can even contain records from multiple tables. To be able to use the class, you need the using directive using System.Data; at the top of the file. Then you create the object, for example with DataSet meinDataSet = new DataSet();.

Step 8: Create the SQLite DataAdapter
The DataSet alone doesn't yet know where the data comes from. For that you need the SQLite DataAdapter. It establishes the connection between the data source, i.e. your SQLite database, and the DataSet. You create it with SQLiteDataAdapter sda = new SQLiteDataAdapter(command); and pass in the command you created earlier. The adapter can both retrieve data and save it back.

Step 9: Fill the DataSet with the data
Now you fill the DataSet. To do this, you call the adapter's Fill method and pass the DataSet as a parameter: sda.Fill(meinDataSet);. This executes the SQL query, and the result is available in the DataSet. The database connection and the DataSet are now linked to each other, and the retrieved car brands are in your program's memory.

Step 10: Bind the ListBox to the DataSet
Now you link the ListBox to the data. For this you specify three properties:
First, the data source via meineListbox.ItemsSource = meinDataSet.Tables[0];. Since a DataSet can contain multiple tables, you must explicitly specify which table should be used. The first table has index 0. Make sure you don't use index 1 here, otherwise you will get an error.
Then, with meineListbox.DisplayMemberPath = "Automarke"; you determine which column is displayed. Access is via the column name, and the Automarke column contains text.
Finally, with meineListbox.SelectedValuePath = "ID"; you determine the value that belongs to each entry in the background. The ID is the unique identifier of a record in the database. With it, you can reliably find the matching car brand later, even if the display name changes.
Step 11: Select the first element automatically
So that an entry is already highlighted at startup, you set meineListbox.SelectedIndex = 0;. Index 0 refers to the first element of the list. Since the list is sorted in descending order, the car brand with the alphabetically greatest name is highlighted. In the next video, you will use this selection to transfer the values into the TextBox.
Step 12: Close the database connection
At the end of the method, you close the connection again with command.Connection.Close(); or via the connection you used previously. The data remains in the DataSet even when the connection is closed. Closing database access conserves resources and prevents problems with later accesses.

Step 13: Call the method at program start
So that the ListBox is actually filled at startup, you call your method in the window's constructor, directly after InitializeComponent();. So the call meineListboxFüllen(); goes there. Without this call, the method would exist but would never be executed.

Step 14: Test the program
Start the program and check the result. The ListBox should now display all car brands from the database, sorted in descending order, and the first entry is already highlighted. If the list is empty, first check whether the table in the database actually contains records and whether the name of the table and the columns in your SQL query is exactly right. SQL and C# distinguish between uppercase and lowercase in identifiers within the strings, so it's worth taking a close look at the spelling.

Summary – Filling a ListBox with SQLite data in C#
You have learned how to fill a ListBox in C# with data from a SQLite database. You formulated an SQL query with sorting, stored the result in a DataSet via a DataAdapter, and bound the ListBox to the data via ItemsSource, DisplayMemberPath and SelectedValuePath. In the next step, you will link the ListBox with the TextBox so that you can display, change and delete the individual values.
FAQ
Why do I have to give the ListBox a name?Without a name, you cannot access the control in the code-behind, because otherwise C# cannot address the element unambiguously.
Why do SQL commands end with a semicolon?The semicolon in the SQL string indicates to SQLite that the command has ended. The semicolon at the end of the C# line is part of normal C# syntax.
What is the difference between DataSet and DataAdapter?The DataSet stores the retrieved data in memory, while the DataAdapter establishes the connection to the database and fills the DataSet with the result of the query.
What is SelectedValuePath used for?It determines which value belongs to each list entry in the background. Here it is the ID, with which you can uniquely find a record again.
Why is Tables[0] used in the code?A DataSet can contain multiple tables. Index 0 refers to the first table, i.e. the result of your query.
Why do I see no entries after starting?Check whether the method is called in the constructor, whether the table contains records, and whether the table and column names in the SQL query are spelled correctly.

