

Have you so far only written console applications in C# and now want to build a graphical user interface? Then this introduction is exactly right for you. As soon as you create a WPF application in Visual Studio, the development environment changes noticeably. New tools, windows, and files appear that you don't need for a console application. This guide takes you step by step through starting a WPF project and shows you which IDE tools are added and what you use them for.
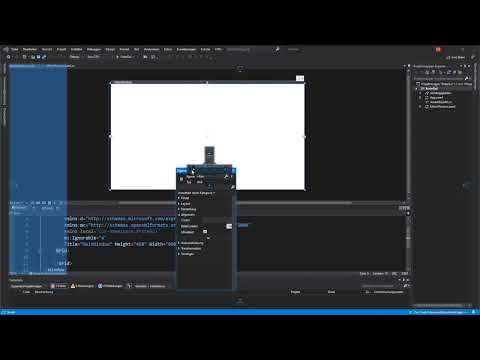
The video is only loaded from YouTube when you play it – data (including your IP address) is then transmitted to YouTube/Google. More in the privacy policy
The installation of Visual Studio should be completed before you begin.
Key Takeaways
- A WPF project can be found and created quickly using the search function in the start window.
- When you start a WPF application for the first time, Visual Studio downloads additional components. This can take a moment.
- The XAML files represent the user interface, while the code-behind files (.xaml.cs) contain the logic.
- The Properties window allows you to customize controls in the XAML code without programming.
- The Toolbox provides all WPF controls that you can place on your main window via drag-and-drop.
- With the pin icon, you determine whether windows hide automatically or remain permanently visible.
Step-by-Step Guide
Step 1: Finding and Starting the WPF Project
After starting Visual Studio, you first see a list of projects you have already created. For a new project, select the option to create one at the top. The project templates then appear on the right side. You can scroll through the list until you find the WPF template. It is faster with the search function at the top: simply enter "WPF" there. Several templates that work with WPF will then be displayed.
For this example, select the "WPF Application" template and click "Next".

Step 2: Naming the WPF Application
In the next dialog, you assign a name to your project. For this guide, "ErsteGUI" is suitable, for example. Then confirm with "Create". Visual Studio now creates the project structure and opens the project. Make sure you choose a name that contains no spaces, as the project will be named more cleanly later on.

Step 3: Waiting for the IDE's First Start
After you have created the project, the application starts. You will notice that the development environment has changed. This is because WPF projects bring their own tools with them. Since you are opening the project for the first time, some components still need to be downloaded. The process therefore takes a little longer. Wait patiently until the initialization is complete before you start working.

Step 4: Getting to Know the XAML Editor and the Designer
Once the IDE is fully loaded, it's worth taking a closer look. In the area at the bottom, you will find the XAML code editor. XAML stands for Extensible Application Markup Language, a markup language for user interfaces. Here you can create and edit code that describes the interface. Above it, you already see the file "MainWindow.xaml". This is where you will later design your user interface. So you don't have to build the interface exclusively through code, but can also design it graphically.

Step 5: Switching Between MainWindow.xaml and the Code-Behind
Next to the file "MainWindow.xaml", you will find another tab with the file "MainWindow.xaml.cs". This file is the C# code of the main window. This is where the logical interactions are executed and processed further, for example when a user clicks a button. The separation is important: the file with the .xaml extension describes how something looks, while the .xaml.cs file determines what happens.
When you switch to the .cs file, the XAML tools disappear automatically because they are not needed there. If you go back to the XAML file, they reappear. For working with the interface, you can display the XAML code editor and the XAML designer at the same time. This way you immediately see how a code change affects the layout.


Step 6: Opening and Using the Properties Window
A particularly helpful tool is the Properties window. You open it via the menu by clicking the "Properties" entry in the View menu. It appears in the middle area of the interface. There you will see a small cross, the so-called docking compass. With this cross you can drag the window to the desired position, for example to the left of the designer.
The advantage: When you select a button or a text field, the window displays all properties of this control. You can change values such as size, caption, or color directly there. You don't have to write a single line in the XAML code, although the change is of course reflected there.

Step 7: Exploring the Toolbox
The Toolbox is located on the left side of the window. Click on it once briefly. When opening it for the first time, a short initialization may occur again. After that, you will see a selection of WPF controls, for example buttons (Buttons), checkboxes (CheckBox), or text fields (TextBox). With these elements you will later build the interface of your main window. The next videos will show you the placement in detail.
Note that the Toolbox is closed automatically as soon as you click anywhere else in the IDE. This is practical if you want to have as much space as possible for your workspace.

Step 8: Pinning Windows with the Pin Icon
If you don't want the Toolbox or the Properties window to constantly hide, you can pin them. In the top right of each window there is a pin icon. If it is vertical, the window is docked and stays permanently visible. If it is horizontal, the window is automatically hidden as soon as you click elsewhere. Try both to find out which setting suits your working style better.

Step 9: Keeping an Eye on the Solution Explorer
Something has also changed in the Solution Explorer. The main window file is now called "MainWindow.xaml", and there is also the file "App.xaml" for the application as a whole. For this guide, you don't yet need to deal with both files in detail. What is important is only that you recognize the structure and know which file has which task.
Step 10: Looking Ahead to User Interface Design
You have now set up a working WPF project environment and know the most important tools. In the next steps, you will insert controls from the Toolbox into the main window and observe how the XAML code changes in the process. You will also use buttons and other elements to design your interface piece by piece. So feel free to open your project once more and take a calm look at how the IDE has changed compared to a console application.
Summary – Creating a WPF Project in Visual Studio: The New IDE Tools at a Glance
You have learned how to find, name, and start a WPF project in Visual Studio using the search. You now know that the XAML editor describes the interface, while the code-behind file contains the logic. You also know the Properties window, the Toolbox, and the pin icon, with which you can customize your workspace. With this foundation, you are well prepared to place controls on your main window in the next step.
FAQ
Do I need a separate Visual Studio installation for WPF?No, you need an existing Visual Studio installation that includes the components for desktop development with .NET. The WPF template will then appear in the project selection.
Why does the first start of my WPF project take so long?When opening it for the first time, components that are needed for interface design are still being loaded. This only happens once, after which the IDE starts faster.
What is the difference between MainWindow.xaml and MainWindow.xaml.cs?In the XAML file you define what the interface looks like. In the .cs file you write the C# code that determines what happens on user actions.
Can I change properties of a control without writing code?Yes, you use the Properties window for that. If you change a value there, the XAML code is adjusted automatically.
How do I prevent the Toolbox from constantly hiding?Click on the pin icon in the title bar of the Toolbox. If it is vertical, the window stays permanently visible.

