
Imagine a table in which you can expand individual rows so that further entries become visible beneath them, similar to folders in a file explorer. That is exactly what the TreeTableView in JavaFX does. It combines a table with a tree structure and is particularly suitable for data with hierarchies, such as categories with subitems, project structures, or organizational units.
The video is only loaded from YouTube when you play it – data (including your IP address) is then transmitted to YouTube/Google. More in the privacy policy
In this tutorial, you build a small TreeTableView step by step. You create the data elements, link them into a tree, create a table column, and pass the contents to it. Finally, you add everything to your user interface layout. Basic knowledge of Java and a basic understanding of the TreeView from the previous video will help you, but you don't need any prior knowledge of tables.
Key Takeaways
- A
TreeTableViewconsists of a root element (TreeItem), child elements beneath it, and at least oneTreeTableColumn. - Each column needs a cell value factory (
setCellValueFactory) that determines which value is displayed in the cell. Without it, the column stays empty. - With
root.setExpanded(true), the child elements are directly visible at startup. - The finished table is supplied with columns via
getColumns().add(...)and then integrated into the layout.
Step-by-Step Guide
Step 1: Create Data Elements as TreeItems
Begin by creating the elements that should later appear in your table. Each element is a TreeItem<String>, that is, a tree element that contains a string. In the example, the first element is called "Element 1". You create it with new TreeItem<>("Element 1") and store it in a variable so that you can use it later.

Step 2: Create Additional Elements
Elements two and three are created in the same way. The fastest way is to copy the line and adjust the variable names and the texts. This gives you three independent tree elements that are not yet connected to each other.
Step 3: Create the Root Element and Expand It
For the three elements to form a structure, you need a common root element. Create it as a TreeItem<String> named root. Then you call setExpanded(true). This method ensures that the child elements are visible after startup and do not remain collapsed.
Step 4: Add Child Elements to the Root Element
Now you link the elements to the root. Via root.getChildren(), you access the list of children and use addAll to add all three elements at once. The elements are now in the tree, but there is not yet a table column that could display them.
Step 5: Create and Name the Table Column
A TreeTableView displays its contents in columns. Each column is a TreeTableColumn<String, String>. The first type parameter specifies the type of the element, the second the type of the displayed value. Both are String here. As the heading, you pass, for example, the text "Spalte" to the constructor.
Step 6: Set the Column Width
So that the contents are fully readable, you should give the column a fixed width. With setPrefWidth(120), you set a preferred width of 120 pixels. This value is a desired value that the layout adjusts if necessary. However, it prevents the column from showing only a few characters when the texts are long.
Step 7: Set Up the Cell Value Factory with setCellValueFactory
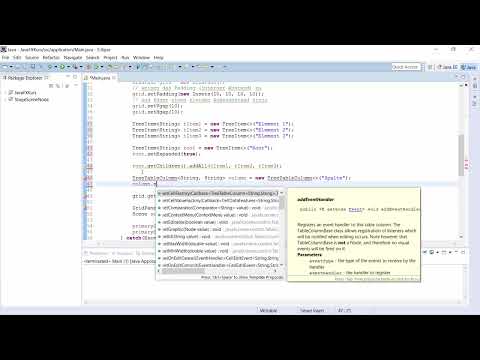
At this point it is decided whether the column shows any content at all. The method setCellValueFactory expects a Callback that supplies the value to be displayed for each row. Without this callback, all cells remain empty, no matter how many elements are in the tree. The callback accepts a CellDataFeatures object, which gives access to the respective TreeItem. You can write it as a lambda expression.

Step 8: Writing out the lambda expression with ReadOnlyStringWrapper
The callback must return an observable value. The ReadOnlyStringWrapper is suitable for this. In your lambda expression, you call cellData.getValue() to obtain the TreeItem, and then getValue() again to get the actual string. If needed, you can break the line so the code stays more readable.
Step 9: Importing the required classes
For the code to compile, you must import the classes used. These include TreeItem, TreeTableView, TreeTableColumn and ReadOnlyStringWrapper. Make sure to choose the variant for TreeTableColumn for the columns and not the one for the regular TableColumn. Both have similar names, and a wrong import leads to type errors.

Step 10: Creating the TreeTableView and connecting it to the root
Now you create the actual table. It gets the type String, and in the constructor you pass the root element root. This way the table knows which tree is to be displayed.
Step 11: Adding the column to the table and integrating it into the layout
You add the column to the table via getColumns().add(column). A table can have several columns, which is why this list is the right place for it. Then you place the TreeTableView in your existing layout, for example in a GridPane, by inserting it with add at the desired position.
Step 12: Starting the application and checking the result
Start the application. You should now see a table column with the heading "Spalte". Below it appear the root element "Root" and the three child elements. Since you set setExpanded(true), the sub-elements are immediately visible. If the column remains empty, first check whether you set the callback from step 7, and then whether the column was actually added with getColumns().add.

Summary – TreeTableView in JavaFX: Displaying tree structures in tables
With the TreeTableView you combine tree structures and table columns in a single control. You first create the TreeItem elements, link them via a root element, and then create the columns. The setCellValueFactory method is crucial here because it controls the display of the values. With getColumns().add you pass the columns to the table, which you then integrate into your layout. The next video covers the HTML editor, with which you can design other interesting interfaces.
FAQ
Do I always have to create the TreeTableView with a root element?Yes, the constructor expects a TreeItem as the root, even if you only want to display a few elements.
Why does my column remain empty even though the elements exist in the tree?The cell value factory is probably missing. Use setCellValueFactory to set a callback that supplies the value to be displayed.
What does setExpanded(true) do?It ensures that the child elements of the root element are visible at startup and do not remain collapsed.
Why do I have to use TreeTableColumn instead of TableColumn?A TreeTableView works with hierarchical data and therefore requires the matching column class. A regular TableColumn does not fit a TreeItem.
Can I display multiple columns in a TreeTableView?Yes, simply add further TreeTableColumn objects with getColumns().add.
What is the ReadOnlyStringWrapper used for?It wraps the string in an observable, read-only object that the cell needs for display.


