
Imagine you open Premiere Pro for the first time and see numerous tabs, windows, and buttons. Many beginners quickly feel overwhelmed at this moment. Yet the interface is not complicated, but above all flexible. The instructor of this tutorial opens a finished project and shows you step by step how the individual areas work together. You get to know the tabs at the top, import clips into the Project panel, control the playback window, and set in and out points. At the end, you can put together your own workspace and save it.
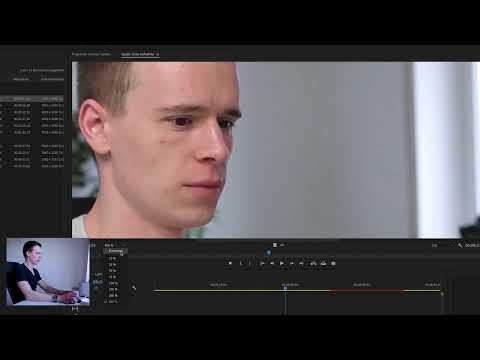
The video is only loaded from YouTube when you play it – data (including your IP address) is then transmitted to YouTube/Google. More in the privacy policy
Key Takeaways
- The tabs at the top are organized according to the workflow: Assembly, Editing, Color, Effects, Audio, and Graphics.
- Windows you don't need can be hidden or closed. This creates clarity and saves space.
- You import clips via the Project panel. A new name in Premiere Pro does not change the file name on your hard drive.
- The playback resolution only affects the preview, not your finished video.
- In and out points determine which part of a clip ends up in the timeline.
- You can save a workspace and recall it at any time.
Step-by-Step Guide
Step 1: Understanding the Tabs at the Top
At the top you will find several tabs. Assembly is for importing and managing your media, Editing for the timeline, Color for color correction, Effects for effect settings, Audio for audio editing, and Graphics for designing text and overlays. The order is no coincidence, but follows a workflow: first review the footage, then cut, color grade, adjust the audio, and finally add graphics. Stick to this order as much as possible, and you will keep an overview.

Step 2: Hiding Unneeded Areas
You usually don't need the Libraries to get started. You hide them by editing the workspace via the menu with the three lines and removing the Libraries entry. Hidden elements disappear completely from the interface. The same applies to windows you never use, such as the Audio Clip Mixer or Metadata. A right-click on the tab and selecting Close Panel is enough. The fewer windows are open, the easier it is to find your way around.

Step 3: Bringing Back Missing Windows
If you are missing a window, it is often on the right edge. With a low screen resolution, areas are moved over there. You bring them back using the two arrows on the right side. If your resolution is high enough, everything fits side by side. If you have closed a window completely, you reopen it via the Window menu.

Step 4: Importing Media into the Project Folder
The Project panel is the place where all clips are collected. Select File and then Import, or press Ctrl+I or Command+I. The file dialog then opens. Select your video and confirm. After a short time, the clip appears in the Project panel. You can also drag clips directly from the Media Browser into the project without opening the file dialog.

Step 5: Sorting Clips into Folders
As soon as your project grows, a fixed folder structure is worthwhile. In the example, there are separate folders for screen recordings, for camera footage, and an automatically created folder for motion graphics templates. Do not place the project file in the same folder as the media. This avoids confusion when you later search for or move files.

Step 6: Reading Clip Information Correctly
In the Project panel you see important details such as frame rate, resolution, and media duration. The media duration consists of three parts: minutes, seconds, and frames. The last number indicates the individual frames within the respective second. The number depends on the frame rate, which is often 24, 25, or 30 frames per second. Hide the columns you don't need so that the view stays clear.
Step 7: Renaming Clips Sensibly
You can rename any clip in the Project panel, for example to Interview Number 1 with the Managing Director. The new name is only an aid within Premiere Pro. The file on your hard drive keeps its original name. With a right-click and the entry Reveal in Finder or Explorer, you can find the original file immediately. For small projects, renaming is not strictly necessary, but for extensive footage it makes orientation enormously easier.

Step 8: Switching Between Source and Program
Double-clicking a clip in the Project panel opens it in the playback window under Source. In contrast, Program shows the content of your timeline. You switch between the two views using the tabs in the playback window. If you then drag the clip into the timeline or double-click the sequence there, the display automatically jumps back. This switch determines your entire workflow, so you should internalize it early on.

Step 9: Setting the Zoom in the Playback Window
In the playback window, you determine how large the image is displayed. The Fit option shows the video as large as possible. The percentage values refer to both the resolution of the video and that of your monitor. A Full HD video on a Full HD monitor is shown in full screen at 100 percent. If you set it to 400 percent, you see individual pixels and quickly realize that the resolution is not sufficient for this magnification. Therefore, you should usually reset the zoom to Fit.

Step 10: Adjusting the Playback Resolution
On the right side of the playback window, you select the playback resolution: full, half, or a quarter. At full resolution, the video is always displayed sharply. At a quarter, Premiere Pro ignores three out of four pixels. During playback, the image then looks like a video with poor reception. As soon as you pause, Premiere Pro displays the image at full resolution again. Important: This setting only affects the preview and has no influence on your later export.

Step 11: Reading the Duration of Project and Source
At the bottom right, Premiere Pro shows you the duration of the content currently displayed. When you select the project, you get the length of the timeline; when you select the source, you get the length of the individual clip. In the example, the clip lasts nine minutes and 27 seconds. This number corresponds to the camera's maximum recording duration, as the camera splits long recordings into several files. If you recognize this value, you know that related parts belong to one recording.

Step 12: Setting In and Out Points
You don't have to use the entire clip. Play it in the Source window and press the I key at the desired starting point for the In point. At the end point, press O for the Out point. You then drag the marked section into the timeline. In the example, only three minutes and 15 seconds of the clip end up in the edit this way. Using the two icons in the Source window, you also determine whether only the video, only the audio track, or both are taken over.

Step 13: Freely Arranging Windows in the Editing Tab
In the Editing tab, you work with the timeline in the foreground. Every window can be moved, enlarged, and dragged to a different location. If you drag a panel to the edge, a new bar is created. If you drag it onto the center of another area, it is placed as an additional tab. In this way, you can, for example, place the libraries with color palettes next to the Media Browser.

Step 14: Saving Your Own Workspace
Once you have found an arrangement you like working with, save it. To do so, go to Window, Workspaces, and select Save as New Workspace. Give it a meaningful name, such as Video Course. Via the same menu, you can select your workspace again at any time. If you accidentally move something, the Reset to Saved Layout entry helps.

Step 15: Working Purposefully in the Color and Effects Tabs
Each tab has its own purpose. In the Color tab, you make color corrections, for example when an image looks too dark. The tools for this are already displayed. In the Effects tab, you control settings such as fading out a clip. In the example, these effect settings can also remain visible next to the timeline in the edit, so that you can check them while cutting. Don't add clips in the Color tab; only edit the color there.

Step 16: Consistently close unnecessary windows
The instructor never actively uses History and Markers. He deliberately uses only a few windows instead of having numerous tabs open in the background. These tabs take up space and quickly lead to confusion when clicked by accident. Therefore, regularly go through your interface and close everything you don't need. Over time, you will notice how much calmer your workspace feels.

Summary ??? Premiere Pro Interface: Tabs, Import and Playback
The Premiere Pro interface is freely customizable, but it follows a clear workflow. The tabs at the top guide you from import through editing to color, sound, and graphics. You import clips into the Project panel, organize them in folders, check frame rate and media duration, and use In and Out points to set the desired section.
In the Program Monitor, you control zoom and playback resolution, while the windows of your layout can be freely moved. Save your arrangement as your own workspace and hide windows you don't need. This keeps your interface clear and lets you focus on the essentials.
FAQ
Can I completely change the layout of Premiere Pro?Yes, every window can be moved, enlarged, hidden, or closed. Still, pay attention to the workflow of the tabs.
Why does my video look blurry in the playback window?The playback resolution is probably set to half or a quarter. Choose full resolution, and the image will be displayed sharply again.
Does renaming a clip change the file on my hard drive?No, the new name only applies within Premiere Pro. The original file name remains unchanged.
How do I save my interface for future projects?In the Window menu, select Workspaces and then Save as New Workspace. After that, you can select it again at any time.
What do I do if I accidentally closed a window?Reopen it via the Window menu. It will then appear in your layout again.


