
You're standing with the camera on the tripod, your microphone is hanging outside the frame, and the audio is running on a phone or a separate recorder. After the shoot, you have two files that show the same moment but don't match up in time. This exact problem can be solved in Premiere Pro without moving every clip by hand.
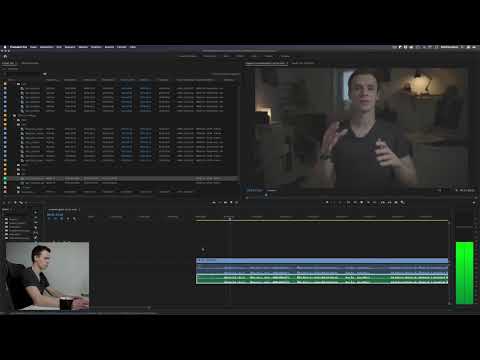
The video is only loaded from YouTube when you play it – data (including your IP address) is then transmitted to YouTube/Google. More in the privacy policy
In this guide, I'll show you which audio sources are suitable for the shoot, how to create a common reference with a clap signal, and how automatic synchronization works. You'll also learn how to check the result and cleanly adopt the finished audio track.
Key Takeaways
Key Takeaways
- External audio is usually clearer than camera audio because cables and power supplies easily generate interference noise. Wireless systems and external recorders are the most reliable options.
- A distinct event in both the picture and the sound, such as a clap, forms the basis for the later alignment.
- The "Synchronize" function in Premiere Pro aligns clips based on their audio waveforms. For recordings without a matching timecode, you choose the "Audio" option.
- Synchronization always works in pairs, meaning two related clips at a time.
- After the analysis, you should check the result. Even a shift of one or two frames is clearly noticeable when listening.
- Link the synchronized clips so that picture and sound stay together while editing.
Step-by-Step Guide
Step 1: Determine the Suitable Audio Source
Before you synchronize anything in Premiere Pro, you decide how the audio will be recorded. Wireless systems, whose transmitter is attached to the speaker and transmits directly to the camera or to a recorder, are particularly reliable. External recorders are also suitable, such as a phone with a suitable connector or a professional device. A cable from the microphone to the camera, on the other hand, tends to hum as soon as outlets or lamps are nearby, and it gets yanked out quickly if someone trips over it. It's important that the audio is recorded separately. The camera audio should always keep running as well, because it serves as a reference later.

Step 2: Create a Common Reference
So that Premiere Pro can match the tracks, you need a moment that can be clearly identified in both the picture and the sound. The classic solution comes from the film set: you clap your hands together once, forcefully, so that the hands meet in the frame and the clap is heard at the same time. Make sure this moment is visible on every camera. Plan this clap for every shoot, even if you're only recording a single subject.

Step 3: Select the Clips and Open the Menu
In the timeline or in the project panel, select the two clips that belong together: the video file with the camera audio and the external audio file. Then right-click one of the selected clips and choose "Synchronize". A dialog with several options opens.

Step 4: Choose the Synchronization Method
Premiere Pro offers three options: Clip Start, Clip End, and Timecode. The Clip Start and Clip End options merely place the clips at the same start or end point. That isn't enough, because the recordings weren't started at exactly the same time. The Timecode option uses embedded timecodes, as is common in the film industry. Since most cameras and recorders in everyday use don't provide a matching code, you generally choose "Audio". Premiere then analyzes the audio tracks and determines how they fit together.
Step 5: Confirm the Reference Track
In the next step, you specify the track the analysis should refer to. Leave the track setting on the first track, because it makes no difference to the result which track you choose as the starting point. Then confirm the dialog with "OK".

Step 6: Wait for the Analysis
Premiere now scans both clips completely. How long this takes depends on the length and file size. Short clips are done in a few seconds; with long recordings you'll need to be a bit more patient. You don't need to do anything during this time. Afterwards, the tracks are aligned automatically.
Step 7: Check the result using the waveforms
The automatic synchronization is very reliable, but it is not always exact down to the last frame. Drag the dividing line below the audio tracks downward so that the waveforms are displayed larger. Then zoom into the timeline until you can see individual peaks, such as the spike of the clap. If the peaks of the camera track and the external track line up, everything is fine. If not, move only the external audio clip frame by frame, using the arrow keys in combination with the Alt key. The video track remains unchanged.

Step 8: Listen critically to the sound
The waveforms alone are not enough; you should listen to the audio as well. Play the section and pay attention to any echo or slight reverberation. Such effects are a warning sign, because they occur when two almost identical audio tracks run slightly offset from each other. A deviation of just one or two frames is especially noticeable with speech. In this case, move the clip in small steps until the sound seems clean and clear.

Step 9: Add further camera or audio tracks
If you have multiple cameras or a screen recording, repeat the process for each additional clip. Place the additional clip in the timeline and select it together with a clip that has already been synchronized. Open the "Synchronize" menu again, choose "Audio" and confirm with "OK". With shorter clips, the analysis runs noticeably faster. Check the waveforms here too and listen to the result. Note: Premiere cannot synchronize an arbitrary number of clips at once, but always works with individual pairs.

Step 10: Mute or replace the old audio track
So that you don't have to manage an unnecessary number of tracks in the timeline, get the unusable original audio out of the way. The simplest option is to mute the audio track of the camera clip so that it is no longer played back. Alternatively, drag the synchronized audio track over the old track so that it replaces the original audio. Hold down the Shift key while doing so, so that the clip does not shift sideways. Otherwise you would destroy the synchronization again.

Step 11: Link video and audio together
Finally, select the video clip and the desired audio track and choose "Link" in the context menu. Alternatively, the keyboard shortcut Ctrl+L on Windows or Cmd+L on Mac works. From now on, picture and sound stay together when moved. This prevents the synchronization from coming undone unintentionally during further editing. If you want to separate parts, simply unlink them again.

Summary – Synchronizing audio in Premiere Pro: Guide for external audio recordings
If you want to merge picture and external audio cleanly, start with a clear audio source and a distinct reference moment, such as a clap. In Premiere Pro, select the clips that belong together, open the "Synchronize" menu and choose the "Audio" option. After the analysis, check the result using the enlarged waveforms and listen critically to the section to detect echoes or offsets. Synchronize multiple cameras in pairs. Then replace or mute the original audio and link the clips so that they stay together.
FAQ
Do I absolutely have to clap to synchronize the tracks?No, any other short event with a distinct picture and sound is enough, for example a knock or a short exclamation. However, clapping is usually the most reliable reference because it is clearly recognizable in both picture and sound.
Can Premiere Pro synchronize multiple clips at the same time?No, the function always works with individual pairs, for example one video track and one audio track. For multiple clips, you repeat the process in pairs.
Why isn't the Clip Start option enough?Clip Start only aligns the clips at the beginning. Since recordings are usually started at different times, picture and sound will not match afterwards.
What does the Timecode option mean in Premiere Pro?Timecode uses time codes that are written into the files during recording. However, many everyday cameras and recorders do not support this function, so the Audio option is the better choice in most cases.
Can I delete the camera audio after synchronization?Yes, you can mute it or replace it with the synchronized audio track. However, the camera audio serves as a reference, so you should keep it until the synchronization is complete.
Why should I use an external recorder or a wireless system?Cables easily cause interference noise and are often impractical in everyday use. Wireless systems and external recorders usually deliver cleaner sound, which you can then reliably synchronize with the video.


