
Do you know this? You're sitting in front of a clip that looks somewhat bluish, and you can't say exactly why. Or the highlights suddenly look cut off, without you knowing why. This is exactly where video scopes help. They translate your image into diagrams and show you how brightness and color are distributed. In this tutorial, you'll get to know the most important scopes in the Lumetri panel of Premiere Pro and learn how to use them effectively when grading.
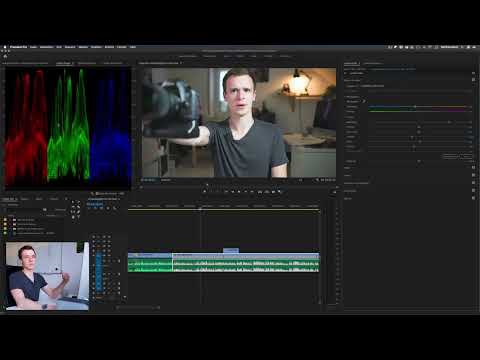
The video is only loaded from YouTube when you play it – data (including your IP address) is then transmitted to YouTube/Google. More in the privacy policy
Key Takeaways
- Scopes show you not only how bright an image is, but also where colors are located and how strongly saturated they are.
- The histogram shows the brightness distribution: the dark areas are on the left, the bright ones on the right.
- The vectorscope shows which color direction your image tends toward.
- The parade displays the color channels side by side and is particularly helpful for grading.
- You can recognize clipping by peaks being cut off at the top or bottom edge. When that happens, image information is lost.
- Scopes complement your eye, but do not replace it. You make the best decision when you combine both.
Step-by-Step Guide
Step 1: Display the Scopes and Read the Histogram
You open the Lumetri Scopes in Premiere Pro via the "Window" menu. There you'll find the entry for the Lumetri Scopes. Via the context menu in the scope window, you can switch the display, for example between histogram, waveform, vectorscope, and parade. It's best to start with the histogram, which is shown first in the tutorial. It is the most familiar display and serves as your entry point.

A common misconception is that the histogram only shows a brightness curve. In fact, it also shows how strongly colors are represented and in which brightness range they lie. Therefore, pay attention not only to the shape of the curve, but also to the color components in the individual areas.

Step 2: Observe Movement in the Image and Color Distribution
When you move the camera or your subject, the scopes react live. You can then see which color is located where in the image. A very bright orange element produces a clear spike in the scope, exactly where it is in the image. So observe how the curves change while you play the clip. This way you quickly learn to connect cause and effect.

Step 3: Use the Vectorscope for Color Direction
The vectorscope is the right scope when it comes to color direction. The colors are arranged in a circle: magenta, red, orange, yellow, green, cyan, and blue. If the distribution of an image leans strongly toward orange, the image as a whole is warm. If it lies in the blue range, it looks cool. The color values are only faintly visible in the background, so it's worth enlarging the scope or looking more closely.

When evaluating, keep in mind that an image with a distinct color cast is not automatically wrong. What matters is whether the cast suits the scene or whether it arose unintentionally.
Step 4: Use the Waveform to Check Brightness
The waveform shows you the brightness across the entire width of the image. So you can see in which area of the image the bright and dark parts are located. Especially when you want to selectively brighten or darken a subject, this display helps you precisely identify the position of the brightness values.

Step 5: Interpret Brightness in the Histogram
Now return to the histogram and take a closer look at the brightness distribution. In the tutorial, the dark areas of the image clearly lie above the bright ones. This means that the clip is rather dark overall. The brighter areas may additionally have a color cast, for example due to a reddish-looking light source. Therefore, always check both pieces of information together: brightness and color.

Step 6: Read the Vectorscope with Labels
With the labeled display of the Vectorscope, orientation is easier. The sectors are named with colors such as blue, yellow, and red, and the skin tone line is also marked. This line is helpful when you want to correct skin tones. If a person's values lie close to this line, the skin generally looks natural.

Step 7: Use the Parade as the main tool for grading
The Parade is the display that proved most effective for grading in the tutorial. It shows the red, green, and blue channels side by side. You can see right away whether one channel is more pronounced than the others and in which brightness range it lies. In addition, you can read from the peaks exactly where you currently stand in terms of brightness.

With the Parade you can also correct the exposure in a targeted way. The Auto button in the Lumetri colors works in a similar way. Watch in the Parade whether the brightness moves sensibly toward the middle, and then adjust it to the situation. An automatic value is only a starting point and does not replace your own judgment.

Step 8: Check the white balance with the Scopes
With white balance, the goal is for the color channels to lie on top of one another. When you shift the white balance toward blue or orange, the peaks in the scope change. As soon as red and blue roughly meet in the scope, the image is generally neutral. It is best to practice this with different clips, because the feel for it develops over time.

It is typical to shift the white balance too far. The image then suddenly looks blue and unnatural. Make sure you judge the color not only by the scope, but also by the overall impression.

Step 9: Recognize and avoid clipping
Clipping is an important warning sign. When peaks are cut off at the upper edge, those areas are overexposed and lose their detail. These spots are then pure white and can hardly be corrected anymore. The same applies at the lower edge to areas that are too dark and get pushed to black.

Be aware of the limits. If you brighten or darken the clip too much, you lose information. Therefore, proceed carefully when making adjustments and only pull the sliders as far as the scope allows.

Step 10: Combine eye and scope and roughly grade the image
The tutorial shows that the best approach is to combine both. First you look at the image with your eyes and ask yourself how it should look. Then you check in the scope whether your correction confirms that. The Parade or the Vectorscope in particular help you assess the color cast more precisely.

A possible workflow for a quick grade looks like this: You first correct the white balance, then adjust the contrast, and finally raise the saturation slightly. Keep in mind: it can always be better. But even a rough pass improves the image significantly.

Summary ??? Reading Lumetri Scopes correctly: Histogram, Parade, and Vectorscope in grading
Scopes are not magic, but translate your image into numbers and diagrams. If you use the histogram for brightness, the Vectorscope for color direction, and the Parade for fine correction, you quickly gain confidence. Watch out for clipping and always combine the values with your own look at the image.
FAQ
Why do you need scopes if you can work with your eyes?Scopes show you values that your eye perceives only imprecisely on a monitor. They complement your eye but do not replace it.
What does clipping mean?Clipping means that brightness or color values extend beyond the edge of the scope and are cut off. Image information is then missing, and the affected areas can no longer be corrected.
Which scope is best suited for grading?In the tutorial, the Parade is described as particularly helpful because it shows the color channels side by side and at the same time makes the brightness visible.
What exactly does the Vectorscope show?The Vectorscope shows the color direction of an image. If the values lie in the orange range, the image looks warm; if they lie in the blue, it looks cool.
Can I correct the white balance with scopes?Yes. You can shift the white balance so that the color channels roughly meet in the scope. The Parade or the Vectorscope in particular helps you with this.


