
Not every cut calls for a transition. A hard cut is often the right choice. But if you want to make a change between two clips softer or mark a change of topic more clearly, Adobe Premiere Pro offers an extensive repertoire of transitions for this. In this tutorial, you will learn where to find the transitions, how to apply them, adjust them, and use them effectively. You will also find out why you should render the preview for elaborate effects and how to create audio transitions.
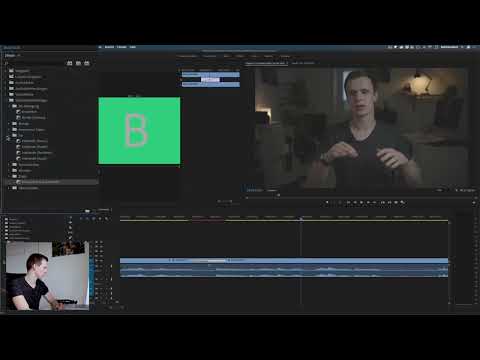
The video is only loaded from YouTube when you play it – data (including your IP address) is then transmitted to YouTube/Google. More in the privacy policy
Key Takeaways
- You can find video transitions in the Effects panel in the "Video Transitions" folder.
- The cross dissolve is suitable for most smooth transitions between clips.
- The duration of transitions can be changed via the edge in the timeline, fine-tuned in the effect settings, and set to black or white if needed.
- Computationally intensive effects such as the cube require a preview by rendering so that playback runs smoothly.
- Elaborate effects such as iris or page peel quickly look unprofessional. Therefore, use them sparingly.
- For audio transitions, the constant power audio crossfade is a good choice.
Step 1: Open the Effects panel and the video transitions
First, open the Effects panel. There you will find the "Video Transitions" folder, which contains all available transitions. At first, this selection can quickly feel overwhelming, because there are a great many effects available to you. For most projects, however, you only need a small selection of them. Enlarge the panel if necessary so that you can read the names of the transitions more easily.

Step 2: Apply the cross dissolve
The cross dissolve is the transition you will use most often. It creates a smooth change from the first clip to the next and therefore looks much softer than a hard cut. Simply drag the dissolve between two clips in the timeline. Make sure you place it at the cut point and not at the edge of the clip, because then only a fade to the end or from the beginning of the clip is created, and no transition between the two.
Step 3: Understand transitions at clip edges and between clips
There is an important difference: if you drag the transition to the edge of a single clip, it only fades out toward the end or in from the beginning of that clip. If you drag it between two clips instead, a true transition between the two is created. Be careful when moving things afterward. If you move a clip, the transition can come loose and disappear. With Ctrl+Z you undo the last action.

Step 4: Use a dip to black or white
For changes of topic, a transition to black is particularly well suited. To do this, insert the "Dip to Black" dissolve between the clips. The image briefly goes black before the next clip begins. You can use the "Dip to White" dissolve in the same way. The transition then passes through a white screen. This variant is especially suitable for deliberately placed breaks, such as between chapters or scenes with different moods.
Step 5: Adjust transitions in the effect settings
When you click on a transition, further options open in the effect settings. There you can, among other things, set the duration, determine the alignment of the transition, and decide whether the transition should be white or black at the beginning or at the end. With later effects, you will find significantly more settings. The settings are clearly laid out, and you should try them out to adapt the transition to your footage.

Step 6: Change the duration of the transition
The duration can be changed directly in the timeline. To do this, move the mouse over the edge of the transition until the mouse icon changes. Then you can grab the transition, hold it, and lengthen or shorten it. A very short transition looks like a quick flash, while a long transition significantly extends the middle section, where black or white then appears. Try out different lengths and check in the preview which duration fits your rhythm.
Step 7: Use and pre-render elaborate transitions such as the cube
Besides the classic dissolves, there are also more elaborate transitions such as the cube. These are significantly more computationally intensive. You can tell because the bar above the transition turns red. To make playback smooth, you create a preview by pressing the Enter key. Premiere briefly pre-renders the area. If the bar is green afterward, you can play that spot back smoothly. Note that when moving clips, the preview sometimes has to be recalculated.


Step 8: Setting the Direction and Behavior of Effects
With transitions like the Cube, you can specify the direction from which the effect builds. For example, you can have it rotate from left to right, from right to left, from bottom to top, or from top to bottom. The preview updates immediately. Zoom effects can also be controlled precisely in the settings. You decide whether image A is enlarged and image B is reduced, and the transition connects both clips the way you need it.

Step 9: Creating Your Own Folders for Frequently Used Transitions
If you use certain transitions regularly, a custom folder is worthwhile. Create a new folder in the Effects panel, for example named "My Transitions". Then drag the desired dissolves, such as the cross dissolve, from the default folder into your own folder. You can't change the original folders, but this way you have your favorites gathered in one place and don't have to click through many subfolders. This is especially practical when you combine video effects with transitions.

Step 10: Using Audio Crossfades for Smooth Sound Transitions
Transitions also work with sound. In the "Audio Crossfades" folder you'll find variants, of which Constant Power is the most common. With this crossfade, one audio track gets quieter while the other simultaneously gets louder. This creates a smooth transition instead of cutting off the audio track abruptly. The variant with exponential fade or constant gain emphasizes the transition a little more. Constant Power is particularly well suited for music, for example when you shorten a piece of music and adapt it to the beat.

Summary – Premiere Pro Transitions: Using Cross Dissolve & Co. Correctly
Transitions in Premiere Pro significantly expand your creative possibilities. The cross dissolve and the dip to black cover most requirements. You change the duration by dragging the edge of a transition, and you fine-tune it in the effect settings. Computation-intensive effects like the Cube need a preview, and custom folders save you time. For sound, the audio crossfade with constant power ensures gentle changes. Use elaborate effects like Iris or Page Peel only if they suit your video, because simple transitions usually look more professional.
FAQ
Where do I find the video transitions in Premiere Pro?You'll find them in the Effects panel in the "Video Transitions" folder.
Why does my transition disappear after moving a clip?The transition is attached to the cut point. If you move the clip, the connection can be lost. With Ctrl+Z you can undo the action.
Why does playback become choppy with some transitions?Elaborate effects like the Cube are computation-intensive. Create a preview with the Enter key until the bar turns green.
Which transitions should I rather avoid?Effects like Iris or elaborate particle transitions quickly look out of place. Use them only deliberately if they fit the style of your video.
Which audio crossfade is suitable for music?The audio crossfade with constant power ensures an even transition and is well suited for music edits.


