
Imagine you've shot an interview, but the refrigerator is humming in the background and the voice sounds muffled. Adobe developed the Essential Sound panel in Premiere Pro for exactly these kinds of situations. It brings together the most important audio editing tools in one interface, without requiring you to have any prior knowledge of frequencies or audio engineering. This guide leads you step by step through the features, shows you where the limits are, and explains when you're better off holding back.
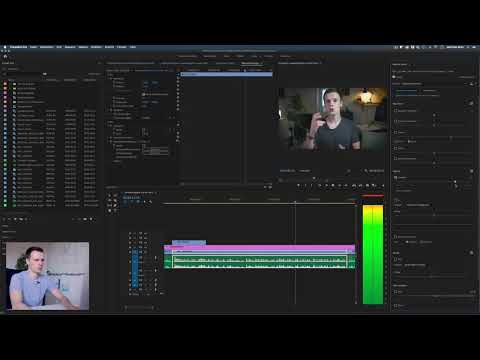
The video is only loaded from YouTube when you play it – data (including your IP address) is then transmitted to YouTube/Google. More in the privacy policy
Key Takeaways
- Essential Sound offers many one-click tools, but it is not a cure-all.
- Noise, hum, plosives, and sibilants can be reduced in a targeted way.
- You should always adjust the strength of each effect individually and pay attention to the result.
- Over-aggressive repairs quickly lead to an unnatural-sounding voice.
- A good recording during production remains the best foundation.
Open Essential Sound and choose the Dialogue category
Before you get started, you should select the audio clip in the timeline. Then open the Essential Sound panel. There you'll find several categories; for speech, you choose the Dialogue tab. Here you have access to the tools covered in this guide.

Use Auto-Match as a starting point
The quickest way to get started is the Auto-Match button. Premiere Pro analyzes the audio track and suggests suitable settings for dynamics, equalizer, and speech enhancement. The result isn't always perfect, but it gives you a usable foundation that you can then refine. Therefore, consider this step a starting point and not the final result.
Reduce noise
With the Reduce Noise tool, you remove background noises such as the steady hiss of a microphone or a room. Every recording has a little noise; the only question is how much. Activate the function and slowly slide the strength control upward. If you already hear changes in the voice itself, it's best to go back a step. You can safely leave a slight noise that is barely noticeable.
Remove hum
If an electrical device nearby causes humming noises, the Reduce Hum option helps. It filters out the typical mains frequency that produces such noises. This function works very precisely and can usually be used well without noticeably changing the voice.
Reduce rumble
You reduce deep, low-frequency disturbances such as footstep noise, wind, or vibrations from mounts with the Reduce Rumble control. Here, too: you should check the effect during playback. If the voice sounds thin or tinny afterward, you've cut too much.
Reduce plosives
Plosives occur when you exhale forcefully on sounds like P or K. The microphone responds with a short, dull thump that sounds significantly louder than the rest of the recording. With the Reduce Plosives control, you dampen these thumps. For good results, however, you should also use a windscreen during recording, because software can't save everything.
Reduce sibilants
The situation is similar with sibilants such as S or Z. Especially with sensitive microphones, they can come across sharp and unpleasant. The Reduce Sibilance control attenuates these high frequencies. Be careful not to make the voice sound dull. A light touch is enough in most cases.
Reduce reverb
An annoying room sound occurs when the audio was recorded in a reverberant room with hard, smooth walls. With the Reduce Reverb control, you reduce this reverberation. It works best at light to medium settings. At strong values, the voice quickly sounds artificial and strangely distorted.
Use Repair with caution
The Repair option combines several corrections in one step. It can be very helpful, but it also carries the risk that the audio will eventually sound odd. The more you crank up the corrections, the more likely this effect becomes. Therefore, proceed step by step, listen to every change, and compare it with the original. As soon as the voice sounds metallic or robotic, it's time to dial the strength back.
Adjust dynamics for a clear voice
The Dynamics function ensures that the voice stays in the foreground while background noises move into the background. To do this, Premiere Pro analyzes the frequency range of the voice and lowers everything else. In the panel, you can set how strongly this effect is applied. With a quiet recording with little background noise, the effect is barely audible, whereas with background noises it is often very noticeable. This works particularly well when the background noises are clearly different from the voice, such as steady noise or a hum. Sirens or sudden noises, on the other hand, are difficult to remove this way.

Adjust the equalizer in a targeted way
The equalizer boosts or lowers certain frequency ranges. In the Essential Sound panel, you can choose a preset, for example a slight boost for a male voice. This slightly amplifies the typical frequency range of a male voice, while the rest remains untouched or is slightly reduced. For female or particularly high voices, you choose the corresponding setting. The equalizer is thus a kind of fine-tuning that you can adapt to the voice at any time.
Create a telephone or radio sound
The equalizer can also be used creatively. If you want a scene to sound as if someone is speaking on the phone or over an old radio, the Telephone preset removes the low and high frequencies that are normally not transmitted over a telephone line. The result immediately sounds like a different room or a different situation and is well suited for narration or flashbacks.
Remove voices in the background
Sometimes unwanted conversations can be heard in a recording, such as passersby or employees in the background. With the function for removing background voices, you can reduce such speech components. Be careful, though, because if the main person's voice sounds similar or overlaps, its quality will suffer as well. Therefore, always check the result with headphones.
Improve speech
With the Enhance Speech option, intelligibility can be increased in a targeted way. There you choose between a male and a female voice and can move the slider for the strength. Especially with a recording made with the camera in the room or a speech from a greater distance, this often helps noticeably. Here too: it is better to proceed in small steps. Too much emphasis quickly makes the voice sound artificial.
Add creative effects such as reverb
Essential Sound can also deliberately add reverb. The Room section offers various environments, such as a large hall or a church. You should choose the strength so that it suits the scene. For example, if you show a person in a large room, a subtle reverb can make the sound more authentic. For a person in a small room, on the other hand, it would be out of place.
Save your own presets
Once you are satisfied with certain settings, you can save them as a preset. To do so, click the corresponding icon in the panel and assign a name. For later recordings that you make with the same microphone and in a similar environment, this saves you a lot of time. This way you get a consistent sound across all videos.

Summary – Essential Sound in Premiere Pro: Improve audio with just a few clicks
Essential Sound is a practical tool that gives you a quick entry into audio editing in Premiere Pro. With automatic matching you get a starting point, after which you can specifically reduce noise, hum, rumble, plosives, and sibilance. Dynamics, Equalizer, and Enhance Speech refine the sound of the voice, while reverb and room effects provide a fitting atmosphere. Always make sure to use the effects with restraint, and trust your ears. A cleanly recorded audio track remains the best basis, and Essential Sound is the ideal complement to it.
FAQ
Do I need prior knowledge of audio engineering to use Essential Sound?No, Essential Sound was developed specifically for beginners. Many functions can be operated with a single click or a slider.
Is the Auto-Match option always the best choice?Not necessarily. It provides a usable foundation, but the result is not suitable in every case. Refine the settings manually afterwards.
How can I tell that I have set an effect too strongly?If the voice sounds metallic, dull, robotic, or unnatural, the effect is probably too strong. Reduce the strength step by step until the sound seems natural again.
Can Essential Sound solve all audio problems?No, the tools can reduce many problems, but they cannot completely rescue a bad recording. A careful recording remains the most important foundation.
How can I reuse my settings for future projects?Save the settings as a preset. For similar recordings, you can then apply them again with a single click.


