
Have you ever filmed a clip handheld and noticed afterwards that it looks a bit shaky? Then you know the problem. The good news: Premiere Pro offers a built-in tool for this that lets you compensate for movement automatically. In this tutorial, you'll learn how to use the Warp Stabilizer, what consequences the cropping has, and which settings you can use to refine the result.
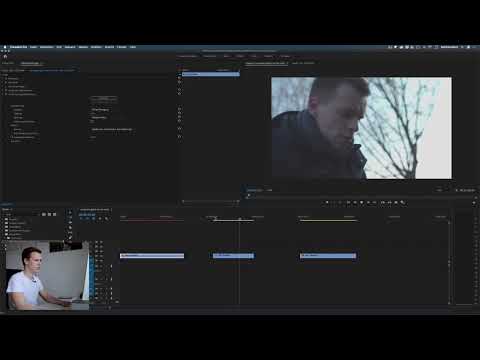
The video is only loaded from YouTube when you play it – data (including your IP address) is then transmitted to YouTube/Google. More in the privacy policy
Key Takeaways
- The Warp Stabilizer analyzes the image frame by frame and compensates for movement.
- Stabilization always requires cropping, because image material is lost at the edges.
- The more the original footage shakes, the stronger the cropping will be.
- The methods Position, Scale Position and Rotation, as well as Subspace Warp, can be restricted in a targeted way.
- The smoothing determines how stable the image becomes and how much of the typical handheld look is retained.
- You can only achieve the best stability with a tripod. The stabilizer is a tool for post-production, not a substitute for steady filming.
Step 1: Find the Warp Stabilizer
First, open the Effects panel and search for the term "Stabilization". Premiere Pro will then show you the matching effects. The Warp Stabilizer is the effect you need.

Step 2: Apply the effect to the clip
Drag and drop the Warp Stabilizer onto your clip in the timeline. As soon as the effect is applied, Premiere Pro immediately begins analyzing the image. You don't have to click anything else; the software does the work itself.
Step 3: Wait for the analysis
During the analysis, you'll see a progress bar showing the percentage. The duration depends heavily on your computer and the resolution of the footage. With 4K footage, it takes noticeably longer than with Full HD. Let the analysis run completely before you evaluate the result.

Step 4: Evaluate the default result
After the analysis is complete, Premiere Pro applies the automatic default setting. Compare the result with the original clip by briefly disabling and re-enabling the effect. You will notice that the image already looks much steadier. At the same time, the image is slightly enlarged, because the cropping is the prerequisite for the movement to be compensated.

Step 5: Understand and control the cropping
If you set the stabilization to "Stabilize, Crop" on a shaky clip, Premiere Pro prevents black borders through automatic scaling. The more the image shakes, the more it has to be cropped. A steady video therefore loses little image area, while a heavily shaky one loses significantly more.


Step 6: Use the tripod mode
If you want a completely steady shot, you can set the method to "No Motion". Premiere Pro then simulates a tripod look in which the camera appears to be bolted down. This mode is particularly suitable for clips in which no panning takes place. With strong camera movements, however, it leads to very tight cropping.

Step 7: Subspace Warp and restricting the method
The most elaborate method is Subspace Warp. It can treat foreground and background differently and take perspective, position, rotation, and zoom into account. Using the method options, you can limit the scope, for example by selecting only Position or Scale Position and Rotation. Try out different variants and compare the result with the original each time. For clips with people walking in the background, restricting it to Scale Position and Rotation often helps.

Step 8: Adjust the advanced settings and the smoothing
Under the advanced settings, you will find the slider for the ratio between cropping and smoothing. If you drag it to the left, the cropping is less, but the image remains less stable. If you drag it to the right, you get a very stable image, which, however, is cropped more heavily. The value of 50% is the default setting and usually represents a good starting point.

If the result looks too smooth to you and you want to keep the typical handheld look, reduce the smoothing. A value of around 25% can be a pleasant compromise. With a very high value, on the other hand, Premiere Pro tries to produce the most stable image that is technically possible.

Step 9: Render the preview and check the result
Stabilized clips often cannot be played back smoothly in the preview. Therefore, render the preview using the keyboard shortcut for the work area preview before you evaluate the result. Pay attention to the background, because that is where small residual movements are most noticeable. On Mac systems, playback may run somewhat slower than on Windows, but normally the work goes well there too.
Step 10: Make the right decision for your clip
You can only achieve a completely stable image with a tripod. The Warp Stabilizer is particularly suitable for micro-shakes, such as those caused by footsteps, and for slight unsteadiness when filming handheld. For heavy camera shake, however, it is not sufficient. A certain handheld look may deliberately be retained, because many viewers forgive small unsteadiness as long as the image does not appear strongly shaky. Therefore, use the stabilizer selectively and with moderation.

Summary – Stabilizing video in Premiere Pro: Smoothing shaky clips step by step
With the Warp Stabilizer in Premiere Pro, slight to moderate camera shake can be reliably compensated. You apply the effect to the clip, wait for the analysis, and then adjust cropping, method, and smoothing. The stabilizer inevitably crops the image somewhat, and the more the original shakes, the more of the image area is lost. For maximum steadiness, the tripod remains the best choice, while the software usually delivers a convincing result for occasional unsteadiness.
FAQ
Do I have to crop the clip before stabilization?No, the cropping is done automatically by the stabilizer; you don't have to do it beforehand.
Why is the stabilized image enlarged?The stabilizer cuts off a bit at the edge of the image so that no black borders appear when the movement is compensated.
Can Premiere Pro perfectly smooth every shaky video?No, heavy camera shake cannot be completely eliminated. The stabilizer is mainly suitable for slight to moderate unsteadiness.
What does the tripod mode do?The "No Motion" method simulates a fixed camera. This makes the image look very calm, but the cropping is larger with strong pans.
What is Subspace Warp for?Subspace Warp is the most complex method. It can treat foreground and background differently and can be restricted via position, position scale, and rotation.
Why does the preview stutter after stabilizing?Calculating the stabilized clip requires processing power. Render the preview beforehand, and the footage can usually be played back more smoothly.
How do I keep the handheld look?Reduce the smoothing value, for example to 25%. This way, a remainder of the natural movement is retained.


